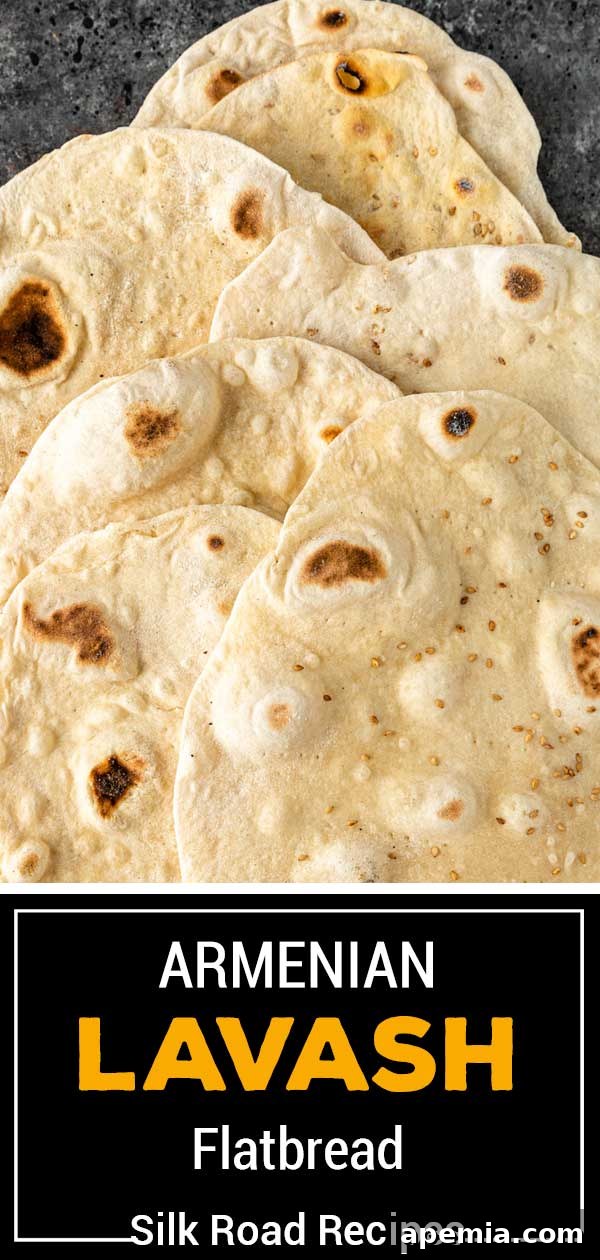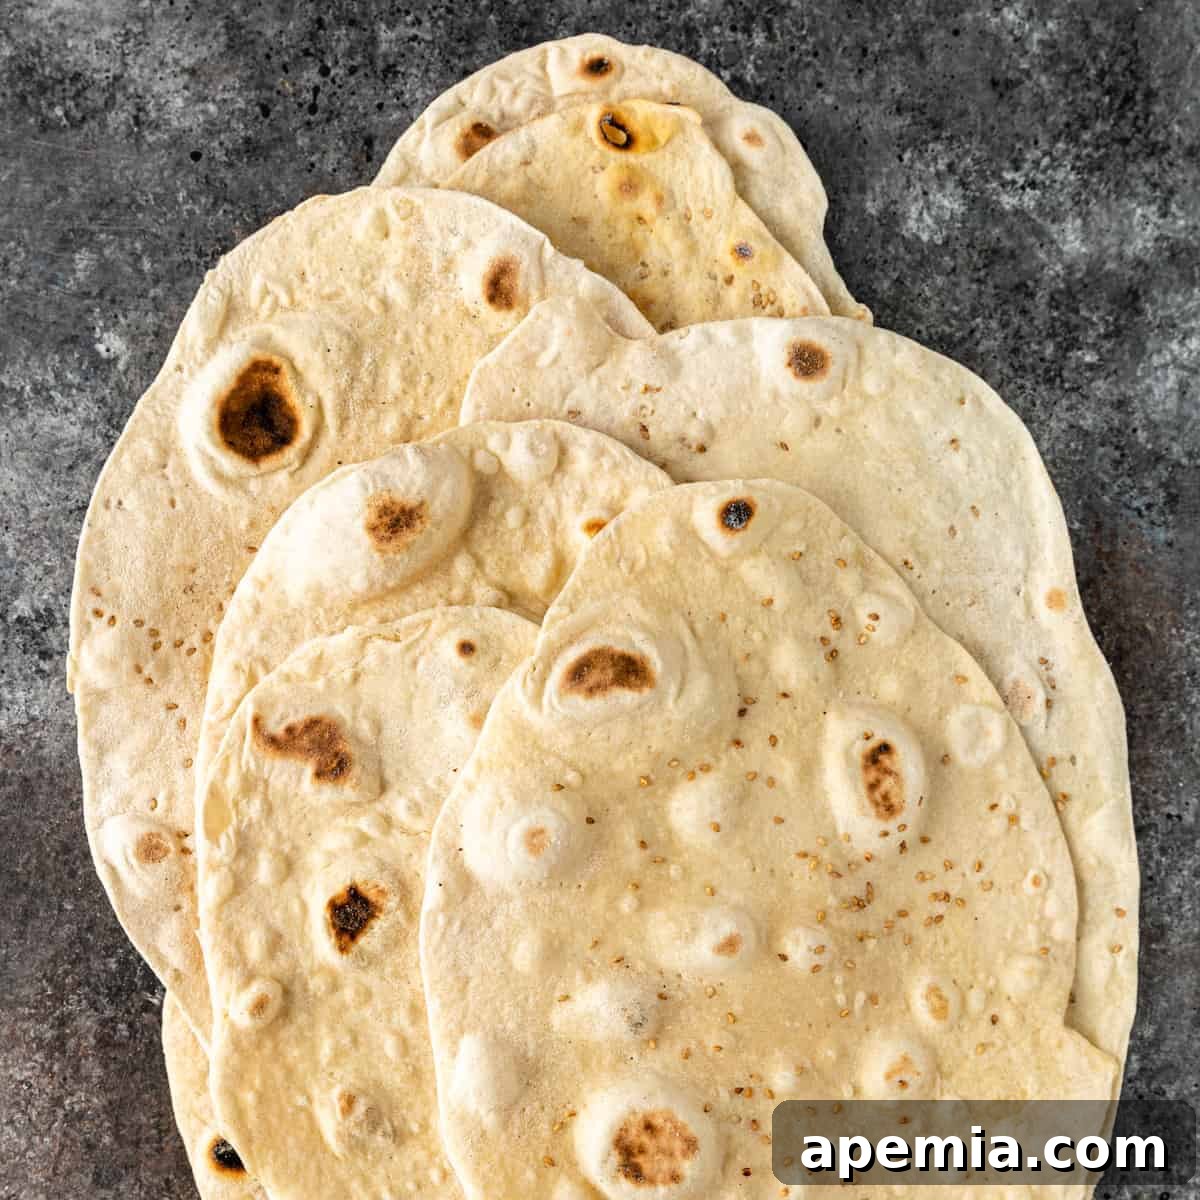
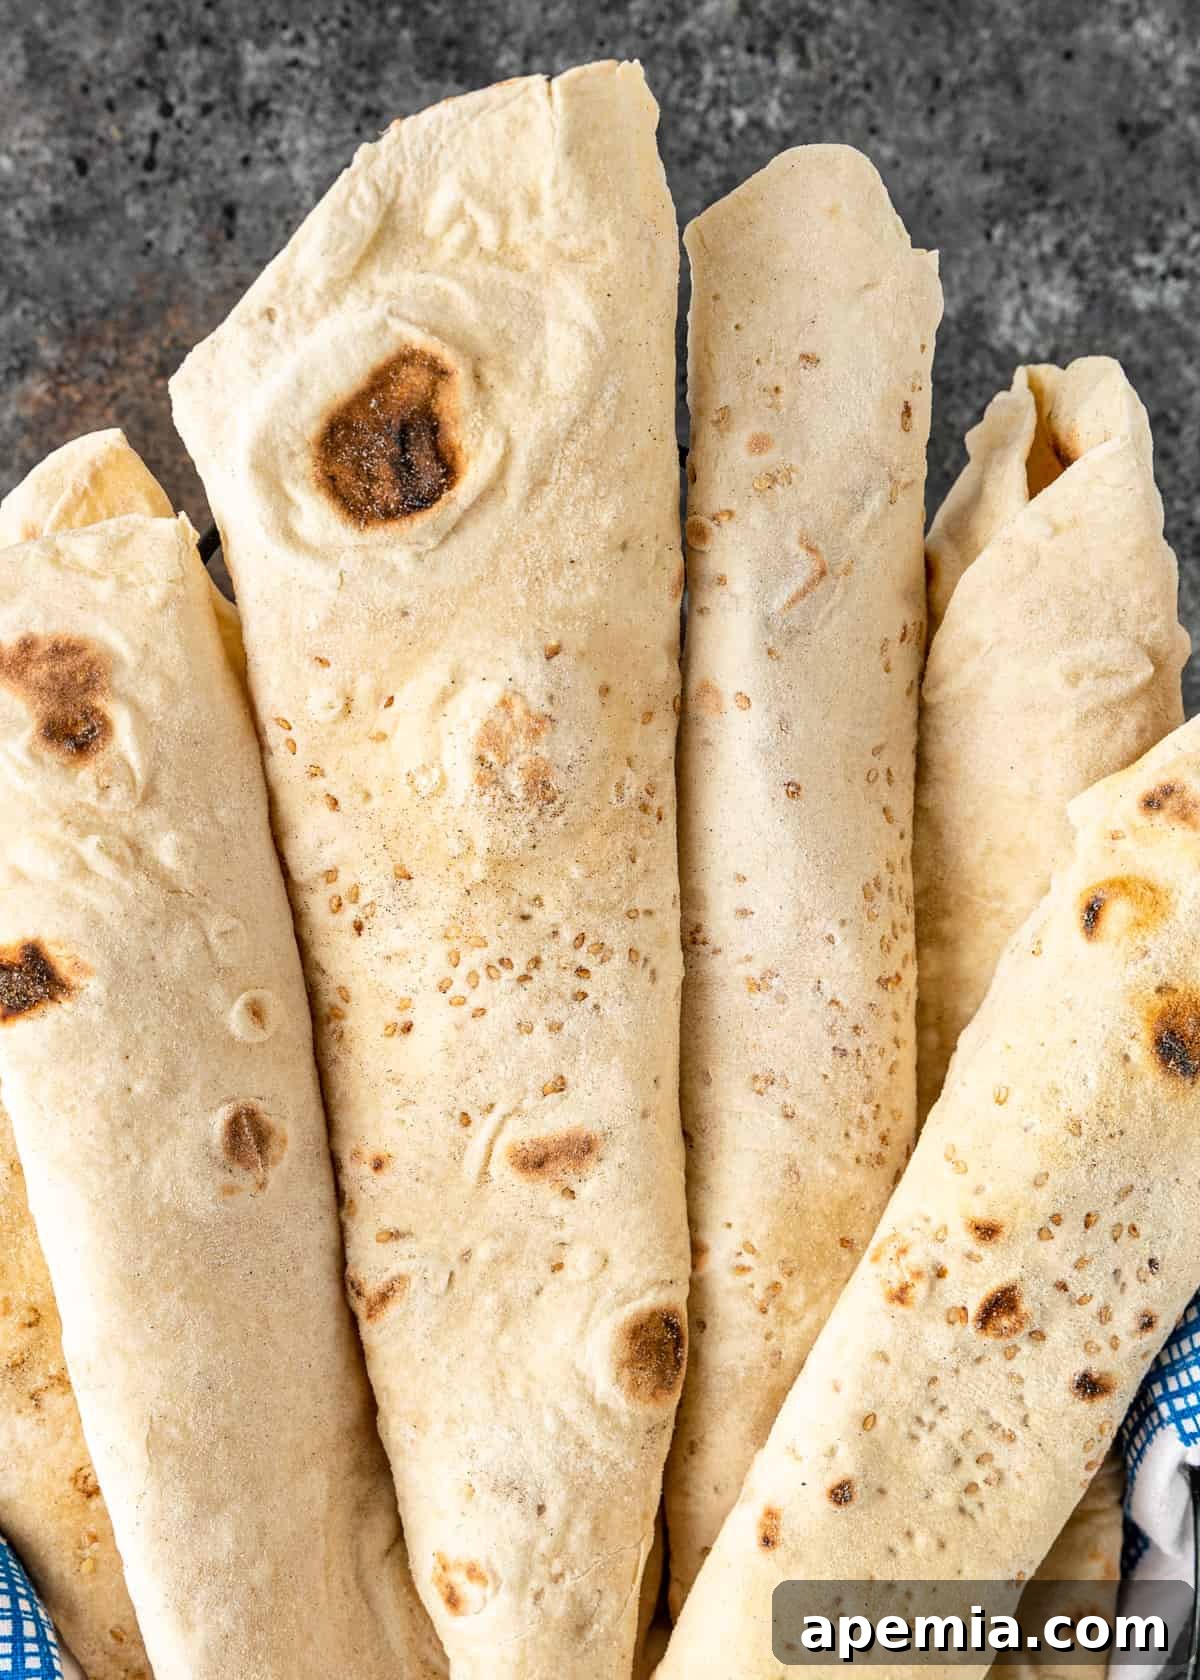
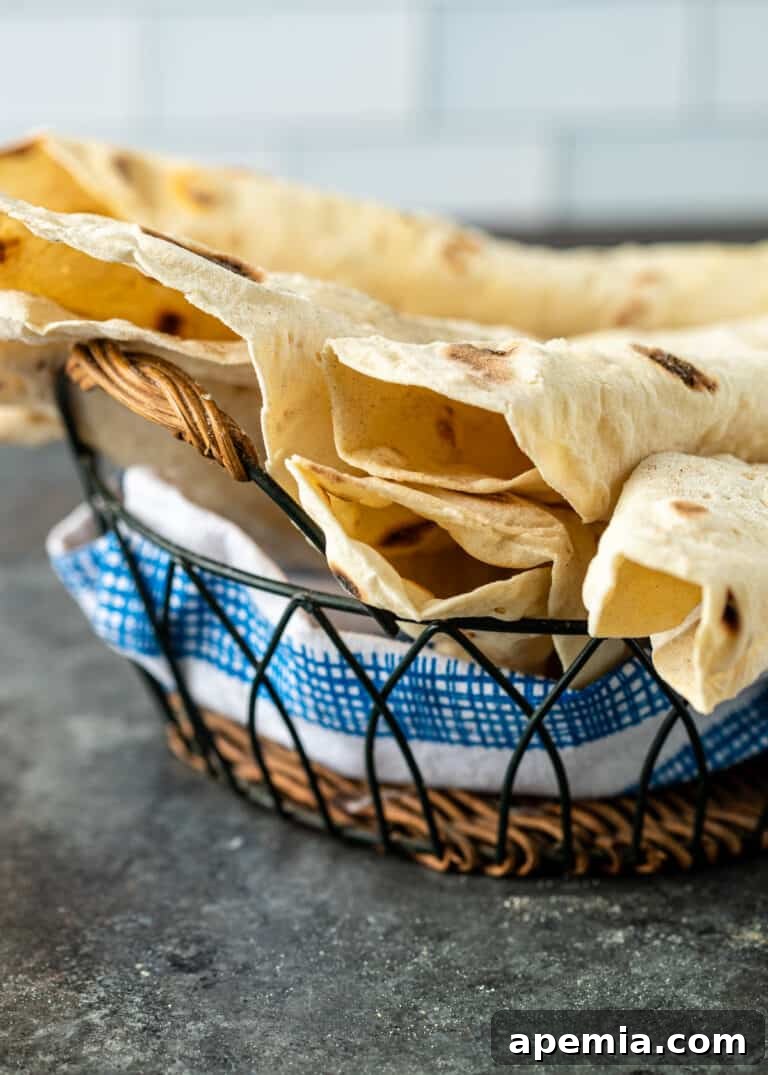
Lavash is more than just a bread; it’s a culinary emblem of Armenian heritage, celebrated for its delicious taste, incredible versatility, and surprisingly simple preparation at home. This scrumptious flatbread, distinguished by its soft, pliable texture, is robust enough to scoop up hearty stews yet delicate enough to serve as a wrap for your favorite fillings. What makes it even more appealing is its humble composition, requiring only five essential ingredients found in most pantries.
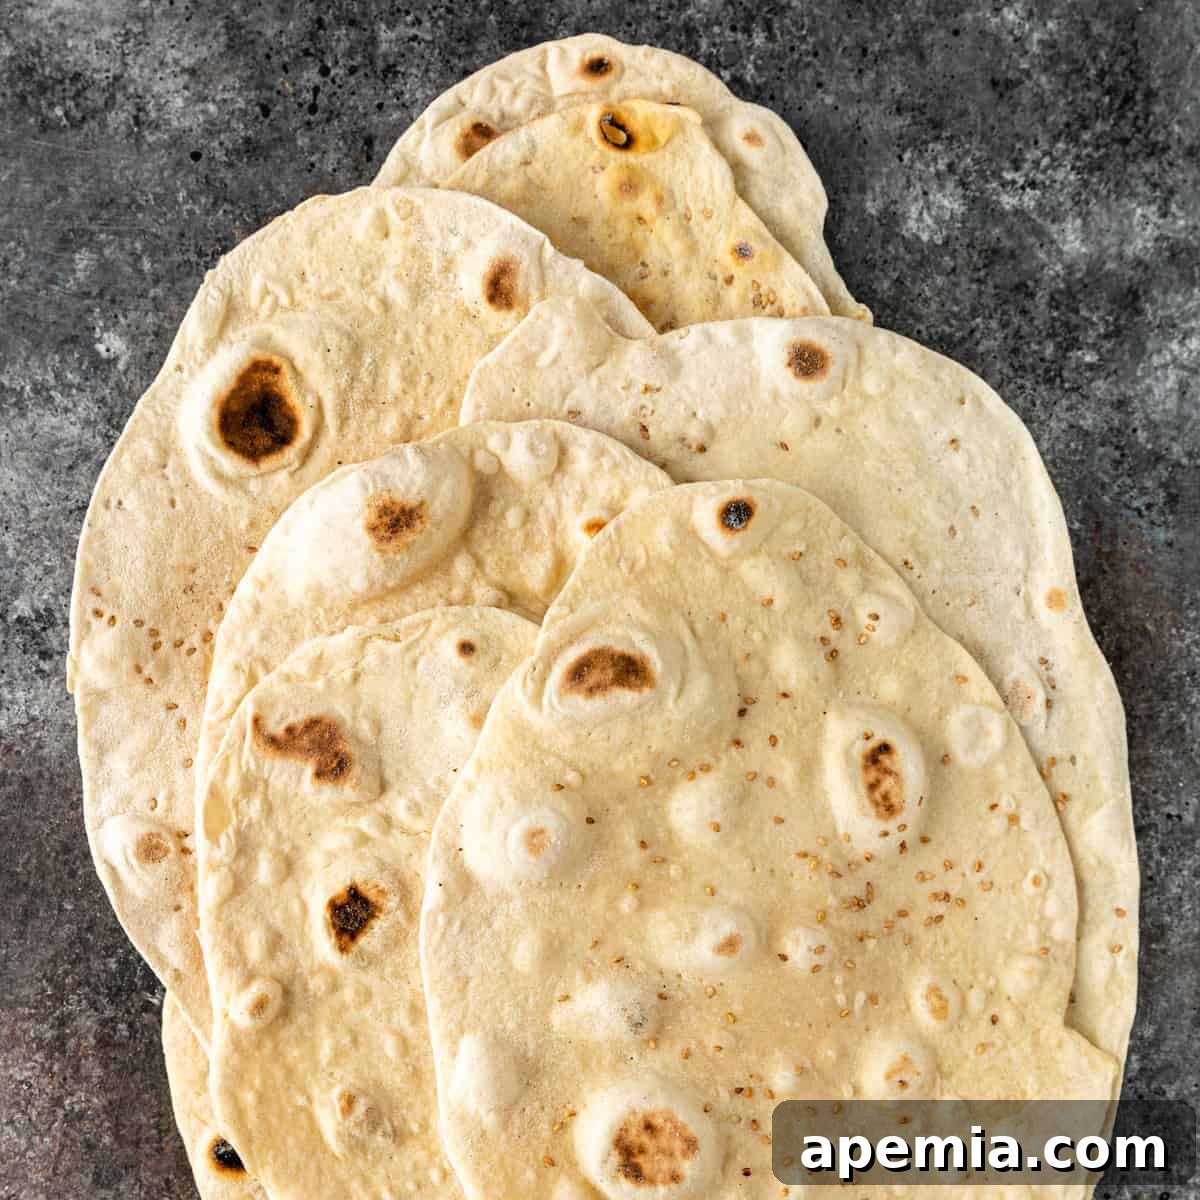
Homemade Lavash: Crafting Authentic Armenian Flatbread
Lavash truly stands out as a simple dish with profound cultural significance and enduring appeal. This time-honored traditional flatbread, with roots stretching back thousands of years, captivates with its temptingly thin profile and distinctive texture. It manages to be both wonderfully crispy and remarkably soft, making it perfectly flexible and foldable. Its popularity extends far beyond Armenia, making it a beloved staple across the Middle East and beyond. The enduring legacy of this ancient bread is easy to grasp once you experience its unique charm and versatility firsthand. In fact, Lavash was inscribed on UNESCO’s Representative List of the Intangible Cultural Heritage of Humanity in 2014, recognizing its crucial role in Armenian cuisine and culture.
While this authentic Armenian flatbread recipe is straightforward, demanding only basic ingredients like flour, yeast, oil, salt, and water, it does call for a generous measure of time and patience. The journey from simple ingredients to a delectable loaf is a rewarding one, and resisting the urge to rush through any step is crucial for achieving that perfect texture and flavor. For an even smoother and more effortless dough preparation, I highly recommend using a stand mixer. While not strictly necessary, it significantly simplifies the kneading process, freeing you to focus on the art of bread making.

Table of Contents
- The Story of Lavash
- Essential Ingredients and Substitutions
- Step-by-Step Guide to Making Lavash
- Storing and Rehydrating Lavash
- Frequently Asked Questions
- Delicious Ways to Enjoy Lavash
- Lavash (Armenian Flatbread) Recipe Card
If you’re eager to explore more homemade flatbread recipes, be sure to check out my delightful Roti, the hearty Barbari, or the aromatic Zaatar Bread.
The Story of Lavash
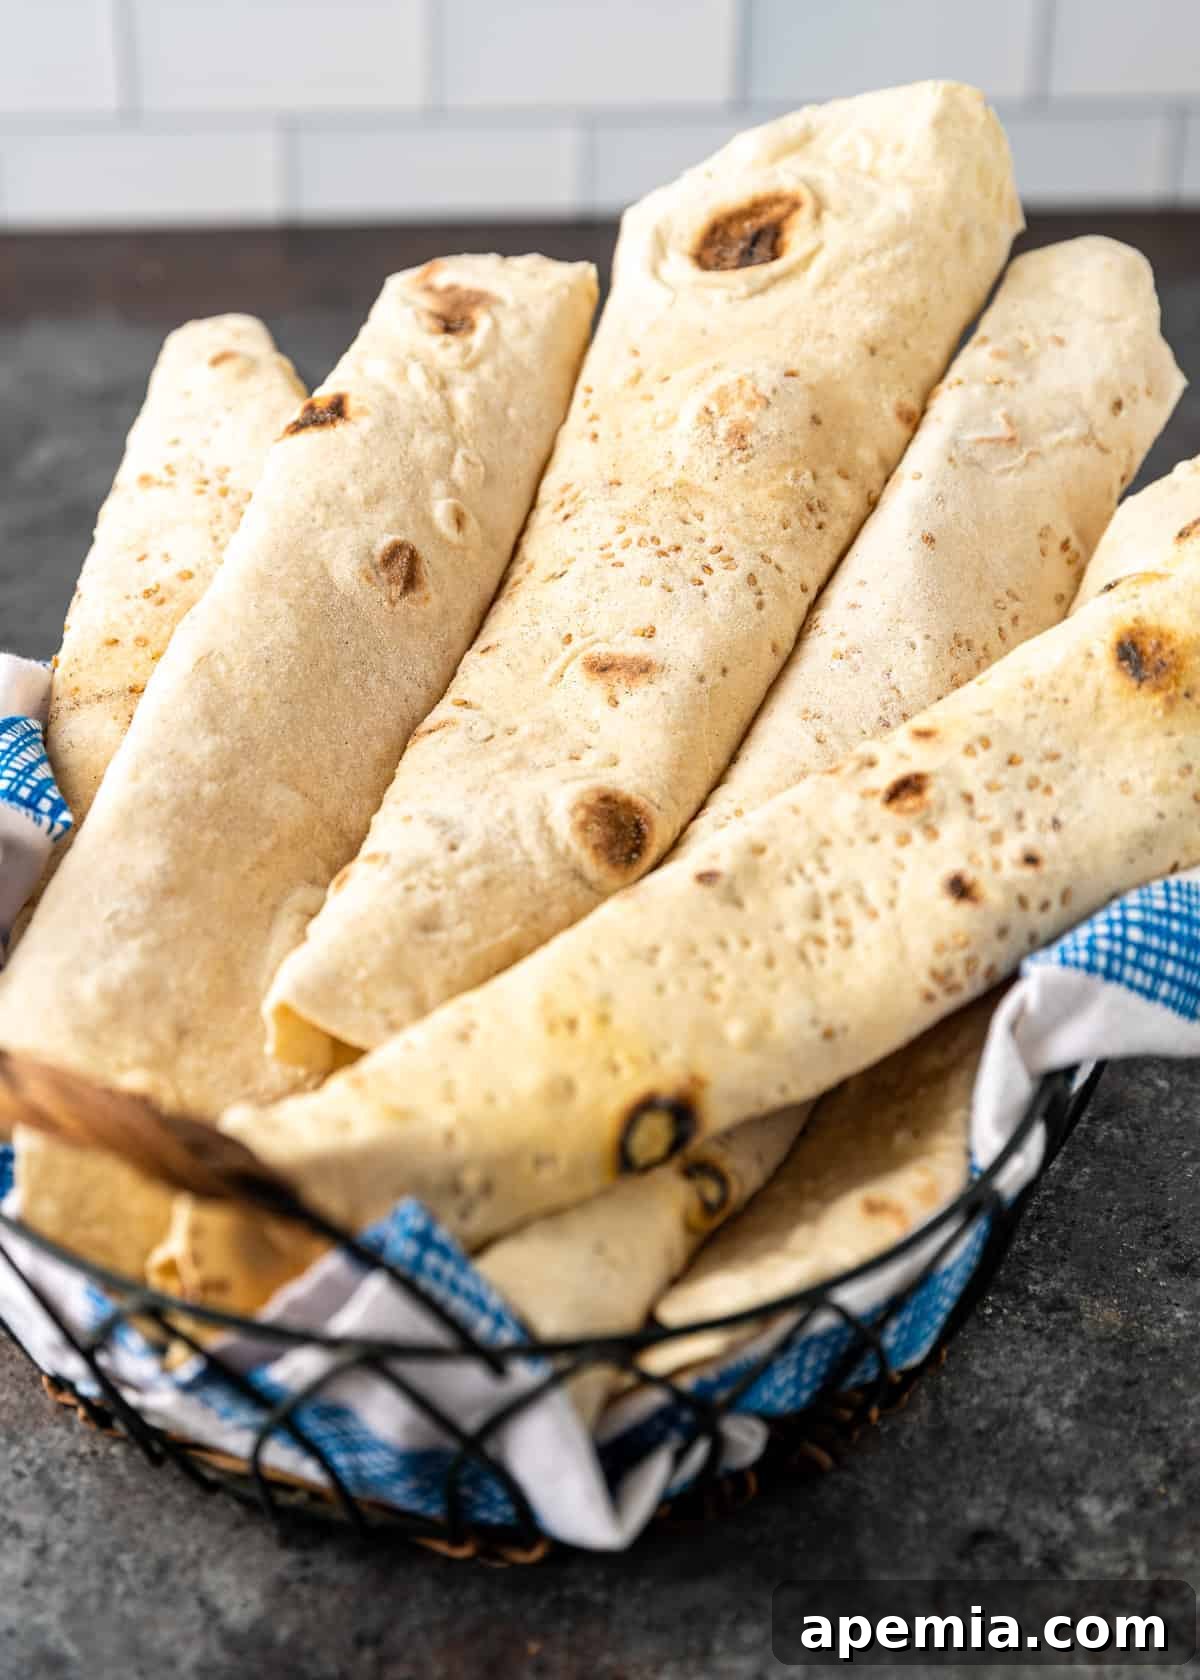
Lavash holds a deeply significant place in Armenian culture, transcending its role as mere sustenance to become a symbol of community, tradition, and hospitality. Its origins are ancient, with evidence suggesting flatbreads similar to lavash have been baked in the region for millennia. Traditionally, lavash was baked in a “tonir,” a clay oven similar to a tandoor, where dough was slapped onto the hot inner walls, cooking rapidly. This method produced the characteristic blisters and unique texture that are hallmarks of authentic lavash.
The practice of baking lavash is often a communal activity, especially in rural areas, bringing families and neighbors together. Large quantities are often baked at once and then stored for future use, symbolizing abundance and preparedness. Its versatility meant it could accompany almost any meal, from rich stews to fresh cheeses and herbs. This rich history and continued importance led to its recognition by UNESCO, solidifying its status as a vital piece of Armenian cultural heritage. When you make lavash, you’re not just baking bread; you’re participating in a living tradition.
Essential Ingredients and Substitutions
- All-Purpose Flour – The foundation of our lavash. For the purest flavor and best texture, I recommend unbleached and unbromated varieties. While all-purpose is ideal, you can experiment with a small percentage of whole wheat flour (up to 25%) for a nuttier flavor and added fiber, though it might slightly alter the bread’s pliability.
- Instant Yeast – This magical ingredient is key to the dough’s rise, creating those beautiful airy bubbles and contributing to the bread’s soft, chewy interior. Instant yeast is convenient as it can be mixed directly with the dry ingredients without prior activation. If you only have active dry yeast, you’ll need to activate it first in a portion of the lukewarm water with a pinch of sugar for 5-10 minutes until foamy.
- Vegetable Oil – Beyond just lubrication, vegetable oil plays a vital role in enriching the dough, adding moisture, and enhancing its pliability. This results in a softer, more flexible flatbread that is less prone to cracking. Any neutral-flavored oil like canola, sunflower, or grapeseed oil works wonderfully here. Olive oil can also be used, but choose a light variety to avoid overpowering the delicate flavor of the bread.
- Kosher Salt – Far from being just a seasoning, salt is essential for enhancing and harmonizing the natural flavors of the dough. It also plays a crucial role in controlling yeast activity and strengthening the gluten structure. Adjust to your taste, but don’t skip it!
- Lukewarm Water – The catalyst for yeast activation and dough formation. The temperature is crucial; too hot will kill the yeast, too cold will inhibit its activity. Aim for a temperature between 105-115°F (40-46°C), similar to a warm bath.
- Sesame Seeds – (Optional) Sprinkled on top or rolled into the dough, sesame seeds add a delightful light nutty flavor and a delicate crunch, elevating the sensory experience of your homemade lavash. Other optional toppings include nigella seeds, za’atar, or a sprinkle of coarse sea salt.
Step-by-Step Guide to Making Lavash
Making lavash is a process that rewards patience and attention to detail. Follow these steps carefully to achieve perfect, pliable flatbreads.
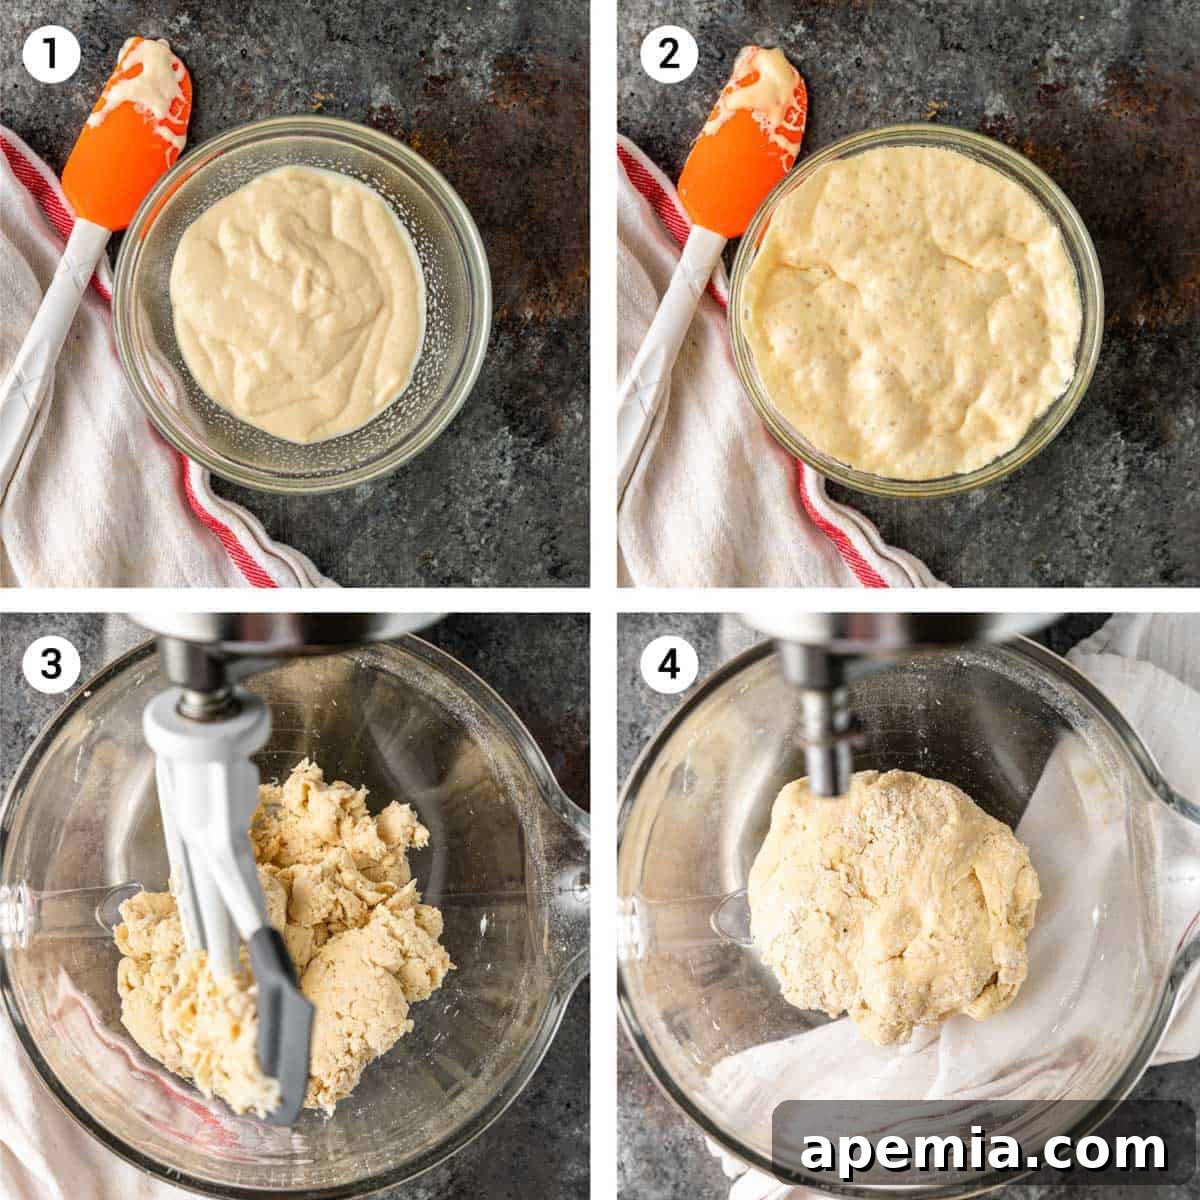
- Prepare the Old Dough (Poolish). In a large mixing bowl, combine the specified flour, lukewarm water, and instant yeast. Mix thoroughly with a rubber spatula until you achieve a thick, sticky paste with no dry spots. This preliminary mixture, often called a poolish or preferment, will contribute significantly to the lavash’s flavor and texture. Transfer this paste to a small, lightly oiled container, cover it loosely with plastic wrap, and allow it to rise at room temperature for approximately 1½ to 2 hours. During this time, the old dough should visibly double in volume and become bubbly. Alternatively, for a deeper flavor development, you can chill the old dough in the refrigerator overnight. If opting for refrigeration, ensure you bring it back to room temperature for at least 2 hours before proceeding with the next steps.
- Initiate the Fresh Dough. Once your old dough is ready, transfer it into the bowl of a stand mixer. Add the additional lukewarm water, vegetable oil, and kosher salt. Using clean hands, gently squish and break up the old dough in the water. This helps to integrate it evenly and kickstart the new dough formation.
- Incorporate the Flour and Hydrate. Attach the paddle attachment to your stand mixer. Add one cup of the remaining all-purpose flour to the mixture. Mix on low speed until the dough takes on a consistency similar to a thick pancake batter. Then, gradually add the rest of the flour, continuing to mix on low speed until all the flour is fully incorporated and a shaggy dough forms. Cover the mixing bowl with a clean kitchen towel and let the dough rest for about 20 minutes. This resting period is crucial as it allows the flour to fully hydrate, making the dough easier to work with and improving its final texture.
- Achieve a Smooth Dough. After the hydration rest, swap the paddle attachment for the dough hook attachment on your stand mixer. Remove the towel, return the bowl to the mixer, and knead the dough on medium speed for approximately 4 minutes. During this kneading phase, you’ll observe the dough transforming; it should become noticeably smooth, elastic, and, importantly, it should no longer stick to the sides of the bowl. This indicates proper gluten development, which is vital for the lavash’s characteristic pliability.
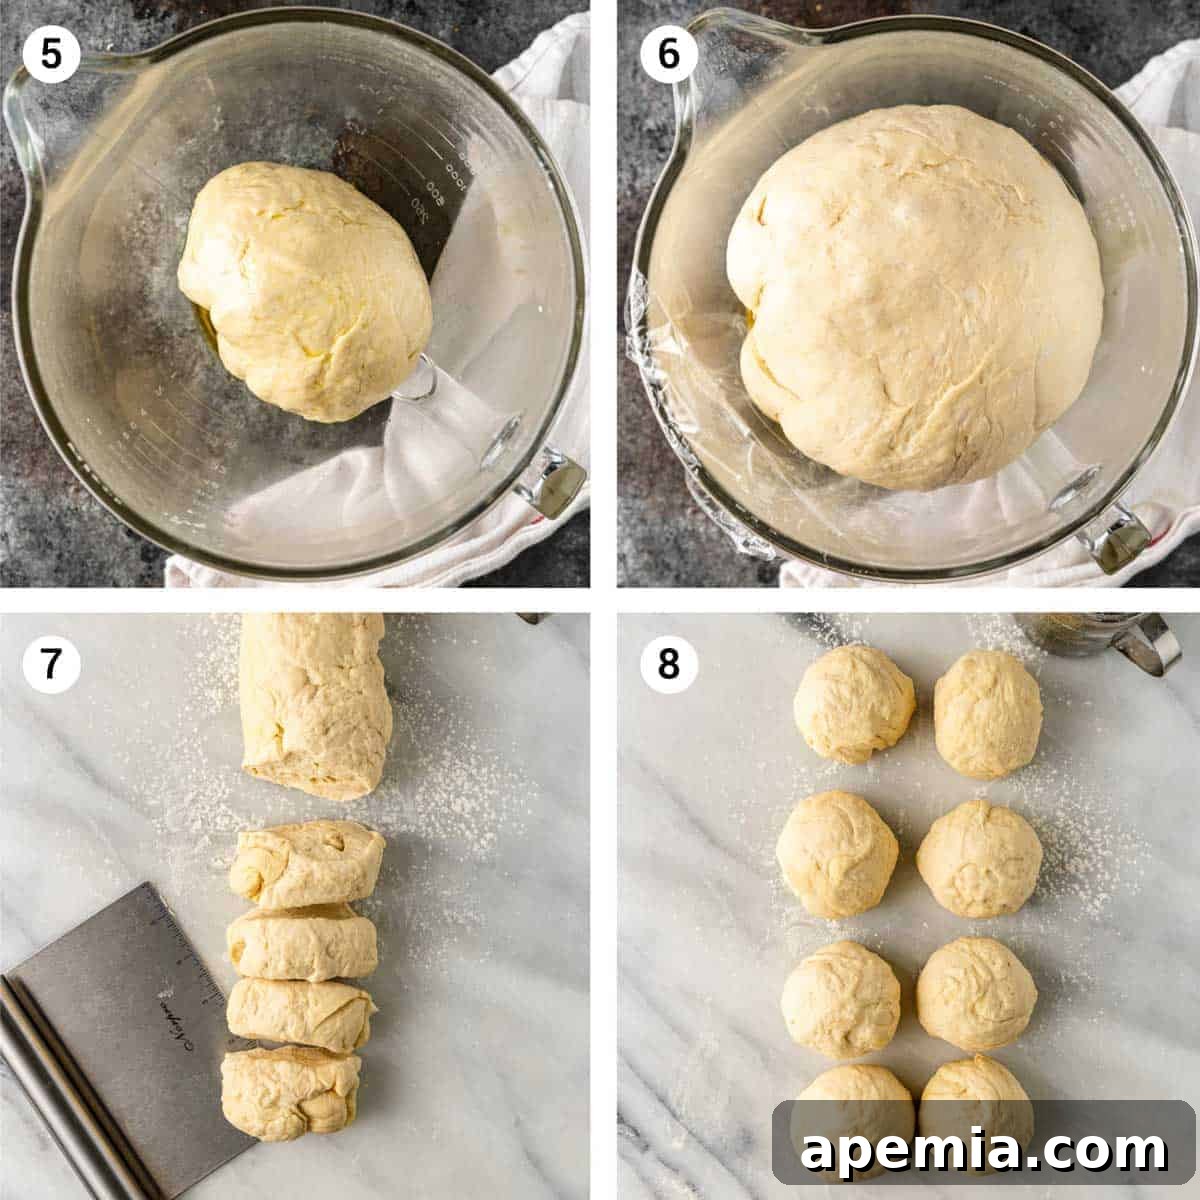
- First Dough Rest. Lightly oil a large bowl with an 8-cup capacity. Transfer the kneaded dough into this bowl, turning it once to coat all sides with oil. Cover the bowl tightly with plastic wrap to prevent a skin from forming, and set it aside to rest for a minimum of 3 hours at room temperature, or alternatively, in the refrigerator overnight.
- Second Rise and Room Temperature. Similar to the old dough, if you opted for overnight refrigeration, ensure the dough is brought back to room temperature for at least 2 hours before proceeding. The dough should have doubled in size and feel airy and light.
- Divide the Dough. Gently turn the risen dough out onto a clean, lightly floured work surface. Using a sharp knife or a dough scraper, divide the dough into 8 roughly equal pieces. Each piece should weigh approximately 3.5 ounces (about 100 grams). Uniform pieces ensure consistent cooking.
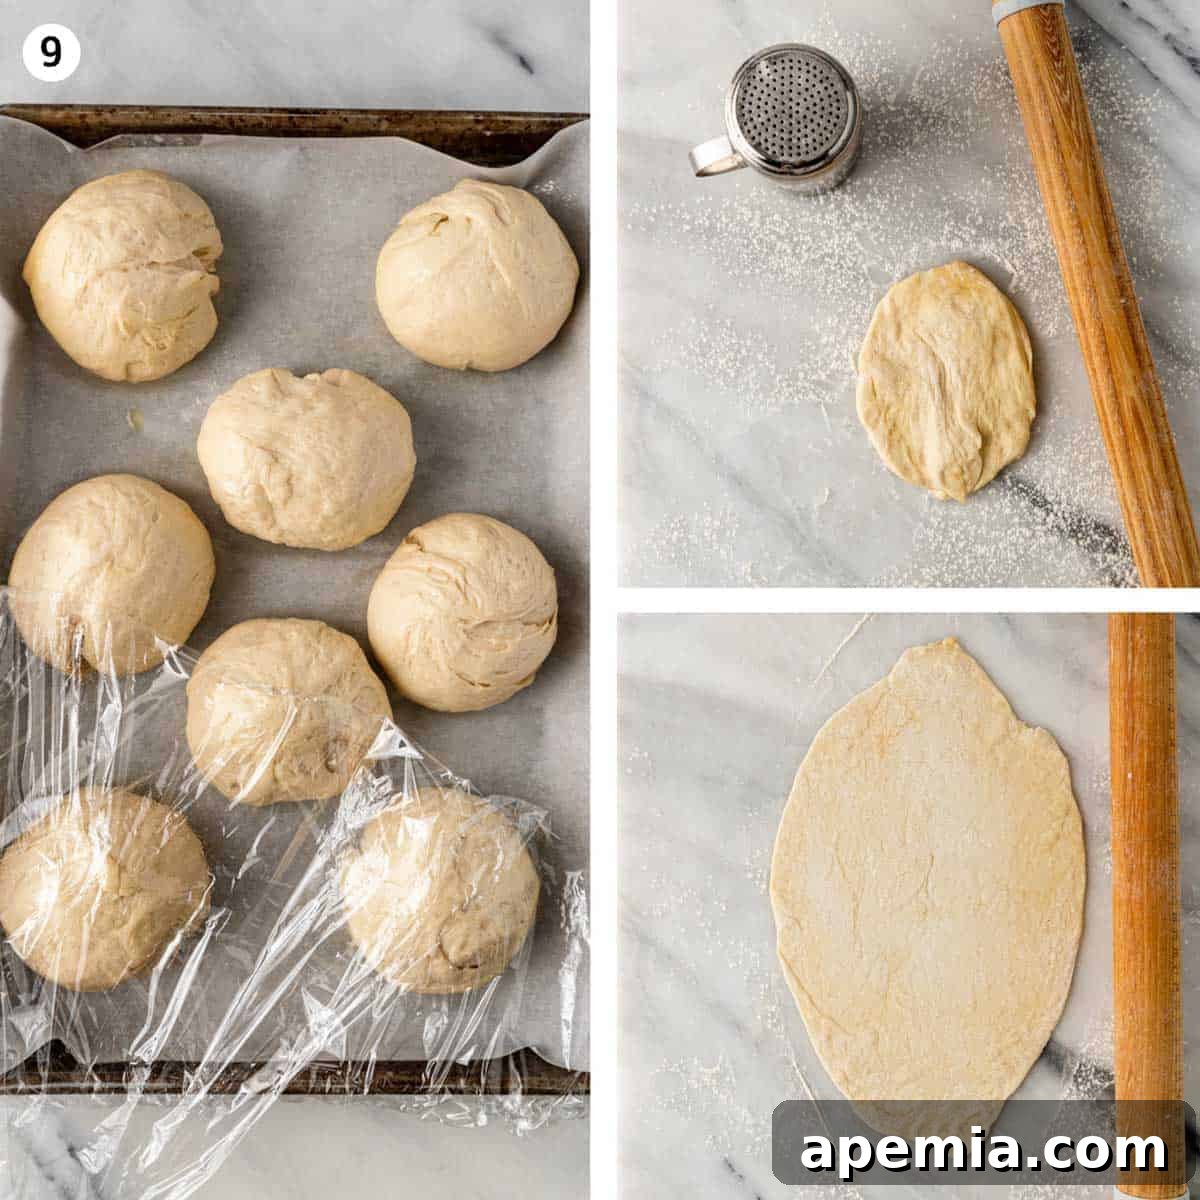
- Shape into Balls. Take one piece of dough and cup your palm over it on the clean counter. Using a circular motion, apply gentle pressure while moving your hand to form the dough into a smooth, tight ball. The friction against the counter will help create surface tension. Transfer the formed dough balls to a lightly oiled baking sheet, ensuring they have enough space and are not touching. Cover them with a lightly oiled piece of plastic wrap or a damp kitchen towel to keep them moist and prevent drying. Allow them to rest for at least an hour. This final rest relaxes the gluten, making the dough easier to roll out thinly.
- Roll the Flatbread. Lightly dust your clean work surface and a rolling pin with a little flour. Take one dough ball at a time, keeping the remaining balls covered to maintain their moisture. Roll each dough ball out into a thin, rectangular shape, aiming for approximately ⅛ inch thickness or even a little thinner. The thinner you roll, the more pliable and airy your lavash will be, and the more likely it is to blister beautifully when cooked. Don’t worry if they aren’t perfectly uniform; rustic charm is part of lavash’s appeal. If desired, you can sprinkle some sesame seeds or other desired toppings onto one side of the rolled-out dough and gently press them in with the rolling pin.
- Heat the Pan. Place a large cast-iron skillet or a griddle (if you have one that spans two burners) over medium-high heat. Allow it to heat thoroughly for several minutes. You’ll know it’s ready when a drop of water flicked onto the surface instantly evaporates with a sizzle. Achieving the right pan temperature is crucial for the lavash to cook quickly and puff up.
- Cook the Lavash. Carefully place one rolled-out flatbread onto the hot skillet. Cook for about one minute on the first side, or until you see small bubbles forming and the surface begins to blister and develop golden-brown spots. Using tongs, carefully flip the lavash over and cook the second side for no more than 30 seconds. This quick cooking ensures a soft, pliable bread. If you prefer a browner, slightly crispier bread, you can flip it back to the first side for an additional 30 seconds. As each lavash bread is cooked, transfer it to a baking sheet and immediately cover it with a clean, dry kitchen towel. This traps the steam, keeping the lavash soft and flexible. Repeat this process with the rest of the dough. Serve the lavash warm for the best experience.
Storing and Rehydrating Lavash
For optimal freshness and pliability, enjoy your homemade lavash soon after it’s made. If you have leftovers, allow them to cool completely before storing them in airtight plastic bags at room temperature. This will help maintain their soft texture for a few days. Alternatively, for longer storage, lavash can be frozen. Stack cooled pieces with parchment paper in between, then wrap them tightly in plastic wrap and foil. They will keep in the freezer for up to 3 months. Thaw at room temperature before serving.
Don’t despair if your lavash happens to dry out and become brittle over time. It’s easily brought back to life! To rehydrate, lightly mist both sides of the lavash with water, then cover it with a clean kitchen towel or place it in a plastic bag for 10-15 minutes. The steam will work its magic, softening the bread until it’s pliable enough to roll up without cracking. If it still feels a bit stiff, simply mist with a little more water and let it rest for a few more minutes until it reaches your desired softness.
Frequently Asked Questions About Lavash
How thin should I roll the lavash dough?
For the most authentic and best results, you’ll want to roll the lavash dough out quite thin. Aim for a thickness of about ⅛ inch (approximately 3 mm) or even slightly thinner if you can manage it. Rolling it thin is key to achieving that characteristic pliable texture and encourages the formation of those wonderful large, airy bubbles during cooking. A translucent quality to the dough is a good indicator you’re on the right track.
Can lavash flatbread dough be made ahead of time?
Absolutely! Lavash dough is quite forgiving and can be prepared ahead of time, which makes it perfect for meal prepping or entertaining. Once you’ve completed the step of dividing the dough and shaping it into individual balls, you can cover them tightly with plastic wrap and store them in the refrigerator for up to 3 days. When you’re ready to bake, simply take the dough balls out, let them come to room temperature for at least an hour (this makes them easier to roll), and then proceed with rolling and cooking as usual.
How do you eat Armenian flatbread?
Lavash is incredibly versatile and can be enjoyed in a myriad of ways, both traditional and contemporary. Its soft and thin nature makes it a perfect accompaniment to almost any meal. Here are just a few of the countless delicious ways to enjoy this ancient flatbread:
- Wraps & Sandwiches: It’s ideal for wrapping around succulent roasted meats like Grilled Koobideh, flavorful Lamb Shawarma, or aromatic Chicken Kofta. Fill it with fresh vegetables, cheese, or even leftover grilled chicken for a quick and satisfying meal.
- Dips & Spreads: Its sturdy yet flexible texture makes it an excellent vessel for dipping into creamy Mutabal, classic White Bean Hummus, tangy Whipped Feta, or any of your other favorite Middle Eastern dips and spreads.
- Vegetarian Delights: For a quick and healthy vegetarian lunch, stuff lavash with Baba Ganoush, refreshing Tabouli Salad, and crispy Falafel.
- With Stews & Curries: Serve lavash alongside rich and hearty stews such as a fragrant Lamb Tagine with Dates and Apricots or a comforting Moroccan Chicken Stew. It’s perfect for soaking up every last drop of the delicious sauces.
- Crispy Snacks: If you let lavash dry out and become brittle, don’t throw it away! You can bake or toast it until crispy and break it into chips for snacking with dips, or use it as a base for pizzas or flatbreads.
What equipment do I need to make lavash?
While you can certainly make lavash by hand, certain equipment can make the process significantly easier and more efficient:
- Stand Mixer: Highly recommended for kneading the dough, saving time and effort.
- Large Mixing Bowls: For preparing the old dough and the main dough.
- Rubber Spatula: For initial mixing of the old dough.
- Measuring Cups and Spoons: For accurate ingredient proportions.
- Kitchen Scale: For precise ingredient measurements, especially flour and water, which is crucial in bread making. Also helpful for dividing dough evenly.
- Plastic Wrap or Damp Kitchen Towels: For covering dough during rising to prevent it from drying out.
- Rolling Pin: Essential for rolling the dough thinly and evenly.
- Large Cast Iron Skillet or Griddle: The best choice for cooking lavash quickly at high heat, ensuring even cooking and beautiful blistering.
- Tongs: For easily flipping the hot lavash on the skillet.
- Baking Sheet: For holding cooked lavash.
- Clean Kitchen Towels: For covering cooked lavash to keep it soft and pliable.
What are common mistakes to avoid when making lavash?
Even with a simple recipe, a few common pitfalls can affect your lavash:
- Rushing the Rising Time: Patience is key. Proper rising allows for flavor development and a tender texture. Don’t shorten the rest periods, especially for the old dough and the main dough.
- Incorrect Water Temperature: Water that’s too hot will kill the yeast, leading to flat bread. Water that’s too cold will make the yeast sluggish, resulting in a slow or non-existent rise. Aim for lukewarm (105-115°F or 40-46°C).
- Not Kneading Enough: Proper kneading develops gluten, which gives lavash its characteristic chewiness and elasticity. If the dough is sticky after 4 minutes in the mixer, continue kneading for another minute or two until it’s smooth and pulls away from the bowl.
- Rolling Too Thickly: Lavash should be very thin. Thick dough will result in dense, less pliable bread. Keep rolling until it’s almost translucent.
- Underheating or Overheating the Pan: A pan that’s not hot enough will dry out the bread before it blisters. A pan that’s too hot will burn the bread quickly without cooking it through. The “water drop test” is a great indicator.
- Not Covering Cooked Lavash: Immediately covering the cooked lavash with a towel after it comes off the pan is crucial. This traps steam and keeps the bread soft and flexible. If left uncovered, it will quickly become stiff and brittle.
Delicious Ways to Enjoy Lavash
Lavash isn’t just a side dish; it’s a culinary canvas! Its neutral flavor and adaptable texture make it perfect for a myriad of uses:
- Everyday Companion: Simply tear off a piece and enjoy it with cheese, fresh herbs, olives, and tomatoes for a light and traditional breakfast or snack.
- Creative Wraps and Sandwiches: Its large, thin surface is ideal for creating hearty wraps. Fill it with anything from grilled chicken and crisp lettuce to roasted vegetables and hummus. It’s a fantastic alternative to traditional sandwich bread.
- Savory Scoops: Use lavash as an edible spoon to scoop up creamy dips like baba ganoush, labneh, or even a simple homemade yogurt dip. Its strength handles even the thickest spreads.
- Crispy Crackers: If you prefer a crispier texture, bake or toast dried lavash until golden and brittle. Break it into shards to serve with soup, salads, or as a base for artisanal cheese boards.
- Flatbread Pizza Base: For a quick meal, use a piece of lavash as a thin, crispy base for a personal pizza. Spread with sauce, sprinkle with cheese and your favorite toppings, then bake until bubbly.
- Dessert Delight: Believe it or not, lavash can be transformed into a dessert. Brush it with butter, sprinkle with cinnamon sugar, and bake until crisp for a sweet treat, or even use it as a base for fruit tarts.
With its incredible versatility, homemade lavash is sure to become a beloved staple in your kitchen, inspiring countless delicious meal possibilities.
Share this recipe on Pinterest!
Love this recipe? Share it with the world on Pinterest to help others discover the joy of homemade Lavash.
Subscribe to my Newsletter, follow me on Facebook, Pinterest, Instagram and YouTube for all my latest recipes and videos.
Lavash (Armenian Flatbread)
8
6 hrs 30 mins
15 mins
6 hrs 45 mins
Ingredients
Old Dough
- 70 g all-purpose flour (1/2 cup)
- 70 ml lukewarm water (1/4 cup plus a scant 1 tbsp)
- ¼ tsp instant yeast
Dough
- 240 ml lukewarm water (1 cup)
- 1 tbsp vegetable oil
- 2 tsp kosher salt
- 440 g all-purpose flour, plus more for dusting (3 cups plus 2 Tbsp)
Instructions
Old Dough Preparation
-
Using a rubber spatula, mix together the 70g all-purpose flour, 70ml lukewarm water, and ¼ tsp instant yeast in a bowl until it forms a thick paste. Scrape the paste into a small, lightly oiled container, cover, and let it sit out for 1½ to 2 hours until doubled in volume (See Note 1 for overnight option).
Main Dough Preparation
-
In the bowl of a stand mixer, combine the prepared old dough, 240ml lukewarm water, 1 tbsp vegetable oil, and 2 tsp kosher salt. Use your hands to squish and break up the old dough to distribute it evenly in the water.
-
Add 1 cup of the 440g all-purpose flour. Using the paddle attachment, mix on low speed until the mixture resembles pancake batter. Next, add the remaining 440g all-purpose flour and continue to mix on low speed until fully incorporated and a shaggy dough forms. Cover the bowl with a kitchen towel and let the dough sit for 20 minutes to hydrate the flour (See Note 2).
-
Remove the towel. Attach the dough hook to the stand mixer and mix the dough on medium speed for about 4 minutes, or until the dough releases from the sides of the bowl without sticking and feels smooth to the touch.
-
Lightly grease an 8-cup capacity bowl and place the dough inside. Cover the bowl with plastic wrap, and let it rest for 3 hours or until doubled in volume at room temperature (See Note 3 for overnight refrigeration).
-
Dust a clean work surface lightly with flour and transfer the dough onto it. Cut the dough into 8 pieces, each weighing approximately 3.5 ounces (about 100g).
Shape the Dough Balls
-
Take one portion of dough. Cup the palm of your hand over it and move your hand in a circular motion on the counter. The friction will help form the dough into a smooth, tight ball. Repeat for all pieces.
-
Lightly oil a rimmed tray and place the dough balls on the tray, ensuring they don’t touch. Cover them with plastic wrap that has been lightly coated with cooking spray or oil. Let them rest for 1 hour (See Note 4 for extended refrigeration).
-
Lightly dust a clean surface and a rolling pin with flour. Work with one piece of dough at a time, keeping the rest covered. Roll each ball of dough into a thin rectangle, approximately 8×12 inches, aiming for about ⅛ inch thick. OPTIONAL: Once the dough is rolled out, sprinkle sesame seeds on one side and gently press them into the dough with the rolling pin. Don’t strive for perfect shapes; a rustic look is fine.
Cook the Lavash
-
Place a large cast-iron pan or a griddle over medium-high heat for a few minutes, or until a sprinkle of water instantly evaporates with a sizzle. This indicates the pan is hot enough.
-
Carefully place one rolled lavash dough into the hot pan/griddle. Cook for about 1 minute, or until it puffs slightly and develops golden-brown blisters on the underside. Using tongs, flip it over and cook the second side for no more than 30 seconds to keep it pliable. For extra browning on the first side, you can flip it back for another 30 seconds.
-
Transfer the cooked lavash to a baking sheet and immediately cover it with a dry kitchen towel to trap steam and keep it soft. Continue cooking the rest of the dough, covering each piece as it finishes. Serve warm.
Storage and Rehydration
-
Eat the lavash soon after making it for the best texture. To store, once cooled, place in airtight plastic bags to keep the bread pliable. If it dries out and turns brittle, don’t worry. Rehydrate it by lightly misting the lavash with water and covering it with a towel or plastic bag. Let it sit for 10-15 minutes to soften. It should become pliable enough to roll up without cracking. If still stiff, mist with more water.
Notes
- You can refrigerate the old dough overnight and bring it to room temperature for at least 2 hours before using.
- This resting period allows the flour to fully hydrate, making the dough more extensible and easier to work with.
- For deeper flavor, you can refrigerate the main dough overnight. Ensure you let it come to room temperature for at least 2 hours before portioning and shaping.
- At this point, the shaped dough balls can be refrigerated for up to 3 days, tightly covered, making it convenient for fresh lavash whenever you desire.
- Recipe adapted from Lavash, by Kate Leahy, John Lee, and Ara Zada.
Nutrition Information
Calories: 244kcal
|
Carbohydrates: 43g
|
Protein: 6g
|
Fat: 5g
|
Saturated Fat: 1g
|
Sodium: 294mg
|
Potassium: 68mg
|
Fiber: 2g
|
Sugar: 1g
|
Calcium: 29mg
|
Iron: 3mg
The information shown is an estimate provided by an online nutrition calculator. It should not be considered a substitute for a professional nutritionist’s advice.
breads
Armenian, Middle Eastern
Kevin
Have You Made This Recipe? Let Me Know on Instagram
Tag @keviniscooking or tag me #keviniscooking!