
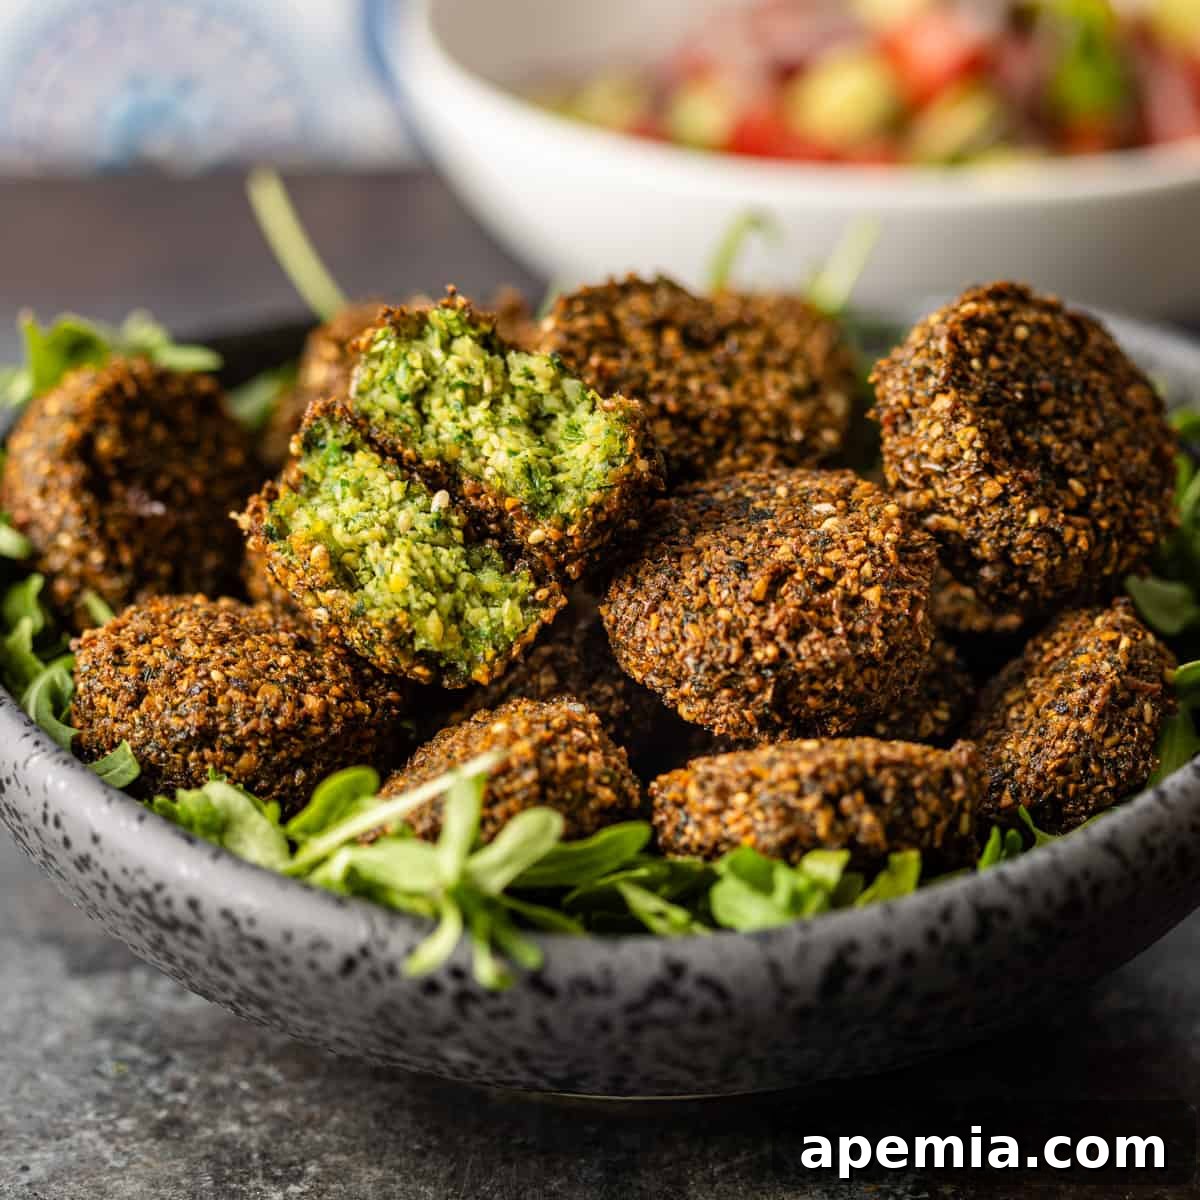
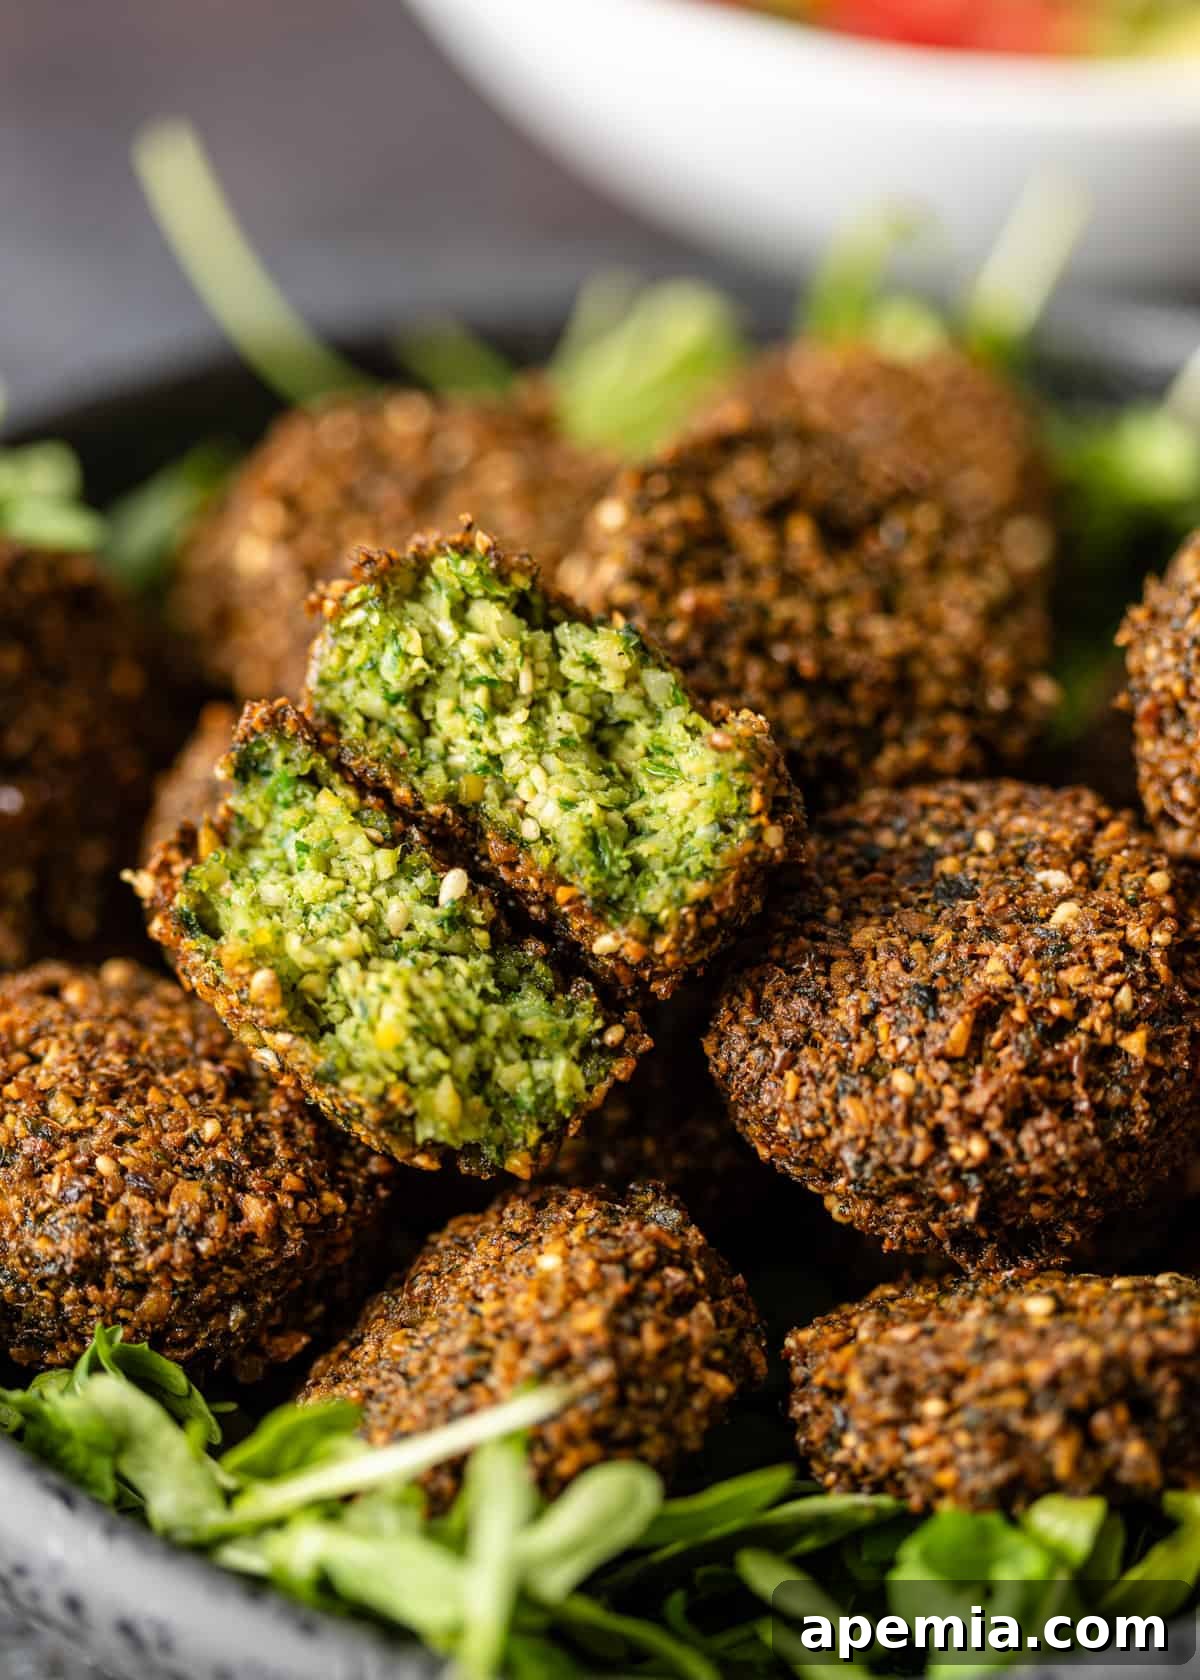
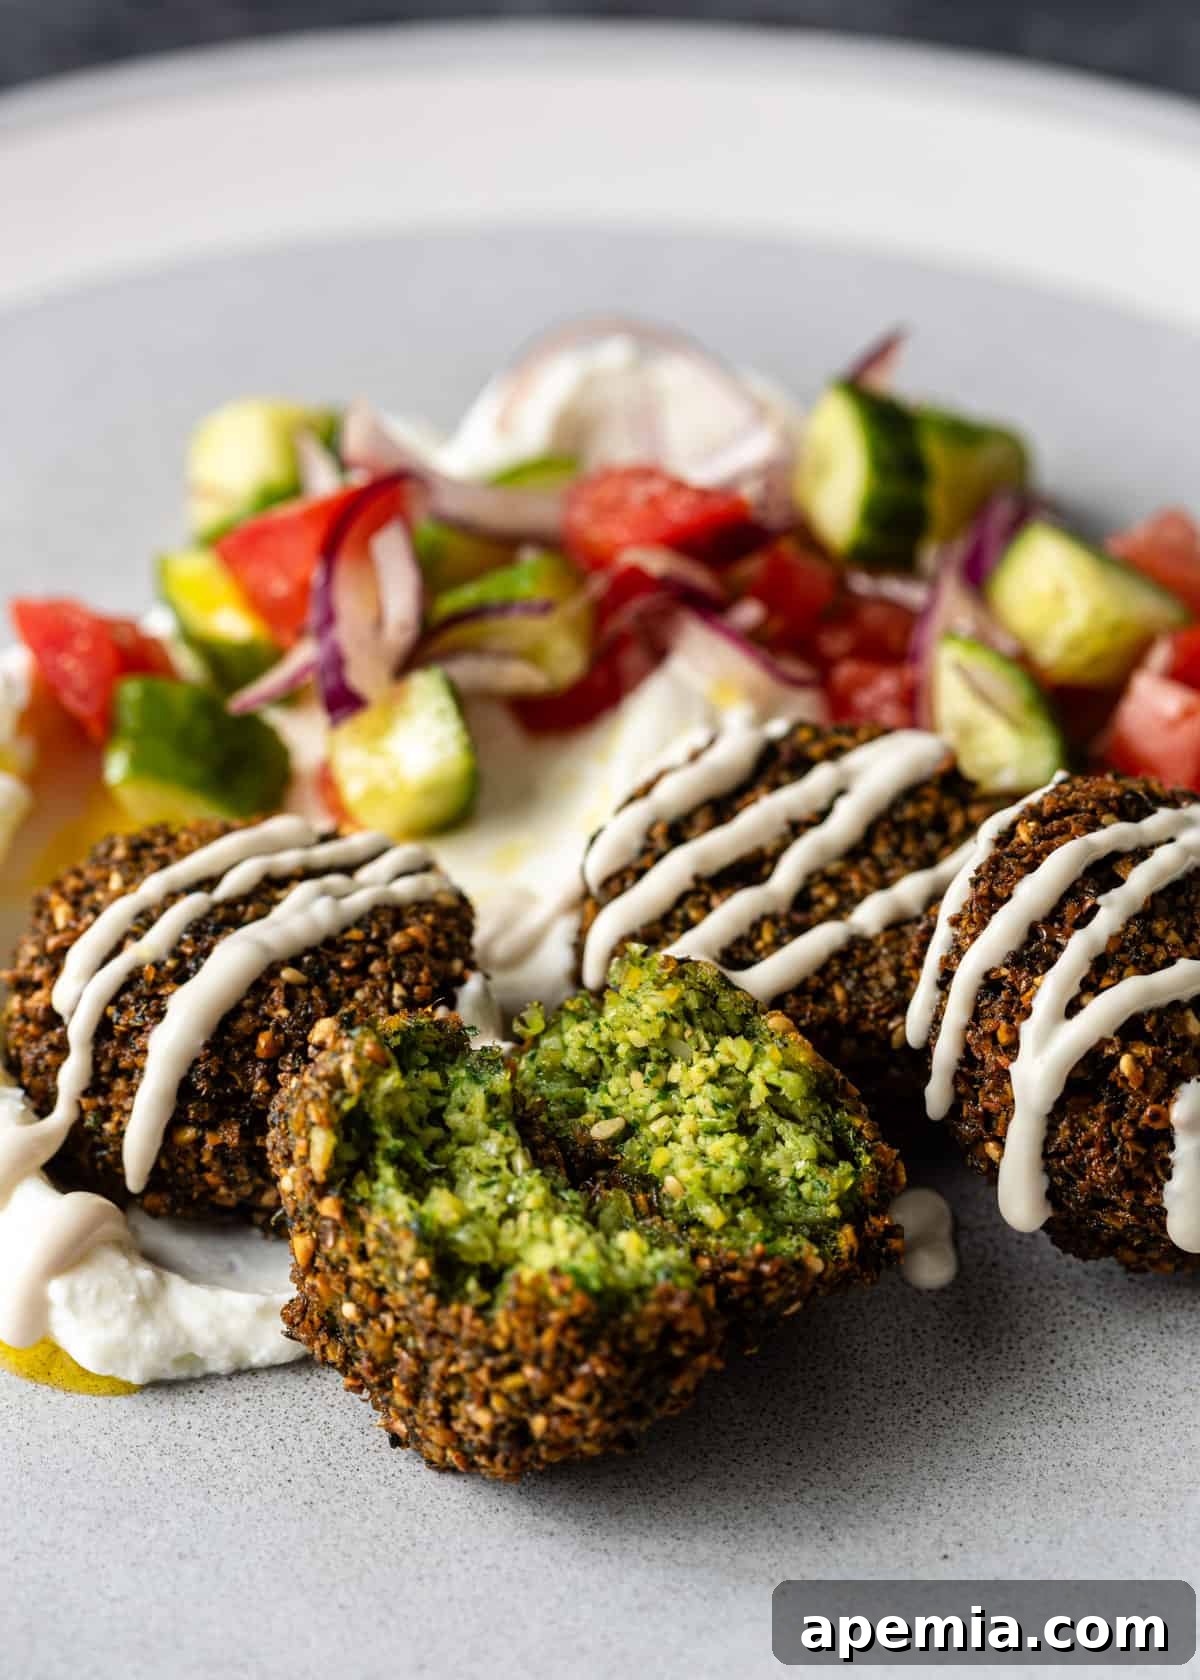
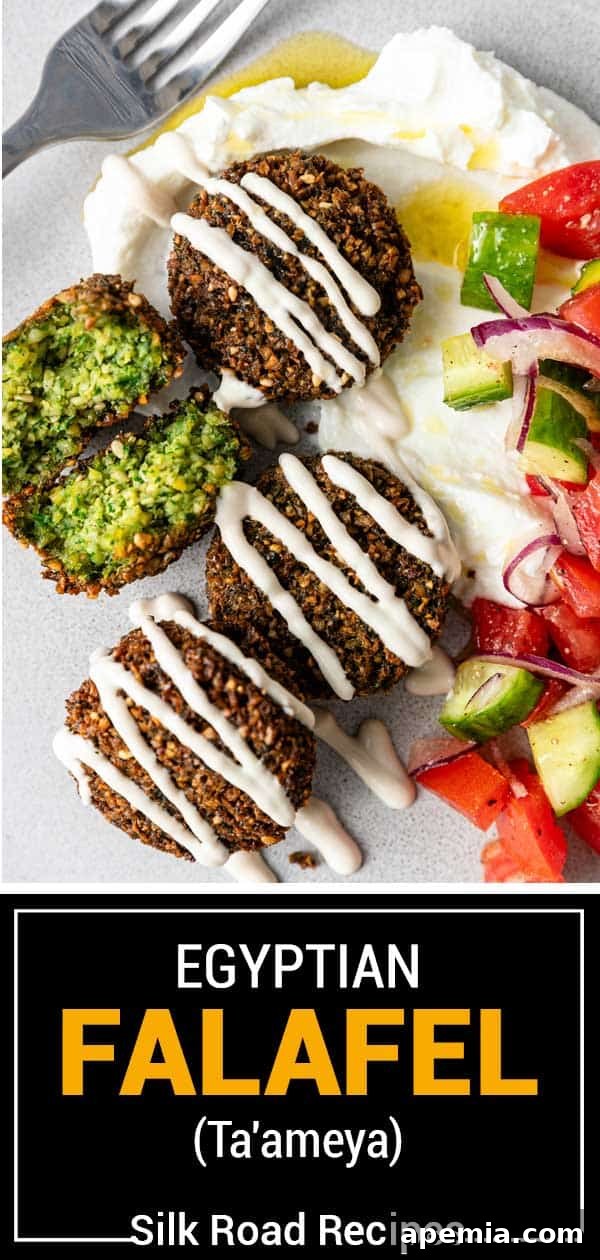
Experience the true essence of Egyptian cuisine with this authentic Egyptian falafel recipe, famously known as Ta’ameya. What sets this recipe apart is its traditional blend of both fava beans and chickpeas, delivering that distinctively light, airy, and impossibly crispy texture that defines genuine Egyptian street food. Whether you choose to fry them to a golden perfection or bake them for a lighter touch, these savory patties are a fantastic vegetarian and vegan meal. Enjoy them generously paired with creamy hummus, warm pita bread, crisp fresh vegetables, and a drizzle of rich tahini sauce – the possibilities are endless!
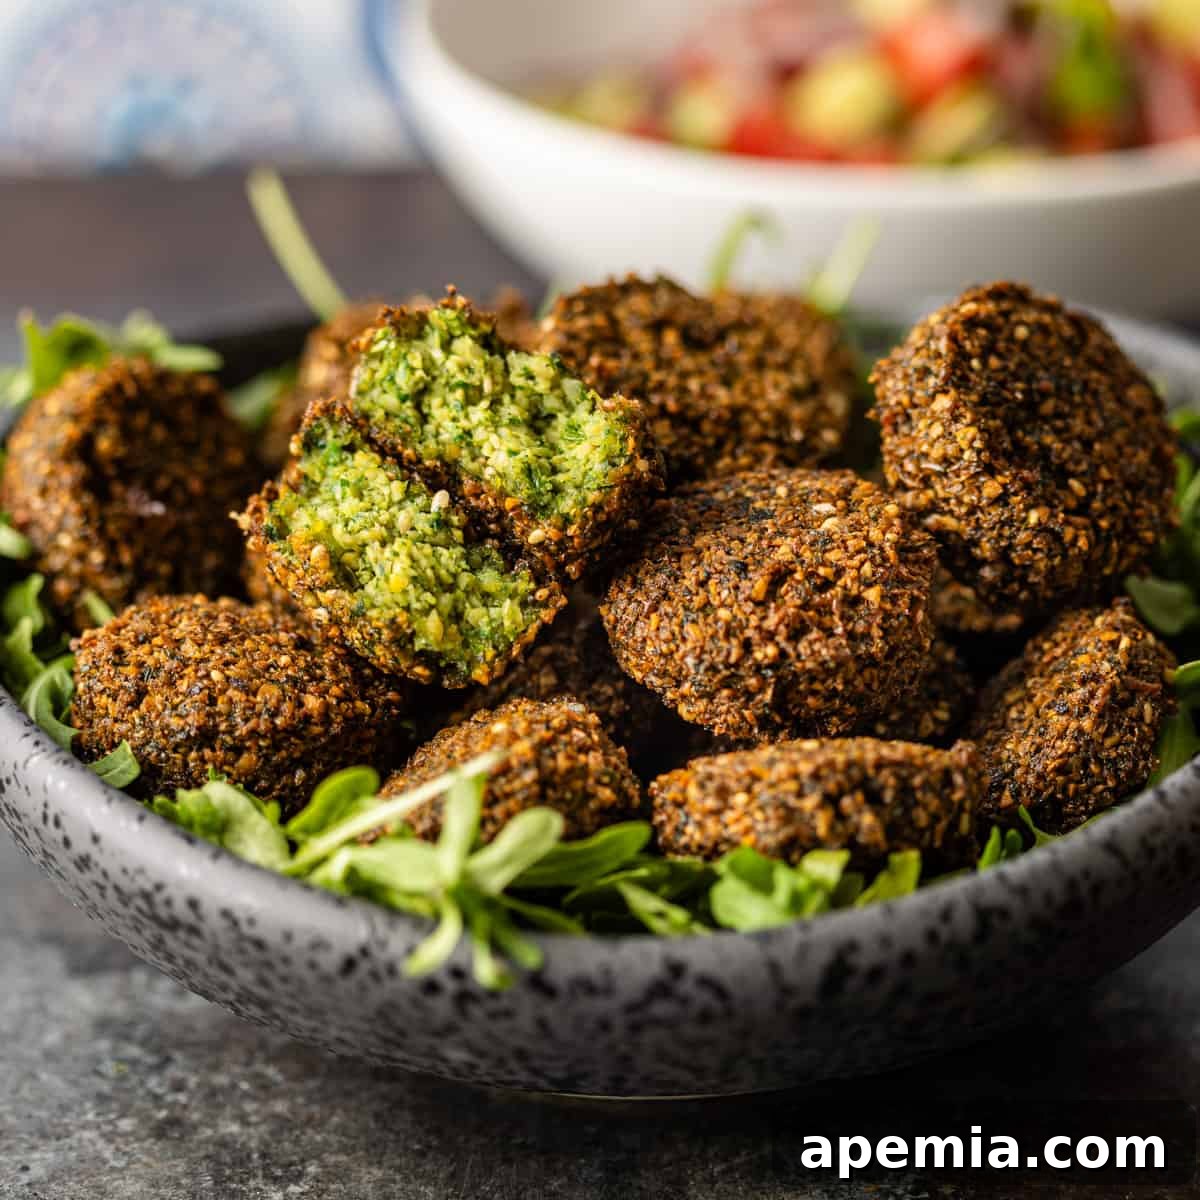
There’s something truly magical about Egypt – from its ancient wonders to its bustling street markets. Each visit leaves an indelible mark, especially the vibrant culinary scene. As soon as I return home, a familiar craving always sets in: the desire for an authentic Egyptian breakfast, featuring hearty Foul Mudammas and, of course, these delectable falafel. It’s more than just food; it’s a sensory journey back to the heart of Cairo.
This particular falafel recipe comes directly from Chef Ahmed Reda, a brilliant chef I had the pleasure of meeting during my most recent adventure in Egypt. Chef Ahmed shared a crucial insight that differentiates Egyptian falafel: it traditionally utilizes a blend of both fava beans and chickpeas. This is a key distinction, as many Middle Eastern falafel recipes predominantly rely on chickpeas alone. The Egyptian version also boasts a more generous infusion of fresh herbs, and for me, a delightful new addition to the flavor profile is the subtle, peppery kick of fresh arugula. These unique elements elevate this Ta’ameya to an extraordinary level!
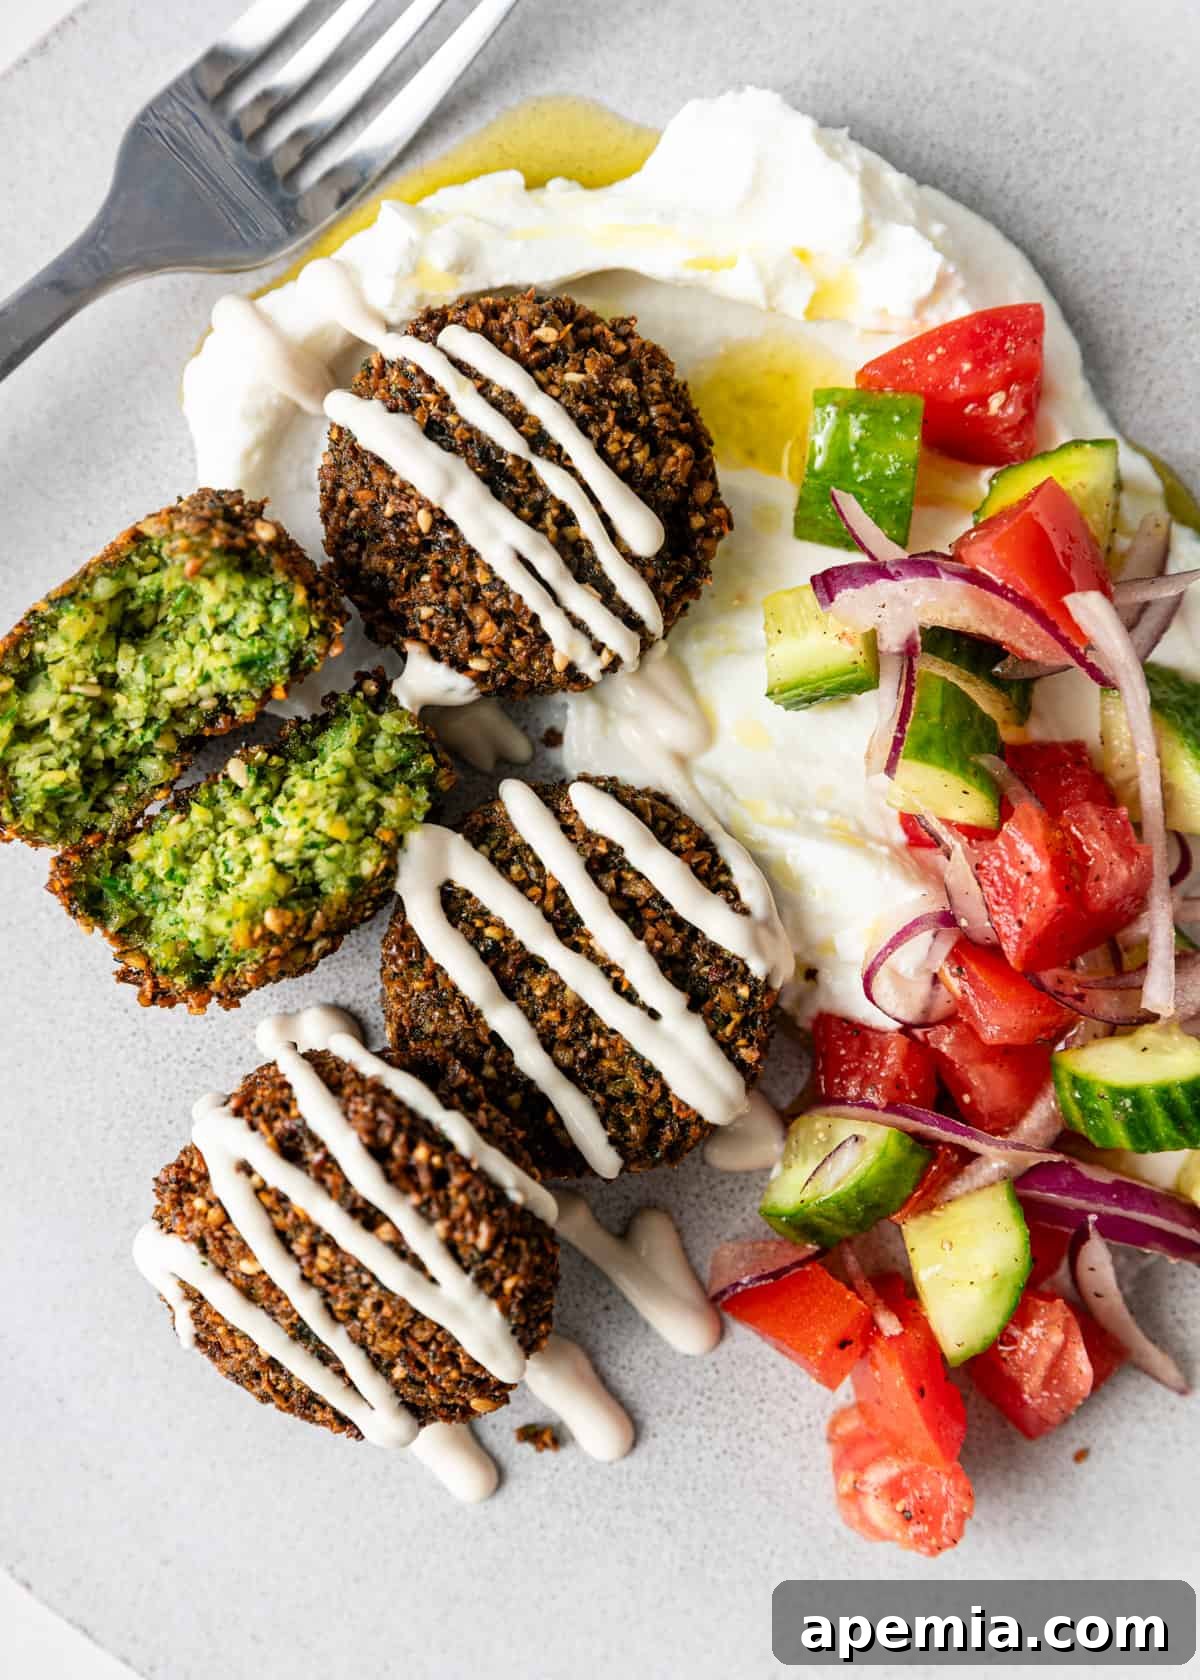
Don’t let the thought of making falafel from scratch intimidate you. This Egyptian falafel recipe is remarkably beginner-friendly and incredibly rewarding. The most crucial (and perhaps easily overlooked) step is remembering to soak the dried beans ahead of time. While this simple step requires patience and planning, it’s not complex. Think of it as a necessary pause on your journey to culinary excellence – the inactive time for soaking is well worth the incredible texture and flavor you’ll achieve. This recipe proves that authentic, homemade Ta’ameya is entirely within your reach, regardless of your cooking experience.
Table of Contents
- The Secret to Perfection: Uncooked Beans!
- Recommended Kitchen Tools
- Ingredient Deep Dive and Substitutions
- Mastering Egyptian Falafel: Step-by-Step
- Frying for Crispiness
- Baking for a Lighter Option
- Storing and Reheating Falafel
- Frequently Asked Questions About Ta’ameya
- Egyptian Falafel (Ta’ameya) Recipe Card
While I adore serving this Egyptian falafel with classic accompaniments like creamy hummus, a drizzle of rich tahini sauce, and warm, fluffy pita bread, your options are far from limited. Ta’ameya is incredibly versatile and pairs beautifully with a wide array of flavors and textures. I’ll be breaking down all the delicious possibilities, from vibrant salads to zesty sauces, ensuring every bite is a delightful culinary experience!
Kevin’s Expert Tip
The Secret to Perfection: Uncooked Beans!
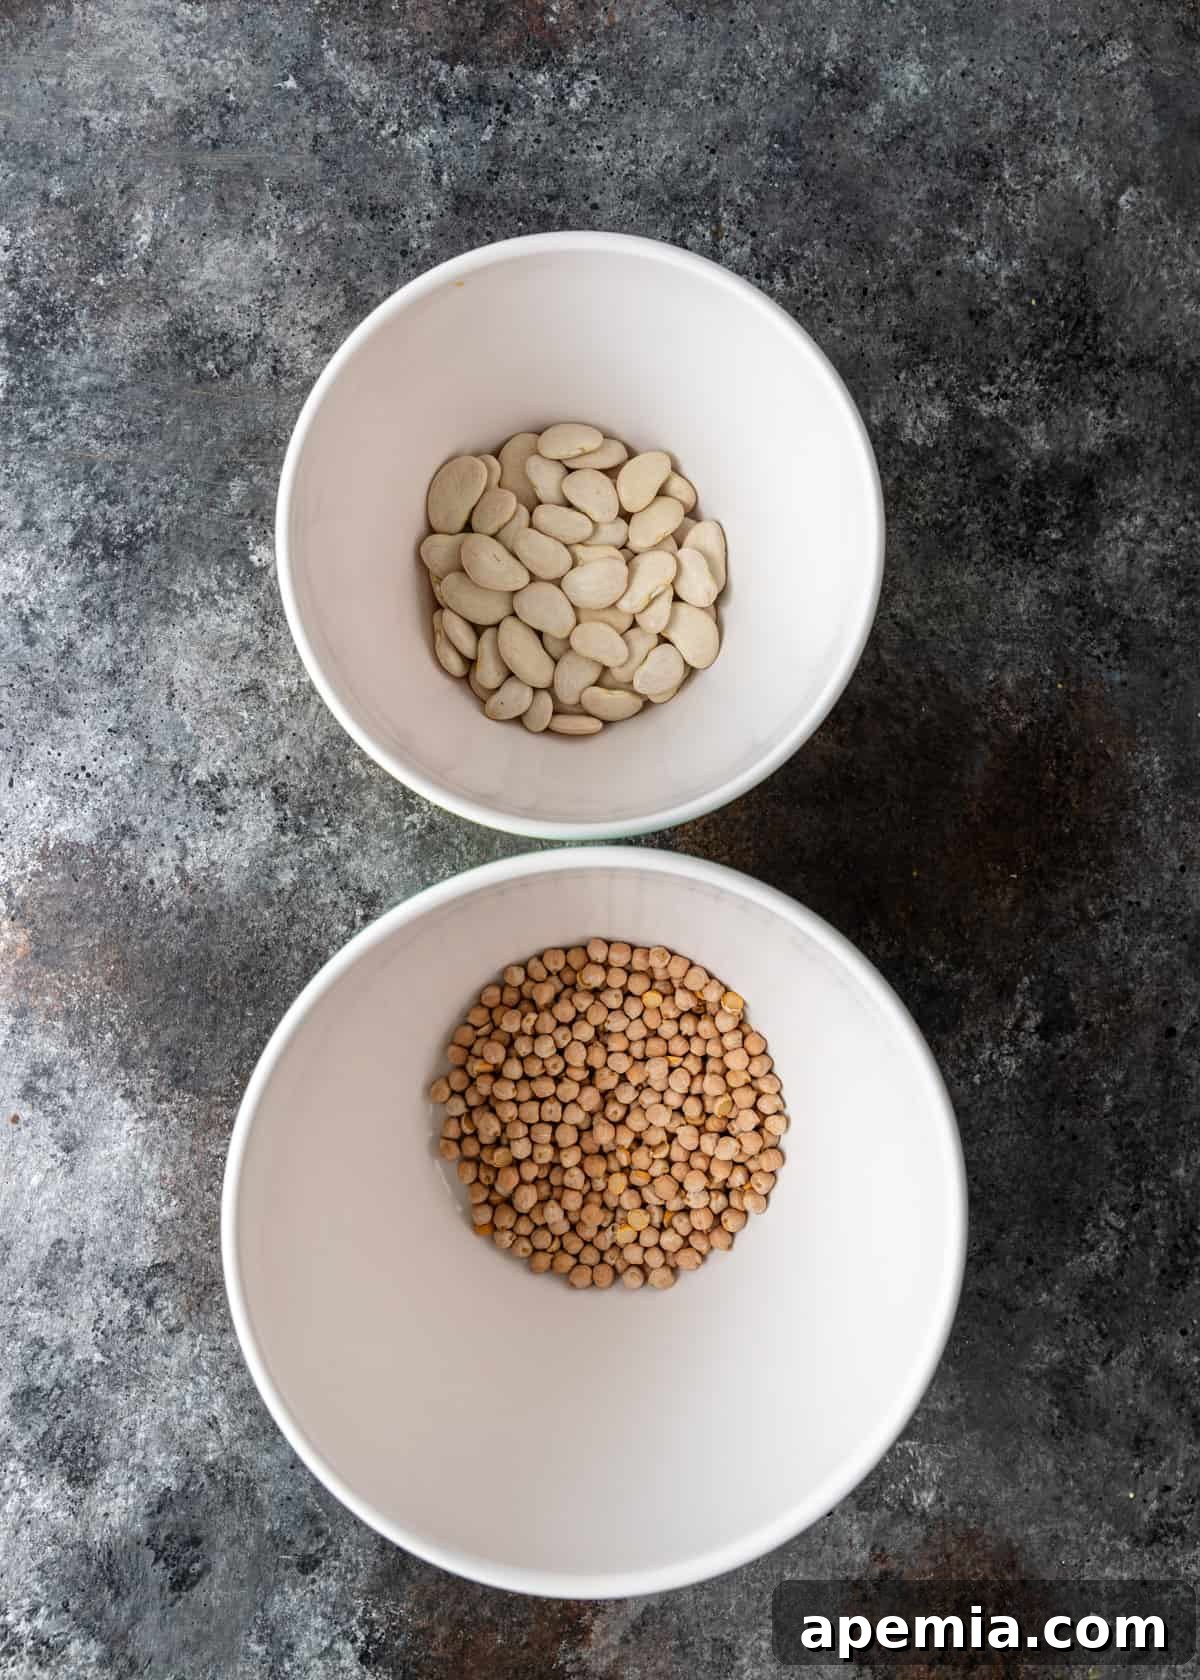
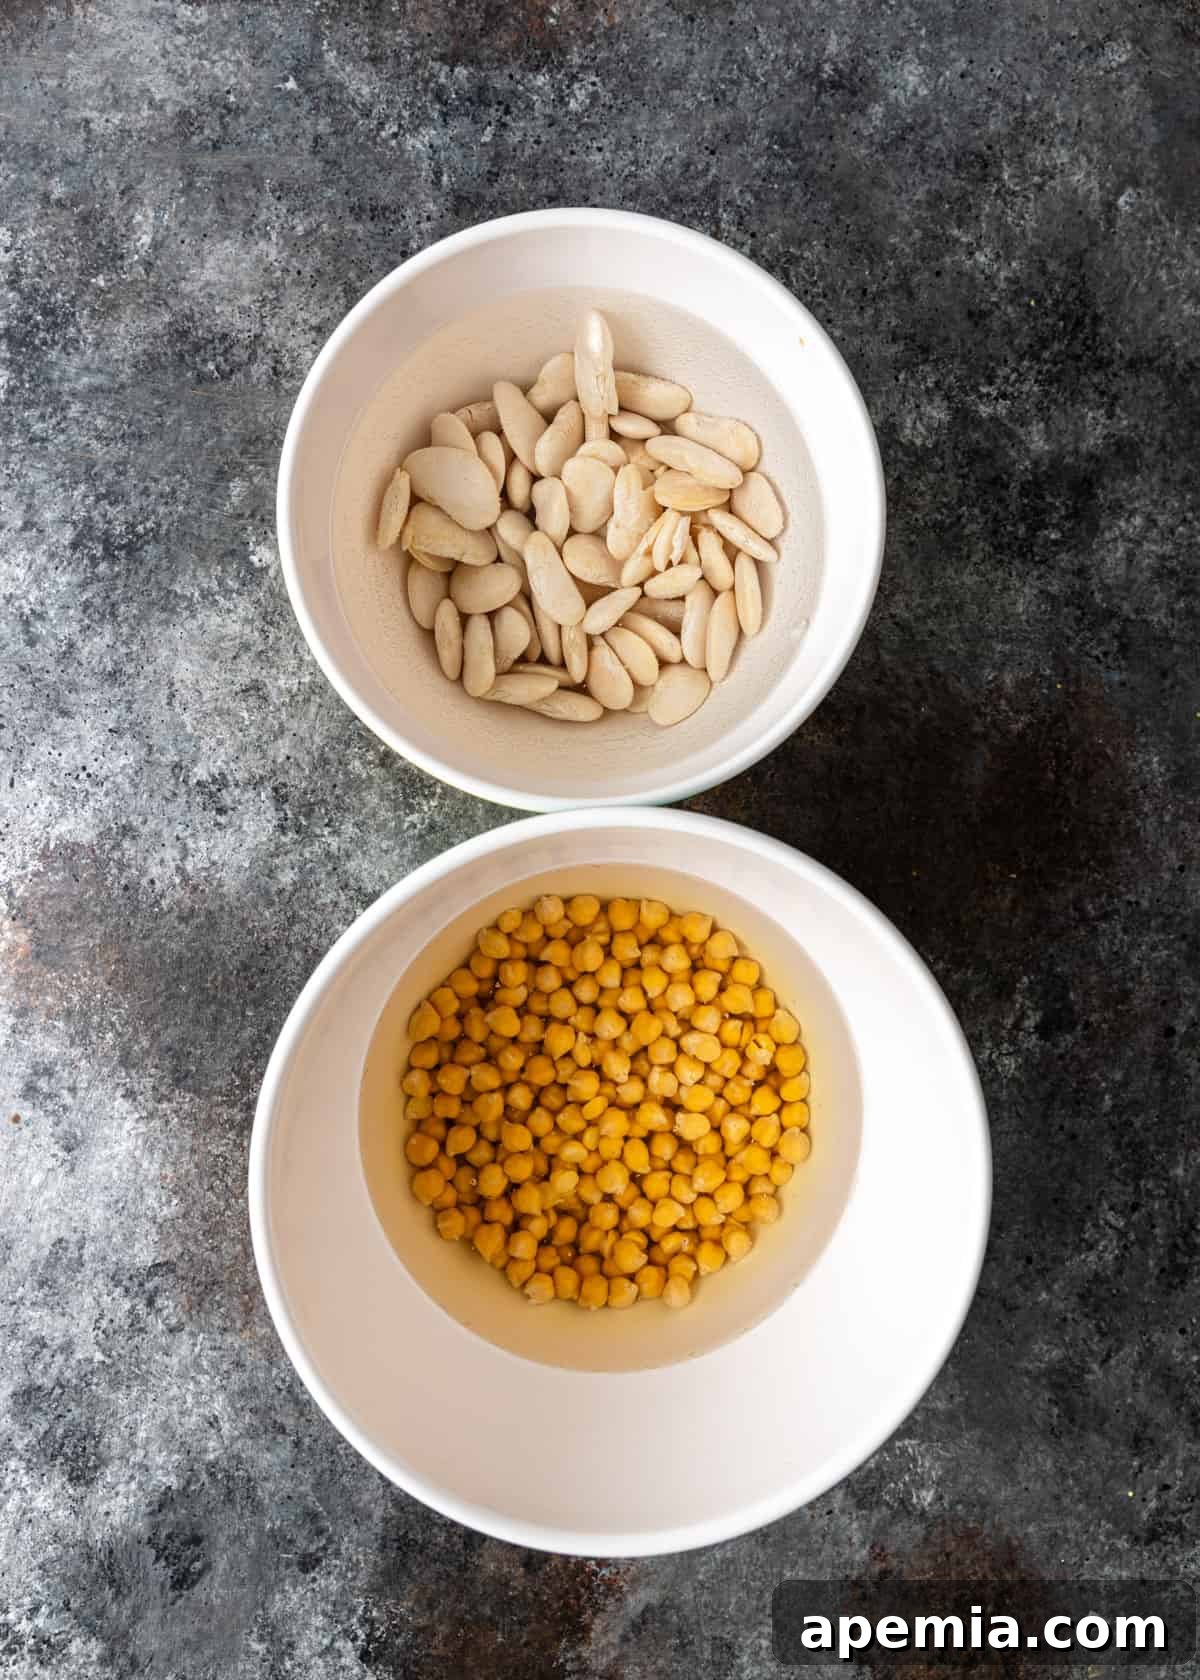
For truly authentic and perfectly textured falafel, you absolutely must use dried and soaked chickpeas and fava beans, rather than their canned, pre-cooked counterparts. This isn’t just a recommendation; it’s the golden rule for achieving that coveted light and crispy exterior with a fluffy, tender interior. The uncooked beans possess a specific starch structure and lower moisture content that is critical for binding the mixture without making it dense or mushy. When processed raw, they create a coarse, yet cohesive batter that fries beautifully.
Seriously, avoid canned chickpeas! Canned chickpeas are already cooked and full of excess moisture. Attempting to fry them will almost certainly lead to a crumbly mess as they struggle to hold their shape. Even if they miraculously stay together, the resulting falafel will have an unpleasantly mushy interior, lacking the traditional crispness and depth of flavor. By adhering to the traditional method of soaking dried beans, you’re not just following a recipe; you’re embracing a culinary technique that ensures an irresistible falafel, capturing the very essence of this beloved Egyptian delicacy. Trust me, nobody wants a mushy falafel! Embrace the soak for unparalleled results.
Recommended Kitchen Tools
Having the right tools can make all the difference in ensuring a smooth and successful falafel-making experience. While some items are essential, others simply make the process more efficient and enjoyable:
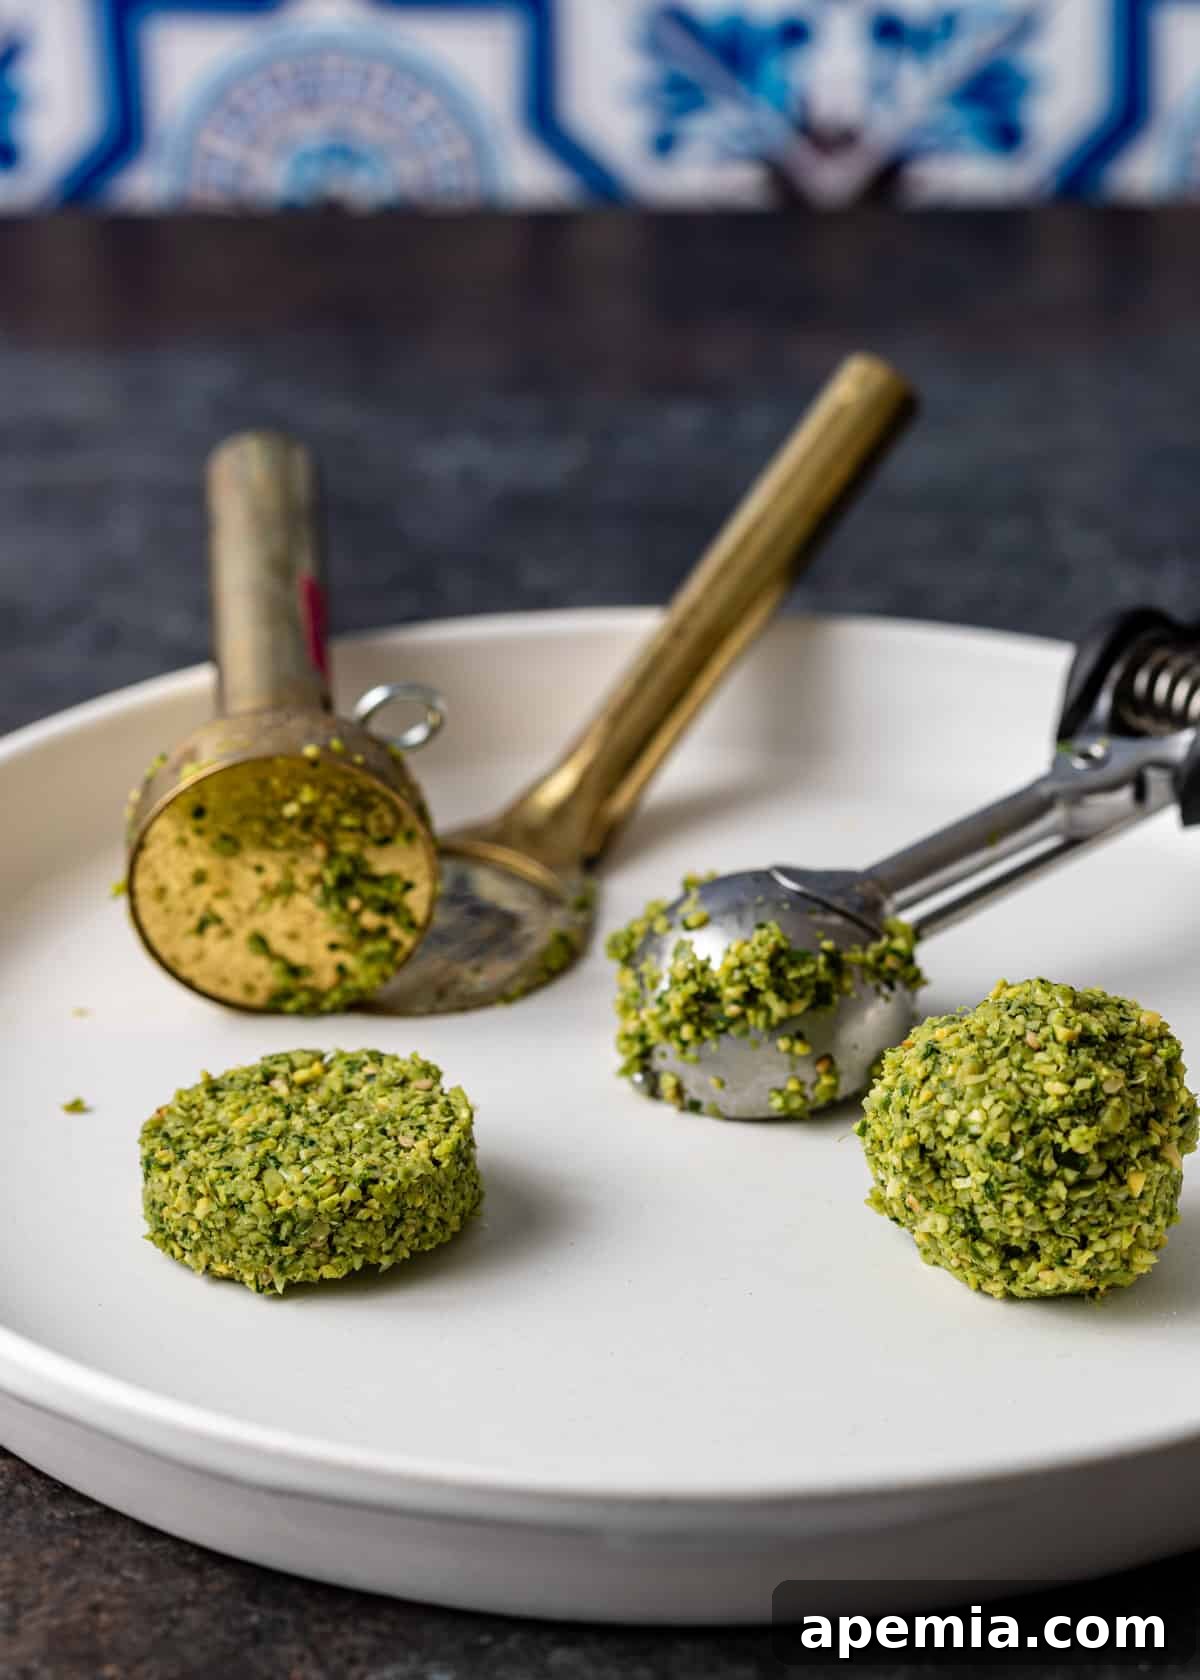
- Falafel Scoop: This specialized tool is highly recommended for creating uniformly shaped falafel patties, which ensures even cooking. The unique design also often creates a slight indentation or hole, perfect for achieving that iconic light and airy texture. While not strictly necessary, it truly simplifies the shaping process.
- Food Processor: An absolute must-have for this recipe. A powerful food processor efficiently chops and blends the beans, herbs, and spices into the ideal coarse-yet-smooth mixture for Ta’ameya. It’s the key to breaking down the raw ingredients to the correct consistency without turning them into a paste.
- Large Bowl: Essential for soaking your dried beans overnight. Ensure it’s big enough to accommodate the beans as they double in size.
- Deep Pot or Skillet: If you opt for frying, a heavy-bottomed pot or a large, deep-sided skillet (like cast iron) is crucial for maintaining consistent oil temperature and safely deep-frying your falafel.
- Baking Sheet: For those choosing the baked method, a sturdy baking sheet is needed to arrange your falafel patties.
- Slotted Spoon or Spider Skimmer: Perfect for safely removing fried falafel from hot oil.
- Meat Thermometer: Highly recommended for accurately monitoring and maintaining the oil temperature during frying, which is vital for perfectly cooked falafel.
- Paper Towels or Wire Rack: For draining excess oil from fried falafel, ensuring they remain crispy.
Ingredient Deep Dive and Substitutions
Each ingredient in this Egyptian falafel recipe plays a vital role in creating its unique flavor and texture. Understanding their contributions and potential substitutions can help you customize the dish to your preference.
- Dried Chickpeas & Fava (or Lima) Beans: This combination is the hallmark of authentic Egyptian Ta’ameya. The fava beans contribute to the lighter, airier texture, while chickpeas add a creamy depth. You can use all fava beans (also known as broad beans or sometimes lima beans) if preferred, but the blend is highly recommended for the best balance. Remember, dried and soaked is the only way to go for that perfect crunch!
- Red Onion: Adds a pungent, slightly sweet base flavor that mellows beautifully during cooking. Good substitutes include green onion (scallions) for a milder taste, leeks for a slightly sweeter, oniony note, or yellow onion if red is unavailable.
- Garlic: Essential for a robust, aromatic foundation. Fresh garlic is always best. Four cloves can typically be substituted with one tablespoon of minced garlic from a jar if fresh isn’t an option, though fresh offers a superior flavor.
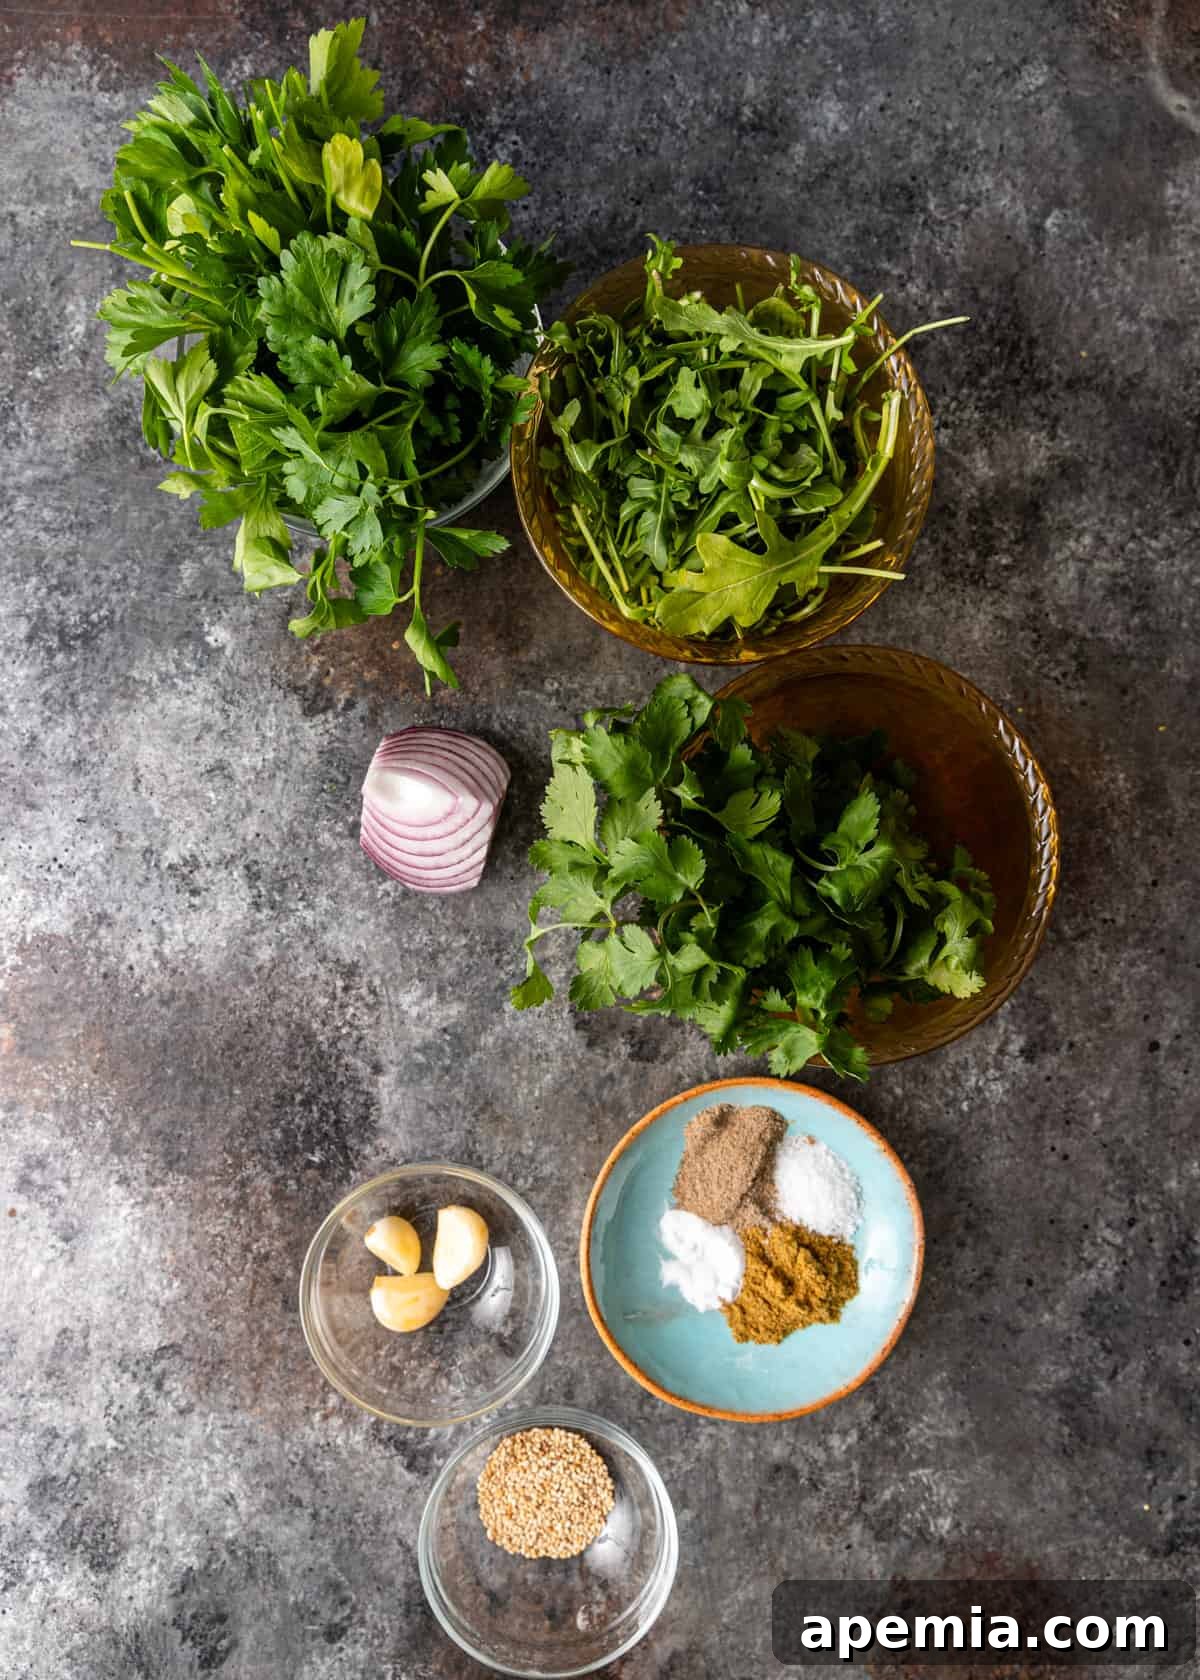
- Herbs & Greens: The vibrant green hue and incredible freshness of Ta’ameya come from a generous blend of flat-leaf parsley, cilantro, and the distinctive, peppery notes of arugula. Arugula is a standout ingredient here, lending a subtle bitterness that balances the richness of the beans and spices. Some Egyptian falafel recipes also incorporate fresh dill for an added layer of herbal complexity; feel free to add a small amount if you enjoy its flavor.
- Ground Cardamom & Cumin: These spices are the soul of the falafel’s aromatic profile. Cardamom offers a warm, floral, slightly sweet and spicy note that is characteristic of Egyptian cuisine, while cumin provides an earthy, robust depth. If ground cardamom is difficult to find, ground coriander can be a suitable substitute, offering a similar citrusy, warm essence.
- Kosher Salt: Enhances all the flavors. Adjust to your taste.
- Toasted Sesame Seeds: An optional but highly recommended addition. Rolling the falafel in sesame seeds before frying or baking adds a wonderful nutty flavor and a delightful textural crunch to the exterior.
- Baking Soda: This is a crucial ingredient for achieving the desired light and airy texture. It acts as a leavening agent, creating tiny air pockets within the falafel mixture, preventing it from becoming too dense.
- Vegetable Oil for Frying/Baking: A neutral-flavored oil with a high smoke point is ideal for frying (like canola, sunflower, or peanut oil) or for coating the baking sheet.
- For Serving – Elevate Your Falafel Experience: Beyond just fresh, warm pita and creamy hummus, here’s how to create a truly memorable falafel meal:
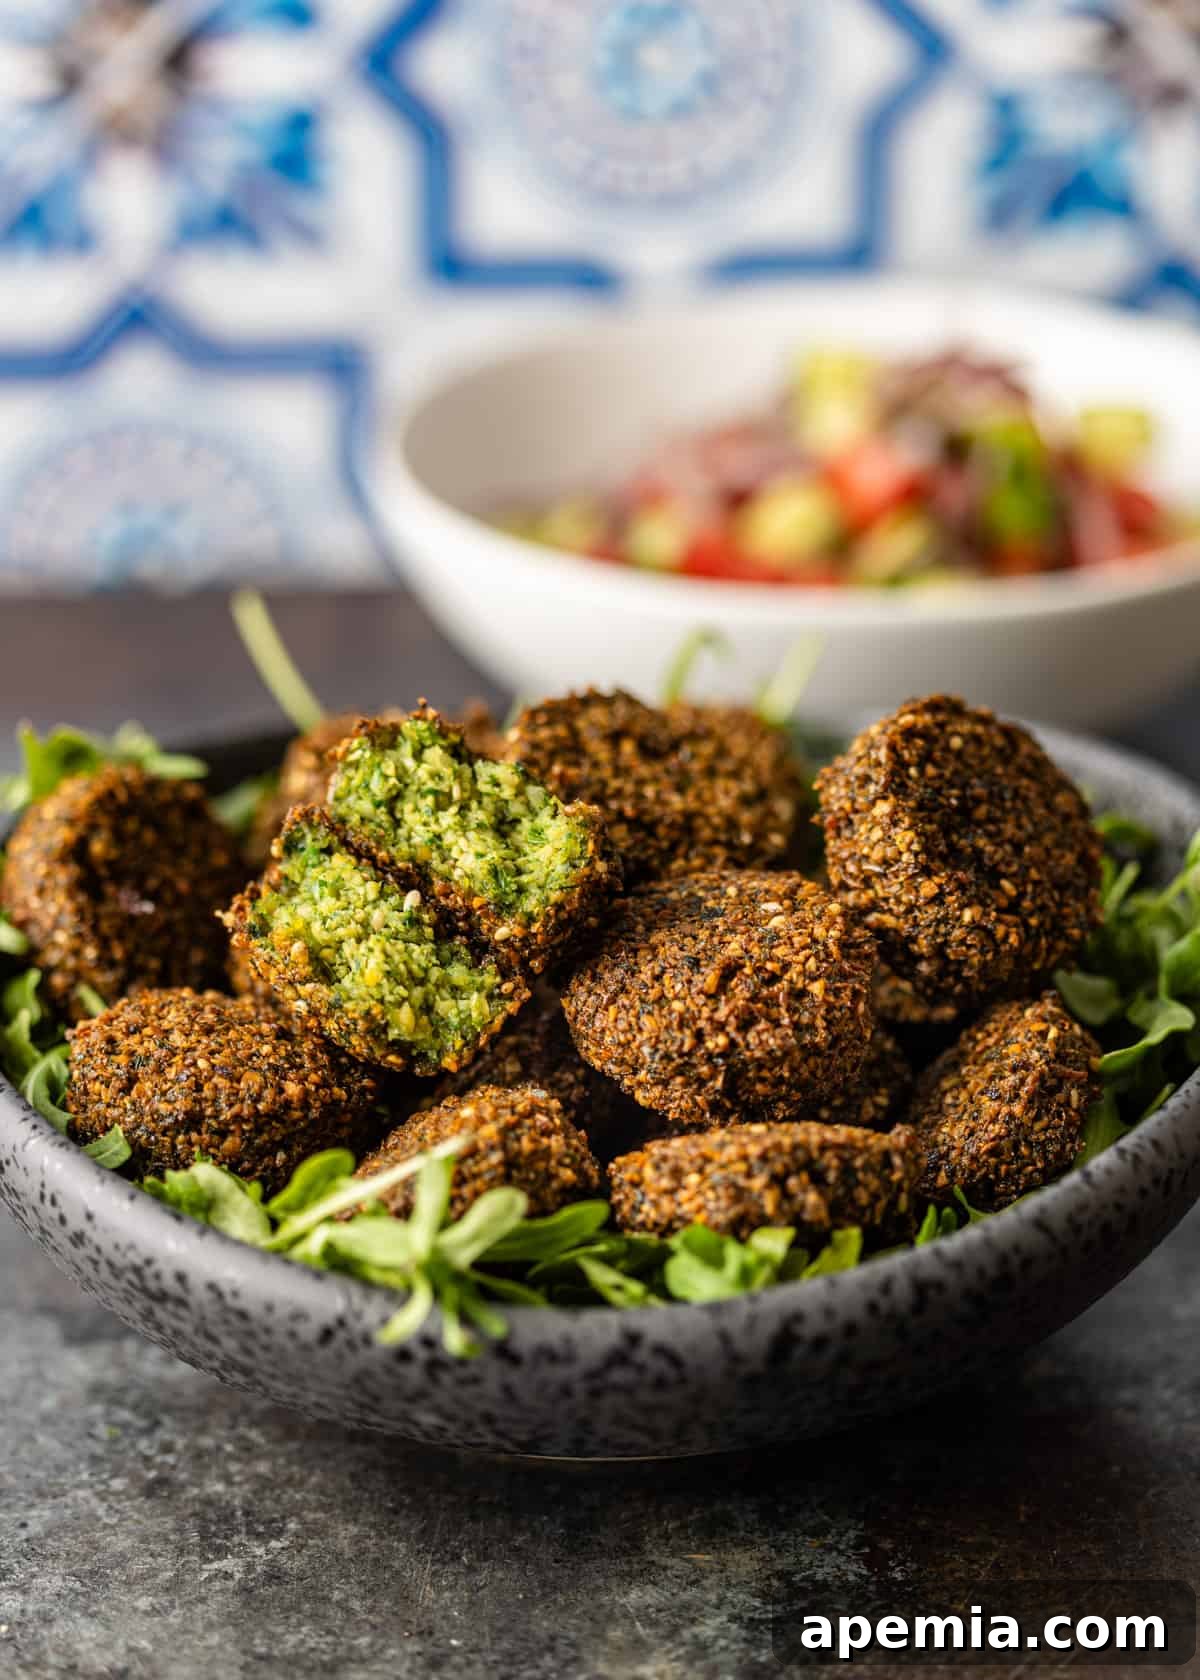
- Fresh or Pickled Vegetables: Offer a refreshing counterpoint to the rich falafel. Consider a crisp tabbouleh salad, a bright and zesty shirazi salad, thinly sliced pickled red onion for a tangy crunch, and plenty of finely shredded lettuce. Sliced tomatoes and cucumbers are also classic additions.
- Sauces and Condiments: The right sauce can transform your falafel experience. The most popular and essential option is undeniably a smooth tahini sauce. But don’t stop there! Explore other vibrant and zesty options like spicy zhoug, fiery shatta (red or green chili sauce), or the intensely garlicky toum (Lebanese garlic sauce). A simple plain yogurt sauce or a refreshing mint-yogurt dip can also be wonderful.
Mastering Egyptian Falafel: Step-by-Step
Creating authentic Egyptian falafel, or Ta’ameya, is a straightforward process once you understand the key steps. Follow these instructions carefully for the best results:
- Soak the Beans (The Foundation): This is arguably the most critical step. In a large bowl, combine your dried chickpeas and fava (or lima) beans. Cover them generously with at least four cups of cold water. Allow them to soak overnight for a minimum of 8-12 hours, or until they have visibly doubled in size and are plump and tender when gently squeezed. This rehydration is vital for achieving the correct texture in the final falafel. Before proceeding, rinse the soaked beans thoroughly under cold running water and drain them completely. Excess moisture can make the falafel soggy.
- Prepare the Aromatics: Peel and quarter your red onion. For this recipe, you’ll only need one quarter of the onion for the Ta’ameya mixture; reserve the remaining three quarters for another culinary use. This portion provides just the right amount of onion flavor without overpowering the herbs and beans.
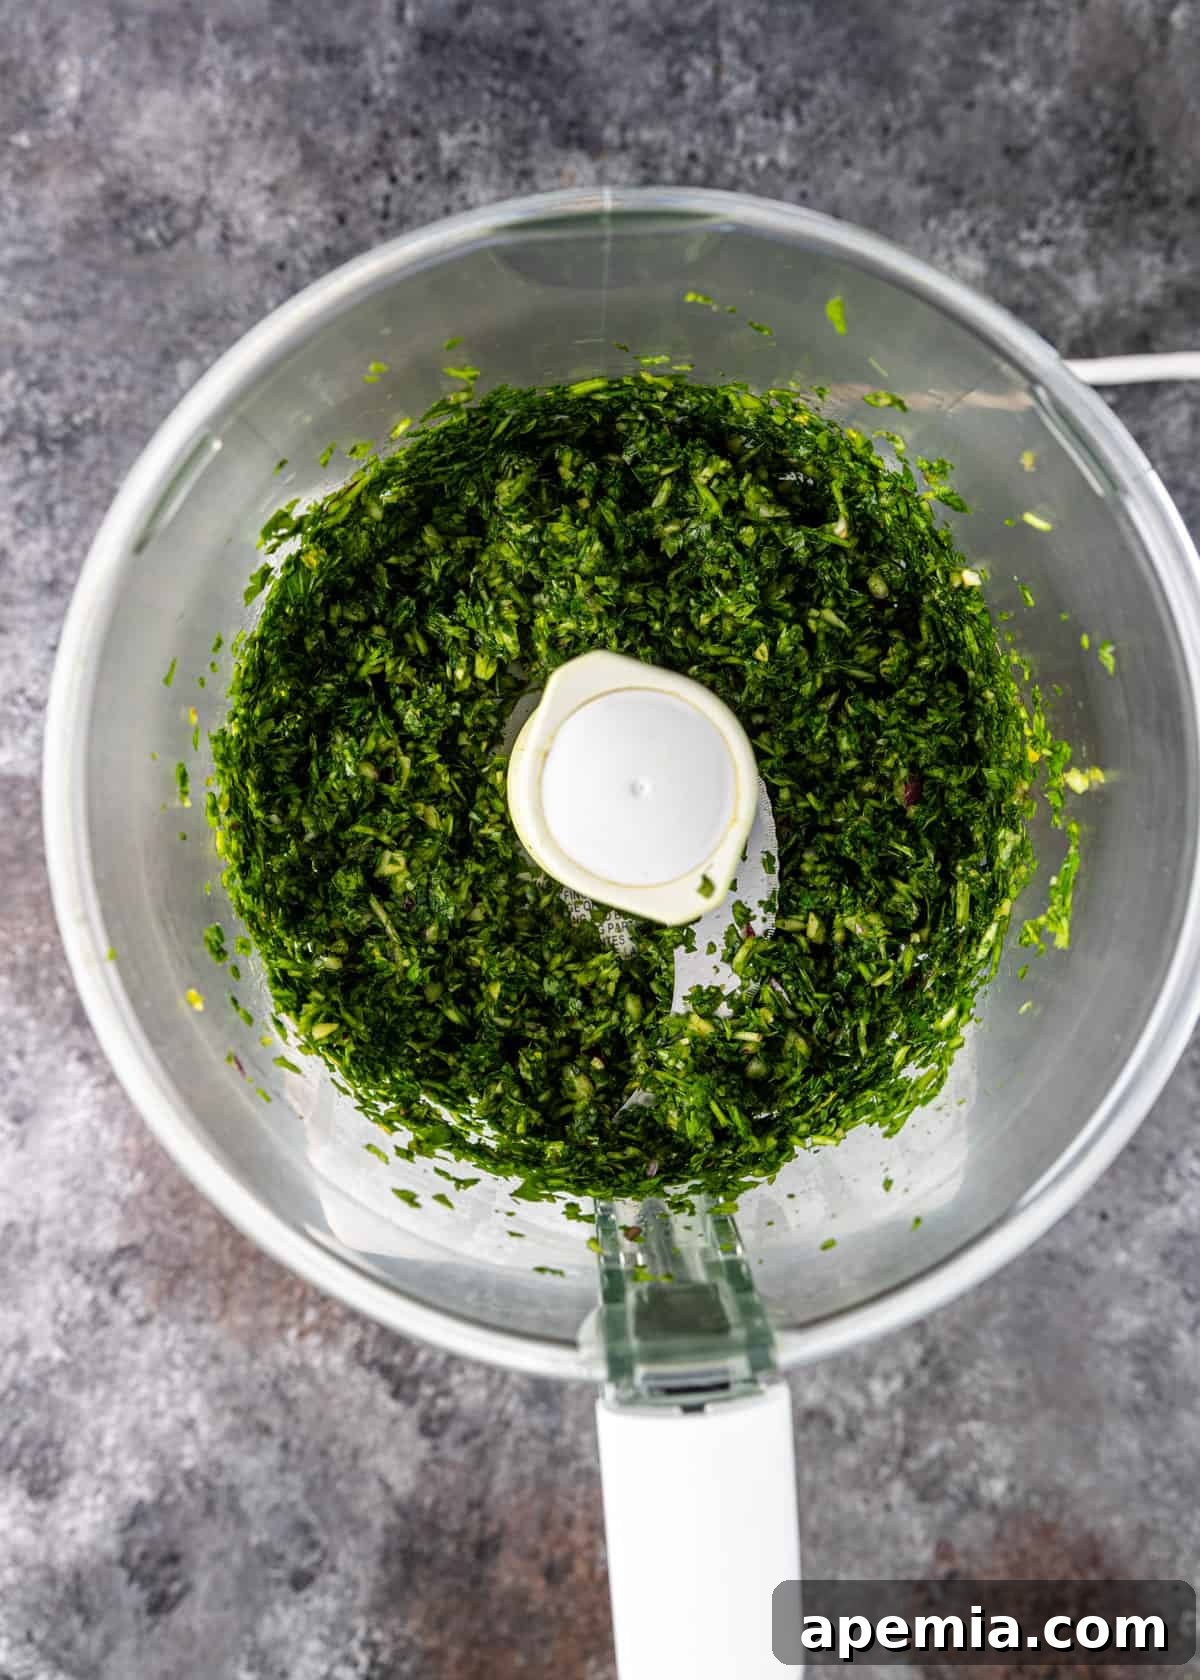
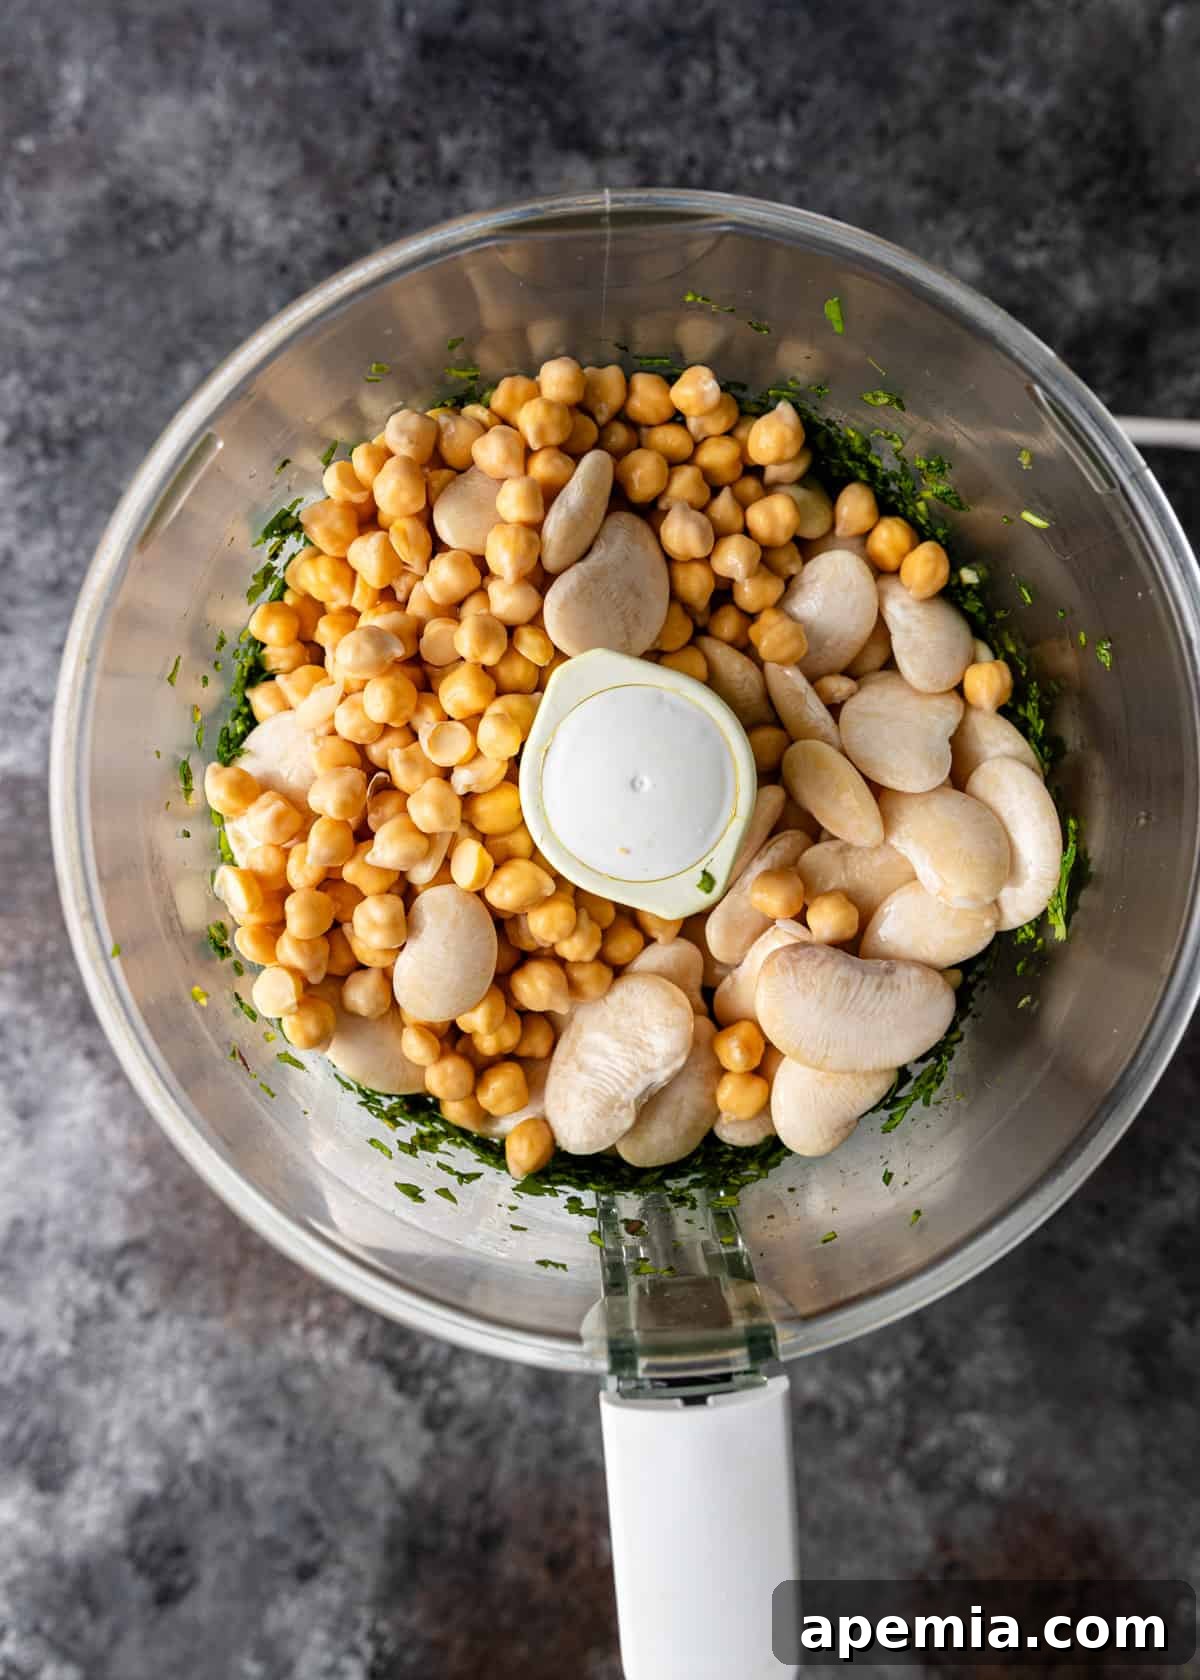
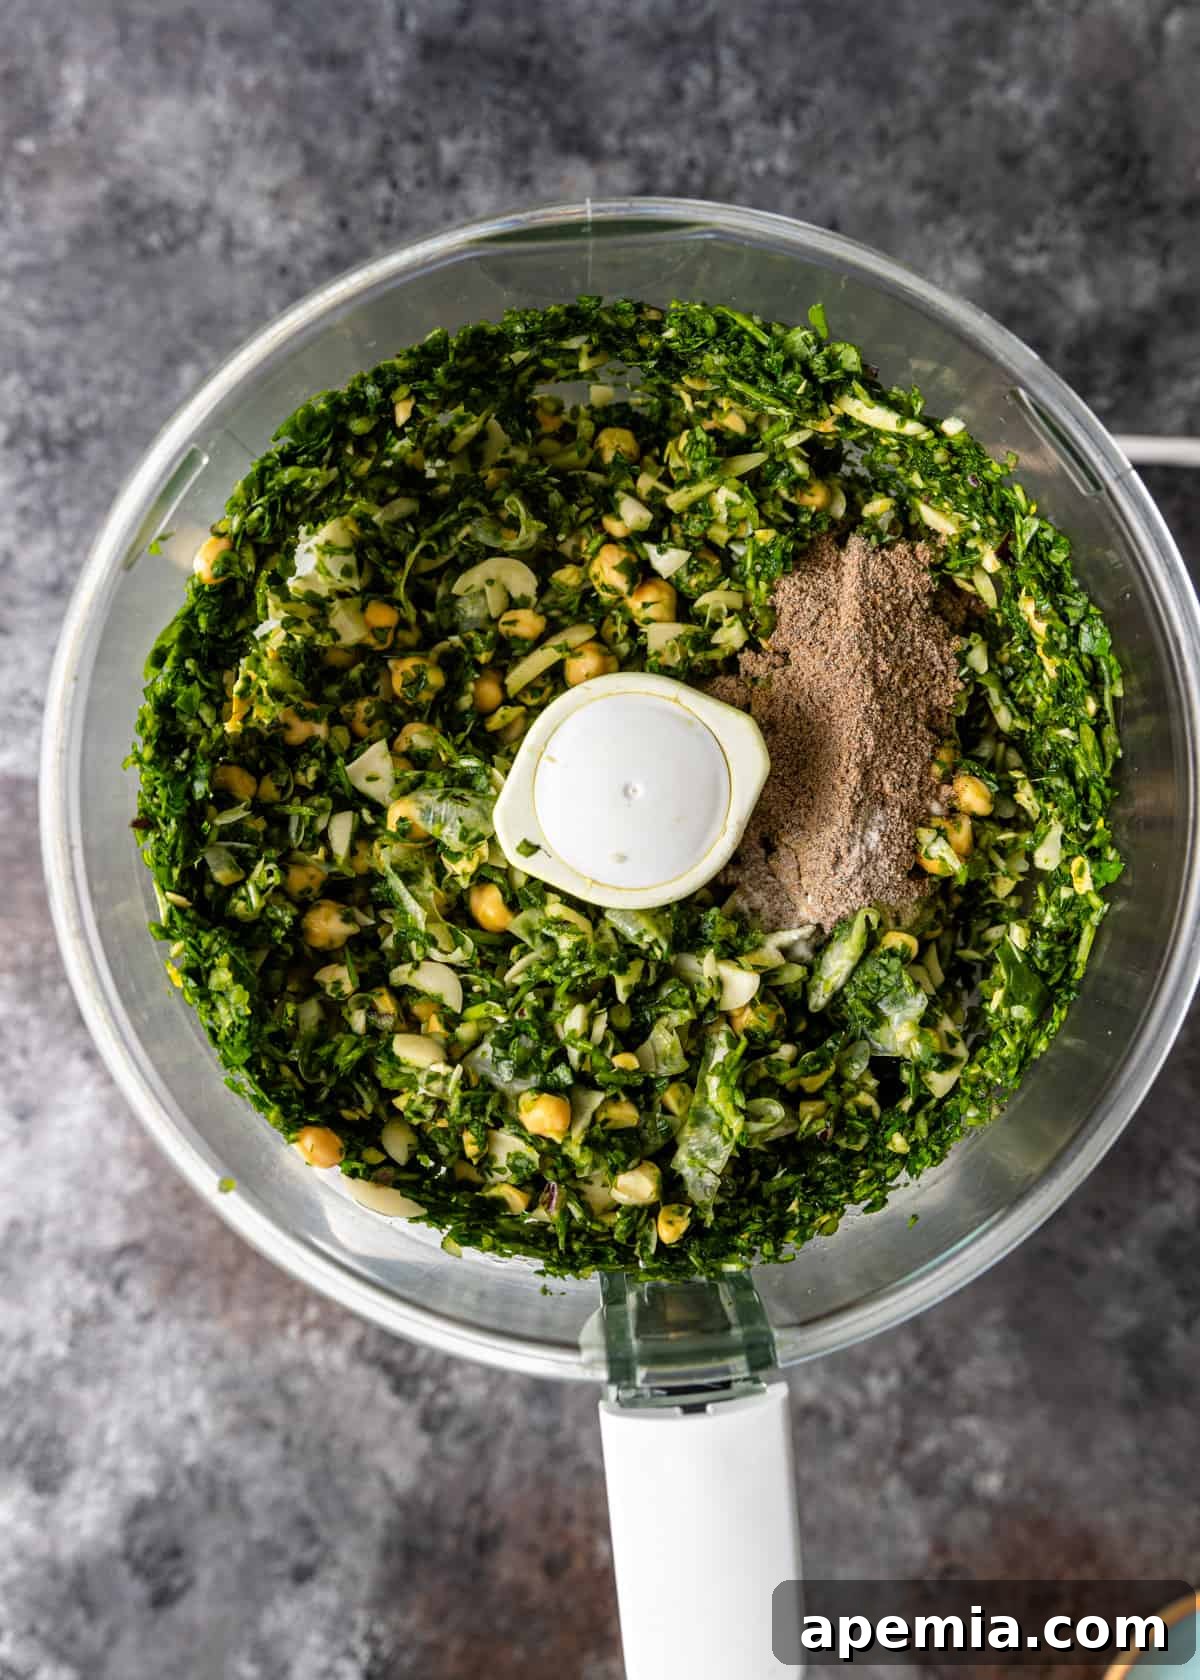
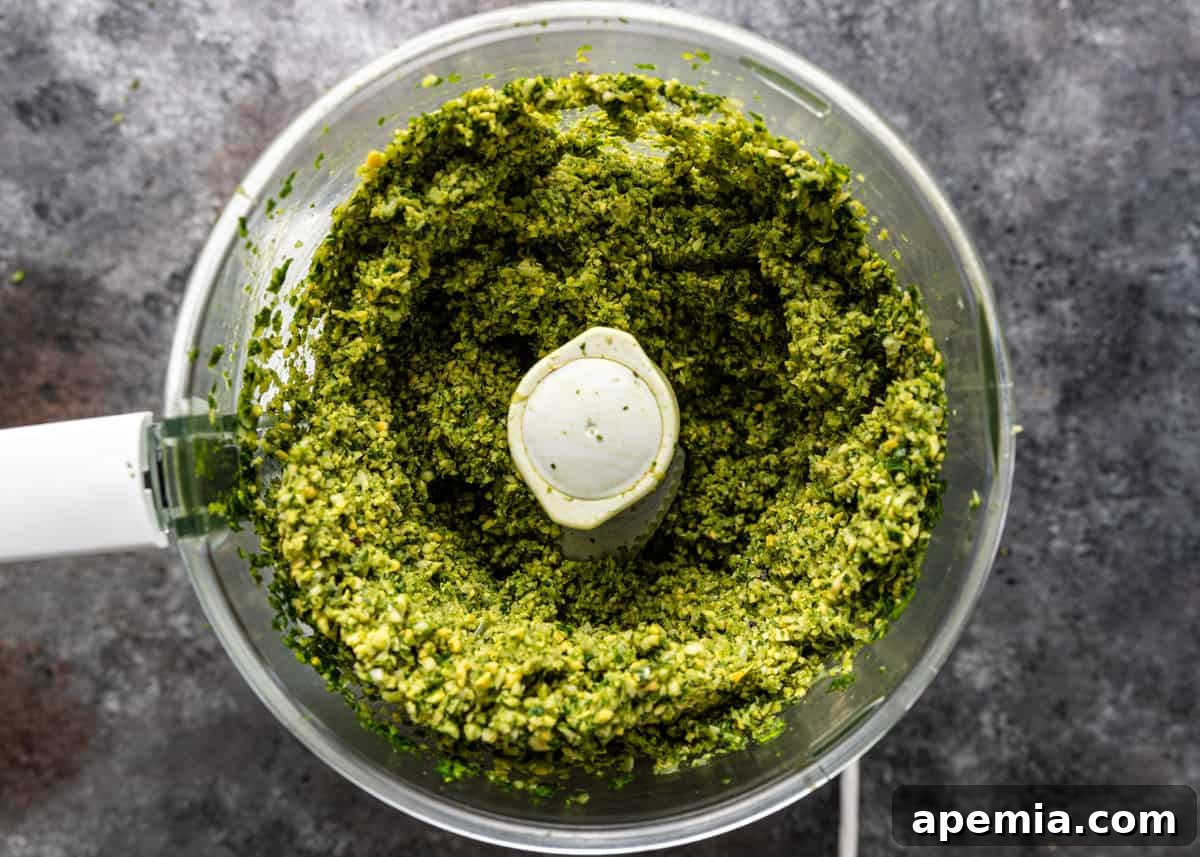
- Blend the Batter (Texture is Key): Add the prepped quarter of red onion, garlic cloves, fresh parsley, cilantro, and arugula to your food processor. Pulse for about 15 seconds until the herbs and onion are finely chopped. Next, add the drained, soaked beans to the food processor and pulse several times. Finally, incorporate the ground cardamom, cumin, and kosher salt. Continue to pulse the mixture in short bursts until it is finely chopped but crucially, not grainy or mushy. The ideal consistency is coarse enough to provide texture, but cohesive enough that it just begins to hold together when squeezed. Over-processing will result in dense falafel.
- Refrigerate Mixture (Flavor Development & Firmness): Transfer the falafel mixture to a bowl, cover it tightly, and refrigerate for at least one hour. This chilling period allows the flavors to meld beautifully and helps the mixture firm up, making it easier to shape and less prone to falling apart during cooking. After chilling, gently fold in the toasted sesame seeds (if using) and the baking soda, ensuring they are evenly distributed. The baking soda is activated by heat, contributing to the falafel’s airy texture.
- Form the Falafel (Shape for Success): Lightly wet your hands to prevent sticking. Scoop approximately one tablespoon of the mixture into your palm and gently roll it into a walnut-sized ball. Alternatively, for traditional disc-shaped Ta’ameya, flatten the ball slightly or use a specialized falafel scoop or a small ice cream scoop for uniform patties. Place the formed falafel on a tray. Repeat this process until all of the mixture has been used.
Once your falafel patties are formed, you can proceed with either the frying or baking methods detailed below, depending on your preference.
Frying for Crispiness
Frying delivers the ultimate crispy exterior that many associate with authentic street-style falafel. Here’s how to achieve perfectly golden and delicious results:
- Heat the Oil: Pour about 2-3 inches of neutral-flavored vegetable oil (such as canola, sunflower, or peanut oil) into a large, deep-sided skillet or heavy-bottomed medium saucepan. Heat the oil over medium-high heat until it reaches a consistent temperature of 350°F (175°C). Use a kitchen thermometer to monitor the temperature accurately; maintaining this temperature is crucial for preventing soggy or burnt falafel.
- Fry in Batches: Carefully place the formed falafel patties into the hot oil using a slotted spoon or tongs. Fry them in small batches, ensuring you do not overcrowd the skillet. Overcrowding will drastically lower the oil’s temperature, leading to greasy and undercooked falafel.
- Cook to Golden Perfection: Fry each batch for approximately 4 minutes, or until the falafel are beautifully golden brown and thoroughly cooked through. They should feel firm to the touch. It’s essential that they have enough time in the oil for the interior to cook and dry out, preventing a mushy center. If the exterior browns too quickly, reduce the heat slightly to ensure the oil maintains a steady 350°F (175°C) and allows for even cooking.
- Drain and Serve: Once cooked, carefully remove the fried Egyptian falafel from the oil using a slotted spoon or spider skimmer. Transfer them to a plate lined with paper towels or a wire rack set over paper towels to drain any excess oil. Serve immediately while they are still hot and wonderfully crispy.
Baking for a Lighter Option
If you’re looking for a healthier alternative that still delivers great flavor, baking your falafel is an excellent choice. While the texture won’t be as intensely crispy as fried falafel, they will still be savory and satisfying.
- Prepare the Baking Sheet: Drizzle about ¼ cup of vegetable oil evenly over a large baking sheet, ensuring the entire surface is coated. Preheat your oven to 350°F (175°C).
- Shape and Arrange: As you form your falafel mixture into walnut-sized balls or disc shapes (as described in step 5 of the “How to Make” section), place them directly onto the prepared baking sheet. For a more even bake and better browning, it’s often beneficial to flatten the balls slightly with your palm or intentionally shape them into disc-like patties. This increases their surface area in contact with the oil and heat.
- Bake to Golden: Bake the falafel in the preheated oven for 25 minutes. Halfway through the baking time (around 12-13 minutes), carefully flip each falafel to ensure even browning on both sides. Continue baking until they are golden brown and cooked through.
- Serve Warm: Once baked, remove the falafel from the oven and serve them warm with your desired condiments and accompaniments.
Air Fryer Alternative: For an even crispier baked falafel, consider using an air fryer! Lightly spray the formed falafel with cooking oil, then air fry at 375°F (190°C) for 12-15 minutes, flipping halfway, until golden and crisp.
Storing and Reheating Falafel
For the absolute best and crispiest texture, Egyptian falafel (Ta’ameya) is truly meant to be enjoyed fresh off the stove or out of the oven. These delightful patties tend to become softer and slightly mushy once they’ve been refrigerated, as the moisture from the air and other ingredients is absorbed. However, if you find yourself with irresistible leftovers, here’s how to store and reheat them:
Storage: Allow any leftover falafel to cool completely to room temperature before storing. Transfer them to an airtight container and refrigerate for up to 3 days. This helps maintain their quality and prevents them from drying out too much.
Reheating for Best Texture: To revive some of that coveted crispiness, avoid the microwave at all costs – it will only lead to further mushiness. Instead, opt for these methods:
- Oven: Preheat your oven to 350°F (175°C). Arrange the falafel in a single layer on a baking sheet. Heat for 8-10 minutes, or until they are warmed through and the exterior has crisped up slightly.
- Air Fryer: This is an excellent method for reheating! Place the falafel in a single layer in your air fryer basket. Air fry at 350°F (175°C) for 5-7 minutes, shaking the basket halfway, until hot and crispy.
- Skillet: For a quick reheat, you can also gently warm them in a dry skillet over medium heat for a few minutes per side, until heated through. This can help re-crisp the surface.
Freezing (for later enjoyment): You can freeze both uncooked falafel mixture and cooked patties.
- Uncooked Mixture: Place the raw falafel mixture in an airtight freezer-safe bag or container, pressing out as much air as possible. Freeze for up to 1-2 months. Thaw in the refrigerator overnight before shaping and cooking as directed. Add baking soda just before shaping.
- Cooked Patties: Allow cooked falafel to cool completely. Arrange them in a single layer on a baking sheet and freeze until solid. Once frozen, transfer them to a freezer-safe bag or container. Freeze for up to 2-3 months. Reheat directly from frozen in the oven or air fryer, adding a few extra minutes to the reheating time.
Frequently Asked Questions About Ta’ameya
It’s a common temptation, but canned chickpeas are already cooked and contain a higher moisture content than dried, soaked beans. This makes them too soft and wet, causing the falafel patties to break apart when fried. Even if they hold together, the interior will be unpleasantly mushy and dense, lacking the authentic light and crispy texture of traditional Ta’ameya. For perfect results, always opt for dried chickpeas and fava beans that have been soaked overnight. Preparing dried chickpeas is simpler than you might imagine!
Yes, there’s a significant difference! Traditional Lebanese and many other Levantine falafel recipes are made exclusively with chickpeas. In contrast, authentic Egyptian falafel, or Ta’ameya, distinguishes itself by using a primary base of fava beans, often with the addition of chickpeas, as in this recipe. This blend of fava beans gives Egyptian falafel its characteristic lighter, fluffier interior and often a greener hue due to the specific herbs used. My recipe offers a delicious hybrid, combining the best of both worlds with fava beans for that amazing light, crispy texture and chickpeas for a touch of added creaminess and richness.
If your Ta’ameya mixture isn’t holding its shape, it might need more processing. Continue pulsing in your food processor until the mixture just starts to cohere when pressed, but be careful not to overmix, which can lead to a pasty texture. Another common solution is to chill the batter for at least an hour (or even longer, up to 3-4 hours) before shaping; this helps firm up the mixture and improve its binding properties. When frying, avoid overcrowding the pot, as this can lower the oil temperature and cause the falafel to absorb too much oil and break apart.
Absolutely! This Egyptian falafel recipe is naturally vegan, as it contains no animal products whatsoever. All the ingredients – beans, herbs, spices, and oil – are plant-based. For a gluten-free option, you’re also in luck! Falafel itself is naturally gluten-free, as it’s made from legumes and herbs. Just ensure any accompaniments you serve it with, such as pita bread, are certified gluten-free if you have dietary restrictions.
Ta’ameya is incredibly versatile! The most classic way is stuffed into a warm pita pocket with fresh vegetables like shredded lettuce, tomatoes, cucumbers, pickled turnips, and drizzled with plenty of tahini sauce. It also makes a fantastic main dish when served as part of a meze platter, accompanied by hummus, baba ghanoush, various salads (like tabbouleh or Shirazi salad), and a selection of dips. Don’t forget a side of pickled vegetables to cut through the richness!
Share this recipe on Pinterest!
Love this recipe? Share it with the world on Pinterest to inspire others!
Authentic Egyptian Falafel (Ta’ameya)
PrintRecipe
Video
Ingredients
- 125 g dried chickpeas soaked overnight
- 125 g dried fava beans (soaked overnight)
- 1 medium red onion (only 1/4 needed for the recipe)
- 4 cloves garlic
- 20 g flat leaf parsley
- 15 g cilantro
- 5 g arugula
- 1 tsp ground cardamom
- 1 tsp ground cumin
- 1 tsp kosher salt
- 1 tbsp toasted sesame seeds (optional)
- 1/2 tsp baking soda
- 2 cups vegetable oil for frying
Optional Serving Condiments
- Pita bread sliced in halves
- Shredded iceberg lettuce
- Tahini Sauce
- Toum Sauce
- Red Shatta Sauce
- Zhoug Sauce
- Shirazi Salad
- Hummus
- Tabbouleh
- Pickled Red Onion
Instructions
-
Place chickpeas and fava beans in a large bowl and cover with 4 cups of cold water. Cover the bowl and let the beans soak overnight (for at least 8 hours). They will visibly double in size. (See Note 1)
-
Rinse the soaked beans thoroughly under cold water and drain them well. Set aside. Peel the red onion and cut it into quarters. You only need one quarter of the red onion for this recipe; save the remaining three quarters for another use.
-
In a food processor, add the quarter piece of red onion, garlic, parsley, cilantro, and arugula. Process for approximately 15 seconds until finely chopped. Add the drained beans and pulse several times. Now, add the ground cardamom, cumin, and salt, and pulse for about a minute until the mixture is finely chopped. The texture should be coarse but cohesive enough to just start holding together, not grainy or mushy. Transfer the mixture from the food processor to a bowl, cover, and refrigerate for 1 hour.
-
After the mixture has chilled, add the sesame seeds (if using) and baking soda to the falafel mixture. Mix thoroughly to ensure the baking soda is evenly distributed.
FRYING METHOD (FOR MAXIMUM CRISPNESS)
-
Heat about 2 cups of vegetable oil (enough to deep-fry) in a large, deep-sided skillet (cast iron works beautifully) or a heavy-bottomed medium saucepan to 350°F (175°C). Use a kitchen thermometer to ensure accuracy.
-
Lightly wet your hands. Scoop about a tablespoon of the falafel mixture into your palm and gently form it into a ball about the size of a walnut. For uniform shapes, you can use a small ice cream scoop, a regular spoon, or a specialized falafel scooper (which often creates traditional flat, rounded patties).
-
Carefully place the formed falafel into the hot oil. Deep fry them in batches, making sure not to overcrowd the pot, as this will lower the oil temperature. Fry each batch for approximately 4 minutes until they are beautifully browned and cooked through. It’s crucial they have enough time in the oil to truly dry out on the inside. If they brown too quickly, slightly lower the heat to maintain a consistent 350°F (175°C). (See Note 2)
-
Remove the fried falafel with a slotted spoon and drain them on paper towels before serving. Serve immediately with tahini sauce and any or all of the optional condiments listed in the ingredients section, perhaps tucked into a warm pita.
BAKED METHOD (FOR A LIGHTER ALTERNATIVE)
-
Add about 1/4 cup of vegetable oil to a baking sheet and spread it evenly to cover the surface. Preheat your oven to 350°F (175°C).
-
Lightly wet your hands. Scoop about a tablespoon of the falafel mixture into your palm and gently form it into a ball about the size of a walnut. For uniform shapes, you can use a small ice cream scoop, a regular spoon, or a specialized falafel scooper.
-
Place each falafel onto the prepared baking tray. I’ve found that it’s better to flatten the balls slightly when baking, or to form them into a disc shape, to encourage even cooking and browning. Bake for 25 minutes, flipping them after 12 minutes to ensure both sides are golden and cooked through.
-
Serve immediately while warm, with tahini sauce and any or all of the optional condiments in a pita (see ingredient list above).
Make-Ahead & Freezing Tips
-
Falafel mixture: You can prepare the falafel mixture (without the baking soda) up to 24 hours in advance and store it tightly covered in the refrigerator. Beyond 24 hours, the fresh herbs may oxidize and lose some vibrancy, and the flavors can dull.
-
Best practice for make-ahead: Grind all the ingredients except the baking soda. Refrigerate this mixture. Just before you are ready to shape and cook the falafel, mix in the baking soda. This ensures optimal leavening and freshness.
-
Shaped patties: You can shape the patties up to 12 hours ahead of time and refrigerate them, well covered. Storing them longer after shaping risks the falafel becoming dense and potentially discolored.
-
Freezing uncooked mixture: Freeze the raw, unmixed (without baking soda) falafel mixture in an airtight container for up to 1-2 months. Thaw in the refrigerator, then mix in baking soda before shaping and cooking.
-
Freezing cooked falafel: Allow cooked falafel to cool completely. Freeze in a single layer on a baking sheet, then transfer to a freezer-safe bag. Reheat from frozen in the oven or air fryer.
Notes
- Using dried and thoroughly soaked chickpeas and fava beans in this recipe is absolutely essential for authentic texture. You must soak them overnight, but they should NOT be cooked beforehand. Simply soak, drain, and then proceed directly to the food processor. If canned (already cooked) chickpeas are used, the interior of your falafel will be mushy, and they are very likely to fall apart when frying due to their high moisture content.
- When frying, it’s critical that the falafel have ample time in the hot oil to cook through and dry out on the inside, ensuring a light and fluffy interior with a truly crispy crust. If you notice the exterior browning too quickly, gently lower the heat of your oil to maintain a steady 350°F (175°C) to allow for even cooking without burning.
- This recipe is adapted from Chef Ahmed Reda, whom I had the pleasure of meeting during my trip to Egypt in 2023. His insights into traditional Ta’ameya were invaluable!
Nutrition
The information shown is an estimate provided by an by an online nutrition calculator. It should not be considered a substitute for professional nutritionist’s advice.
I hope this comprehensive guide inspires you to create your own batch of authentic Egyptian falafel (Ta’ameya) at home. The blend of fava beans and chickpeas, coupled with the fresh herbs and spices, truly makes this a standout dish. It’s a wonderful journey into Egyptian culinary traditions that offers incredible flavors, textures, and a satisfying vegetarian meal. Enjoy the process, savor the aroma, and delight in every crispy, flavorful bite!