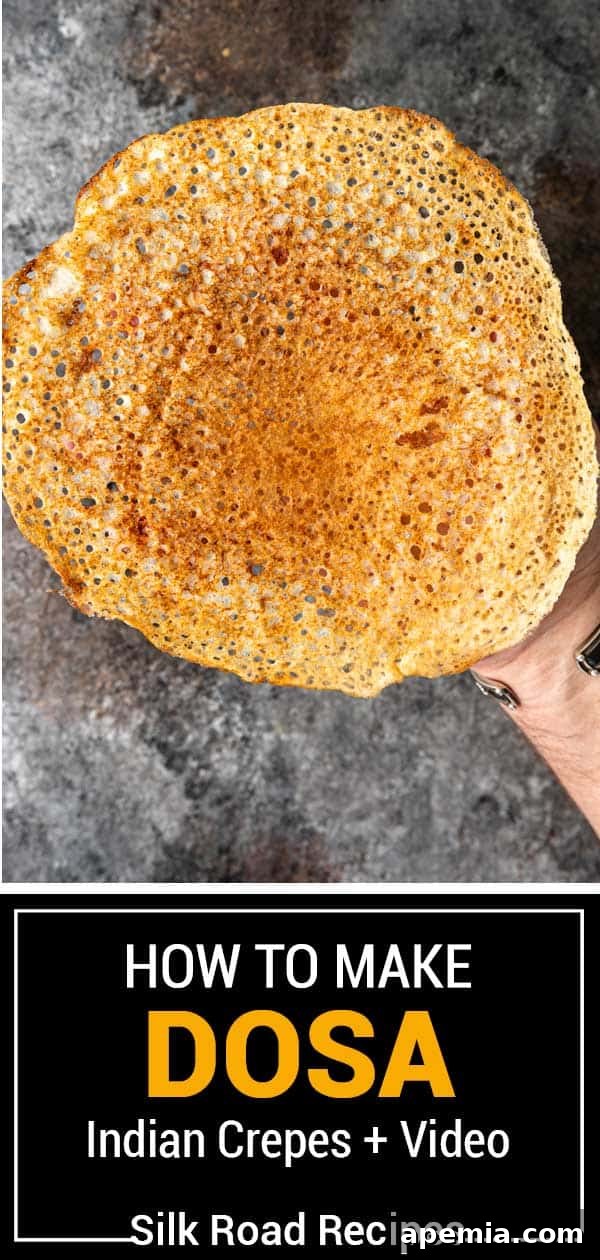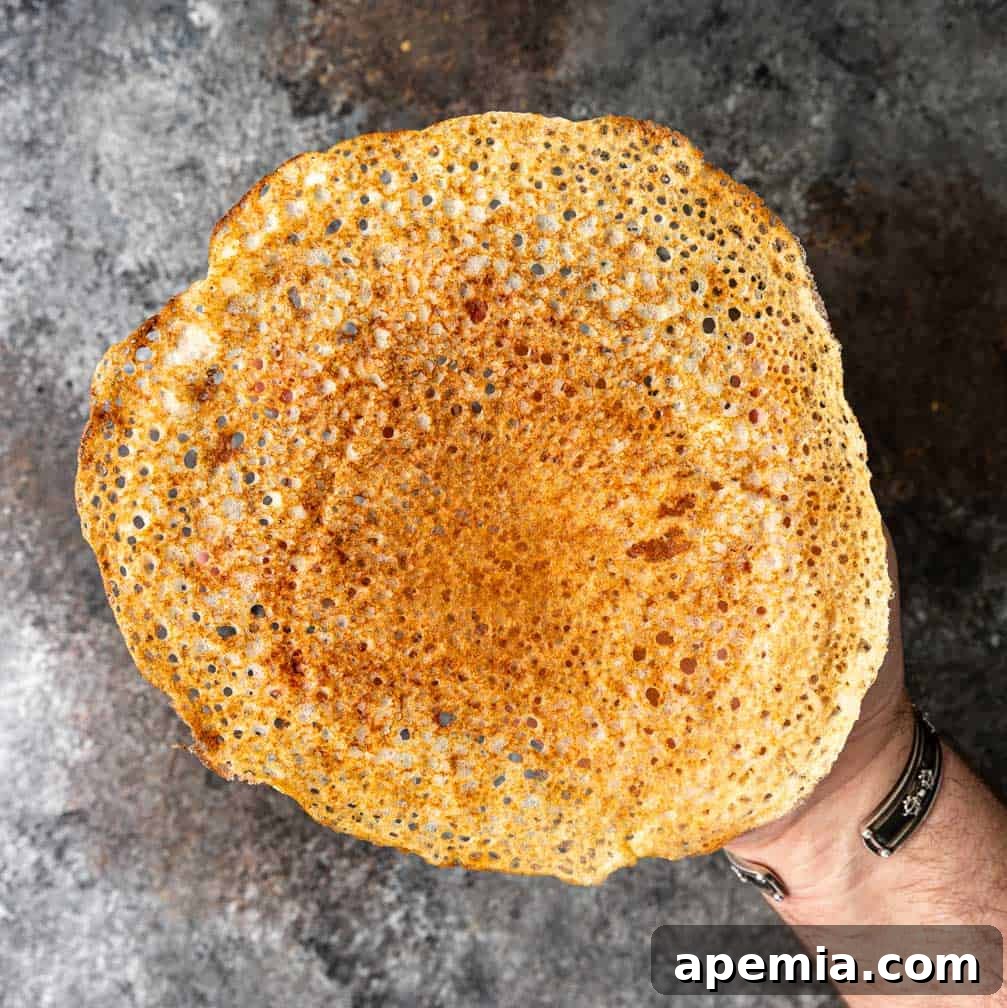
Embark on a culinary journey to the heart of India with this definitive guide to crafting exquisite, paper-thin dosa. My meticulously developed recipe promises a dozen flawlessly crispy, golden crepes, versatile enough to embrace an array of fillings – from subtly sweet to boldly savory. Once you master the art of fermenting the batter, you’ll discover that making dosa at home is not just simple, but incredibly rewarding, quickly becoming a cherished breakfast ritual in your kitchen.
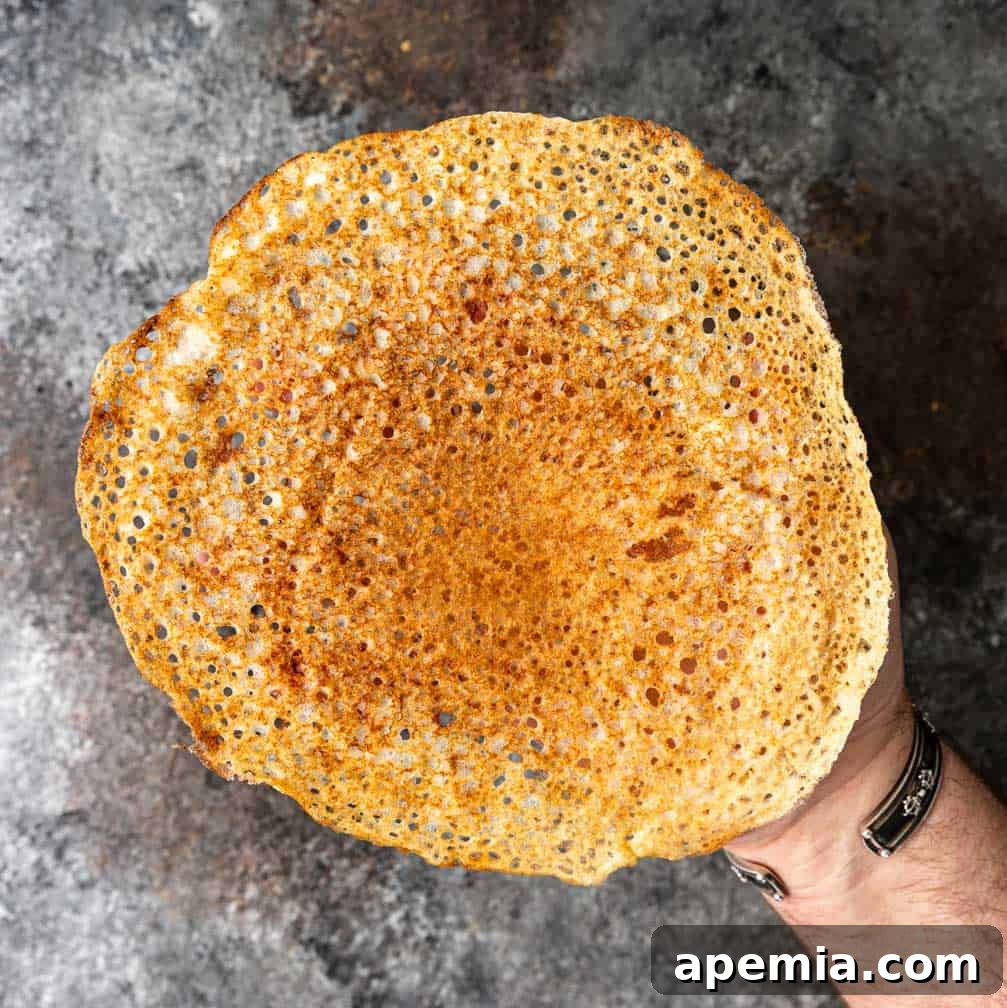
These iconic Indian crepes, known for their incredible versatility, can be savored in various textures. While some prefer them soft and pliable, I personally adore the irresistible crunch of a restaurant-style paper dosa. My first encounter with these delicate, crispy delights in New Delhi left me utterly captivated, and I’ve been dedicated to recreating that authentic experience ever since.
For an unforgettable meal, I particularly recommend filling these homemade dosa with a vibrant aloo masala – a fragrant and spicy potato curry that perfectly complements the dosa’s tangy flavor. To add an extra layer of richness, texture, and protein, sometimes I even incorporate chickpeas into the potato filling. The combination is simply divine.

This comprehensive guide focuses specifically on achieving that coveted paper-thin, impeccably crispy dosa, reminiscent of those enjoyed across India. However, with simple adjustments, this versatile recipe can also yield softer, fluffier crepes, ideal for pairing with an extensive range of traditional chutneys and flavorful dips. Whether you crave crispiness or a more tender bite, this recipe empowers you to customize your dosa experience.
Table of Contents: Your Guide to Perfect Dosa
- Essential Dosa Ingredients & Smart Substitutions
- Mastering Fermentation: The Float Test
- Fermenting Dosa Batter Without an Instant Pot
- Crafting the Ideal Dosa Batter: A Step-by-Step Guide
- Cooking Dosa to Golden Perfection: Techniques & Tips
- Recommended Tools for Dosa Making
- Storing Dosa Batter & Cooked Crepes
- Frequently Asked Questions About Dosa
- The Ultimate Dosa Crepes Recipe Card
To ensure your success in making authentic Dosa, I urge you not to miss any section of this detailed guide. Every step, from ingredient selection to the final sizzle on the griddle, is crucial. Pay close attention to the comprehensive step-by-step instructions, and the precise ingredient list found within the full recipe card. I’ve poured all my tried-and-true tips and clever tricks into this resource, guaranteeing you’ll achieve perfect, restaurant-quality dosa every single time.

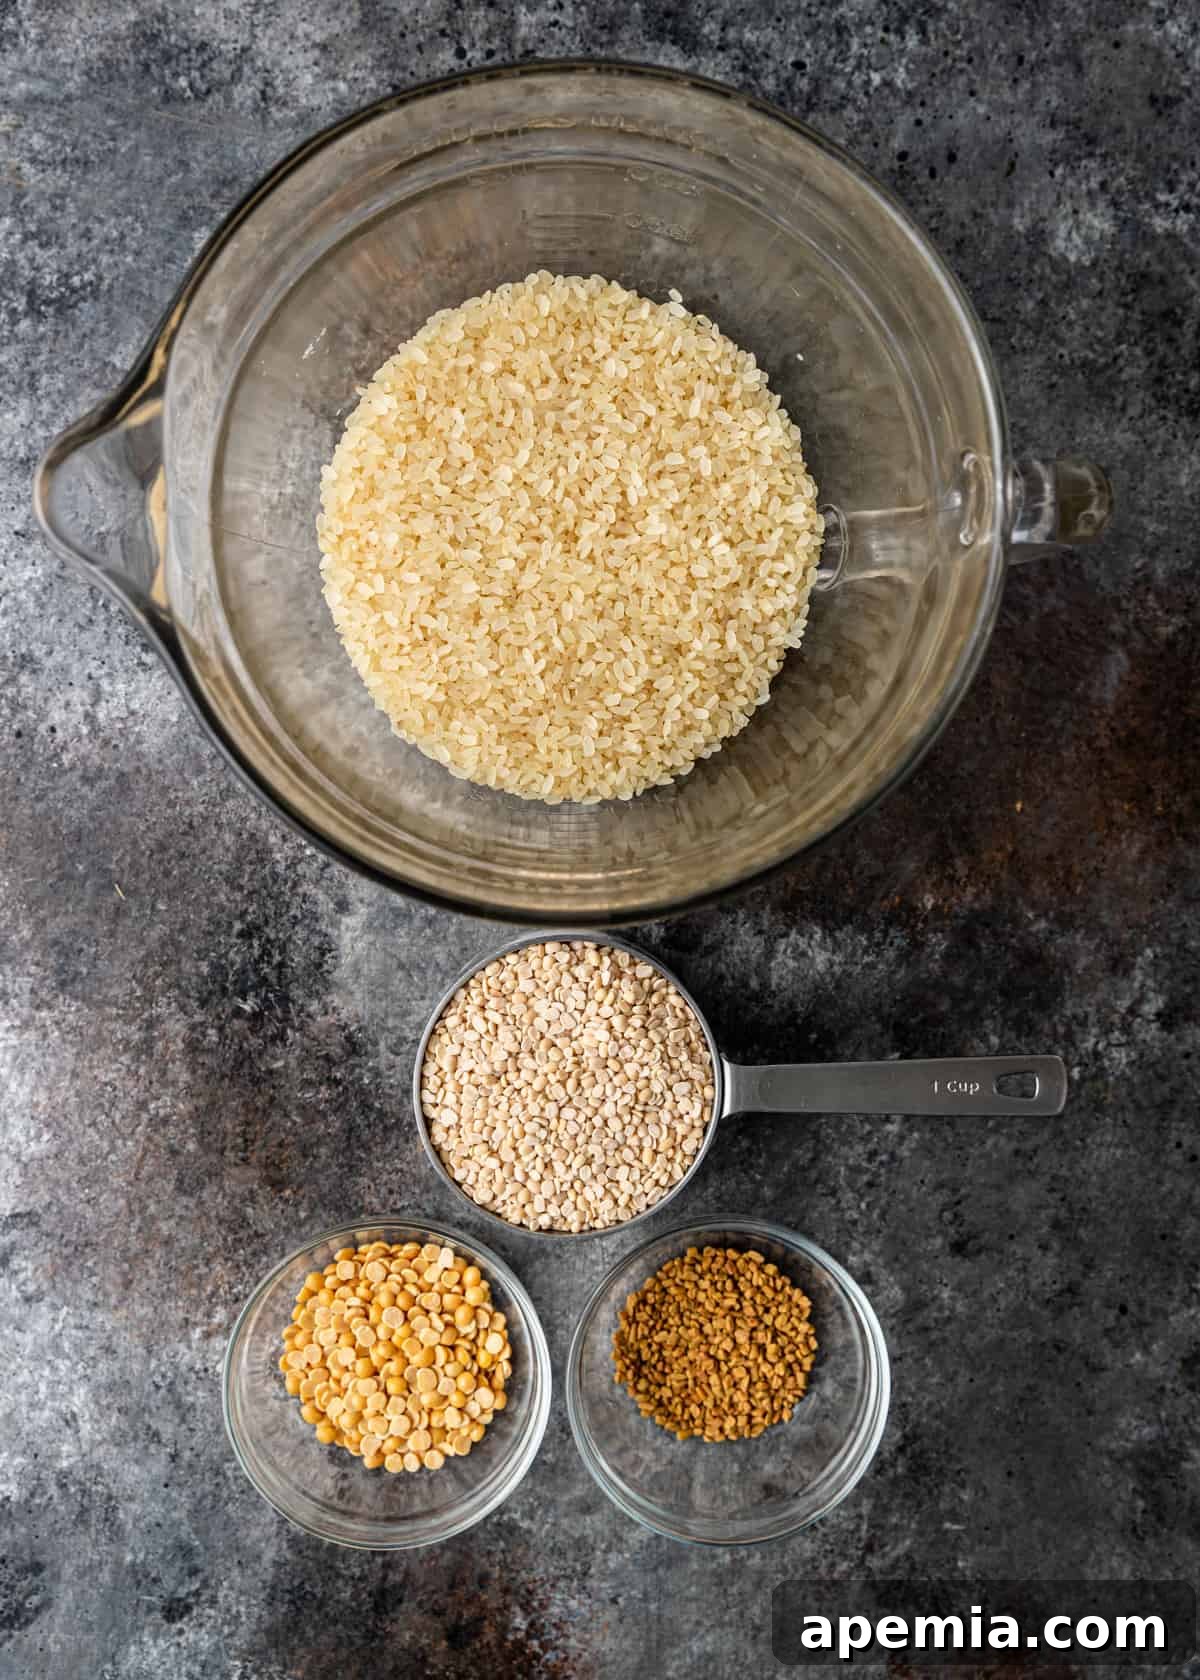
Essential Dosa Ingredients & Smart Substitutions for Authentic Flavor
Understanding your ingredients is key to Dosa perfection. While the full list with precise quantities can be found in the recipe card below, here’s a deeper dive into each component and how it contributes to the irresistible flavor and texture of your homemade Dosa:
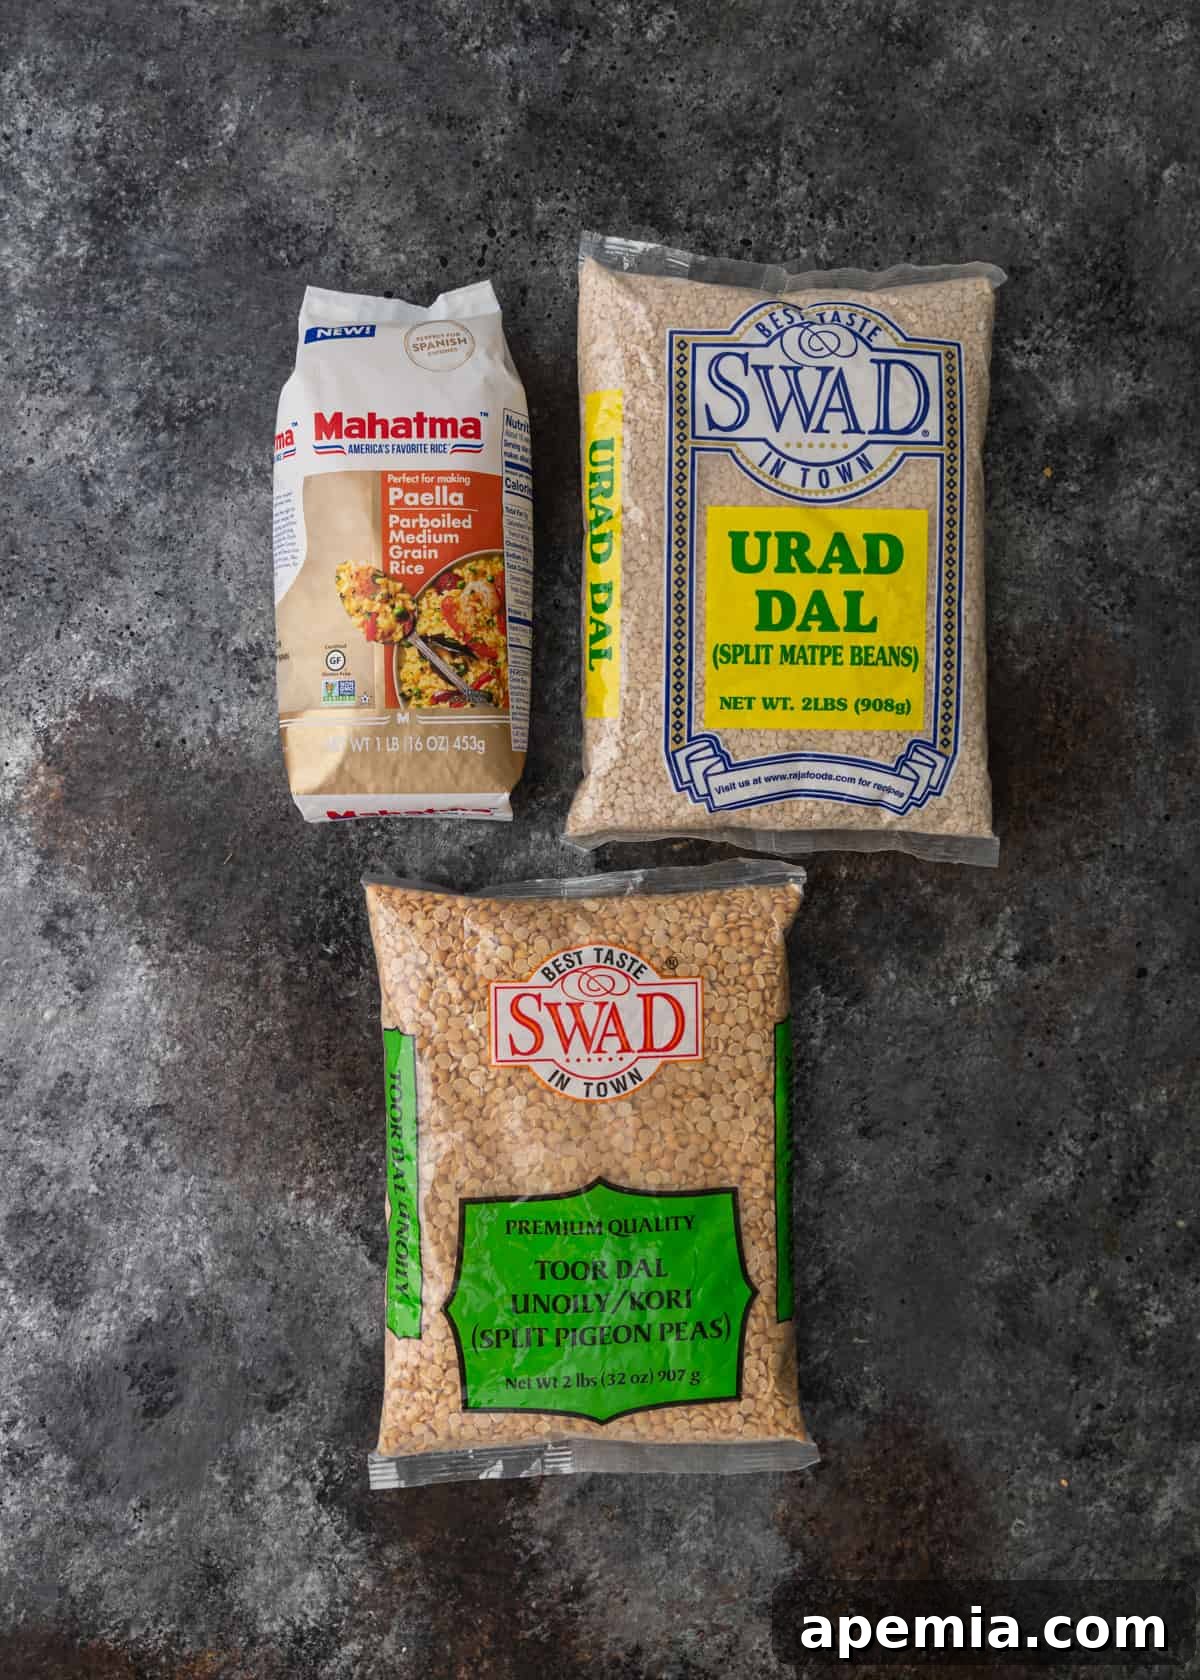
- Parboiled Rice (Idli Rice) – This specific type of rice, often labeled as “idli rice” or simply “parboiled rice,” is fundamental for achieving the characteristic texture of Dosa. Its unique processing helps create a batter that ferments beautifully, resulting in crispy crepes with a soft interior. I’ve found that some brands, like Mahatma, market it as ‘rice for paella,’ which is an excellent substitute if ‘idli rice’ isn’t explicitly available at your local Asian or Indian market. The starch structure in parboiled rice is ideal for fermentation and yields a smooth, non-gritty batter.
- Poha (Flattened Rice) – Adding poha is my secret weapon for truly crispy dosa! This ingredient, typically pre-steamed and then flattened, excels at absorbing excess moisture from the batter, which is essential for that coveted thin, papery crispness. While it can also contribute a subtle, comforting flavor to the crepes, its primary role here is textural. If your preference leans towards softer, more tender, or milder-flavored crepes, you can certainly omit the poha without compromising the core recipe.
- Urad Dal (Split Black Gram) – This distinctive lentil, often called “black gram” or “split black lentils,” is a cornerstone of Dosa batter. Urad dal is crucial for both the fermentation process and for imparting a unique richness and elasticity to the batter. When purchasing, be mindful of packaging; sometimes, other black lentils like beluga lentils are mistakenly labeled as such. Always look for “split black gram” or “urad dal” to ensure you’re getting the correct ingredient for that authentic Dosa texture and flavor profile.
- Chana Dal (Split Chickpeas) – Complementing the urad dal, chana dal brings a wonderful body and creaminess to the batter. These split chickpeas also infuse the Dosa with a delightful savory and slightly nutty flavor, adding depth to the overall taste. It works synergistically with the other ingredients to create a well-rounded and robust batter that cooks into perfect crepes.
- Fenugreek Seeds (Methi) – More than just a fragrant spice, fenugreek seeds play a vital, often underestimated, role in Dosa fermentation. These tiny seeds act as a natural catalyst, significantly enhancing the fermentation process, which is essential for the batter’s rise and tangy flavor. Beyond their functional role, they contribute a subtle, complex nutty and faintly sweet-spicy aroma and taste that is characteristic of authentic Dosa.
- Sugar – A mere pinch of sugar might seem insignificant, but it serves a crucial purpose: it acts as a food source for the yeast and bacteria responsible for fermentation. This small addition helps kickstart and sustain the fermentation process, contributing to a more active and vigorous rise in the batter, ultimately leading to lighter, airier, and more flavorful Dosa.
- Salt (Kosher Preferred) – Salt is not just for seasoning; it’s a critical component in controlling and aiding the fermentation process. While older beliefs suggested that iodized or regular table salt could inhibit fermentation, modern understanding confirms this isn’t the case. However, I consistently recommend using kosher salt in my recipes. Its larger flakes and pure flavor profile ensure better control over seasoning, preventing the possibility of an overly “salty” taste that can occur with finer-grained salts.
- Medium Onion – Used primarily for seasoning the cooking surface, a medium onion is an optional yet highly recommended ingredient. Slicing it in half and rubbing it across the hot griddle with a touch of ghee helps to prime the pan, creating a naturally non-stick surface and imparting a subtle, inviting aroma and flavor to your Dosa as they cook.
- Ghee (Clarified Butter) – Traditionally, Dosa are cooked in rich, aromatic ghee, which imparts an unparalleled nutty flavor and helps achieve that beautiful golden-brown crisp. If authentic ghee isn’t readily available or you prefer an alternative, high-quality unsalted butter or a neutral-flavored vegetable oil (such as sunflower or canola oil) can be used as effective substitutes, though the flavor profile will be slightly different.
Expert Tip
Mastering Fermentation: The Float Test for Dosa Batter
A surefire way to determine if your Dosa batter has perfectly fermented is to perform the simple “float test.” Gently drop a small teaspoon of the batter into a glass or small bowl filled with water. If the batter is adequately fermented, it will float on the surface due to the trapped air bubbles created by the yeast and bacteria. If it sinks, it likely needs a little more time to ferment. This quick test provides a clear visual indicator of your batter’s readiness.
Pro-Tip
No Instant Pot? No Problem! Alternative Fermentation Methods for Dosa Batter
Even without an Instant Pot, achieving perfectly fermented Dosa batter is entirely feasible. Here’s a reliable alternative method to create the ideal warm, consistent environment needed for fermentation:
- Warm Your Oven: Preheat your oven to its absolute lowest temperature setting for just 5 minutes. This creates a gentle warmth without overheating.
- Turn Off Heat: Crucially, switch off the oven heat completely after 5 minutes. We only need residual warmth, not active cooking.
- Prepare for Fermentation: Place your bowl of Dosa batter (make sure it’s in a deep enough bowl to allow for expansion) into a larger baking tray. This acts as a safeguard against any potential spills if the batter rises significantly.
- Cover Loosely: Lightly cover the batter bowl with a clean kitchen towel or a loose-fitting lid. This allows air circulation while protecting the batter.
- Oven Placement: Position both the batter bowl and its baking tray on the lowest rack inside your now-turned-off oven.
- Utilize the Oven Light: Close the oven door and turn on the oven light. The small amount of heat generated by the oven light often provides just enough consistent warmth to encourage steady fermentation.
- Fermentation Time: Allow the batter to ferment in this environment for a minimum of 8 hours. On colder days or in cooler climates, extending this period to 12 hours will yield better results. You’re looking for a noticeable increase in volume and a slightly sour aroma.
This method replicates the controlled warmth of an Instant Pot, ensuring your batter develops the perfect tang and texture for magnificent Dosa.
Crafting the Perfect Dosa Batter: A Detailed Step-by-Step Guide
The foundation of an exceptional Dosa lies in its perfectly prepared and fermented batter. Follow these crucial steps to create a smooth, light, and tangy batter that’s ready for your griddle.
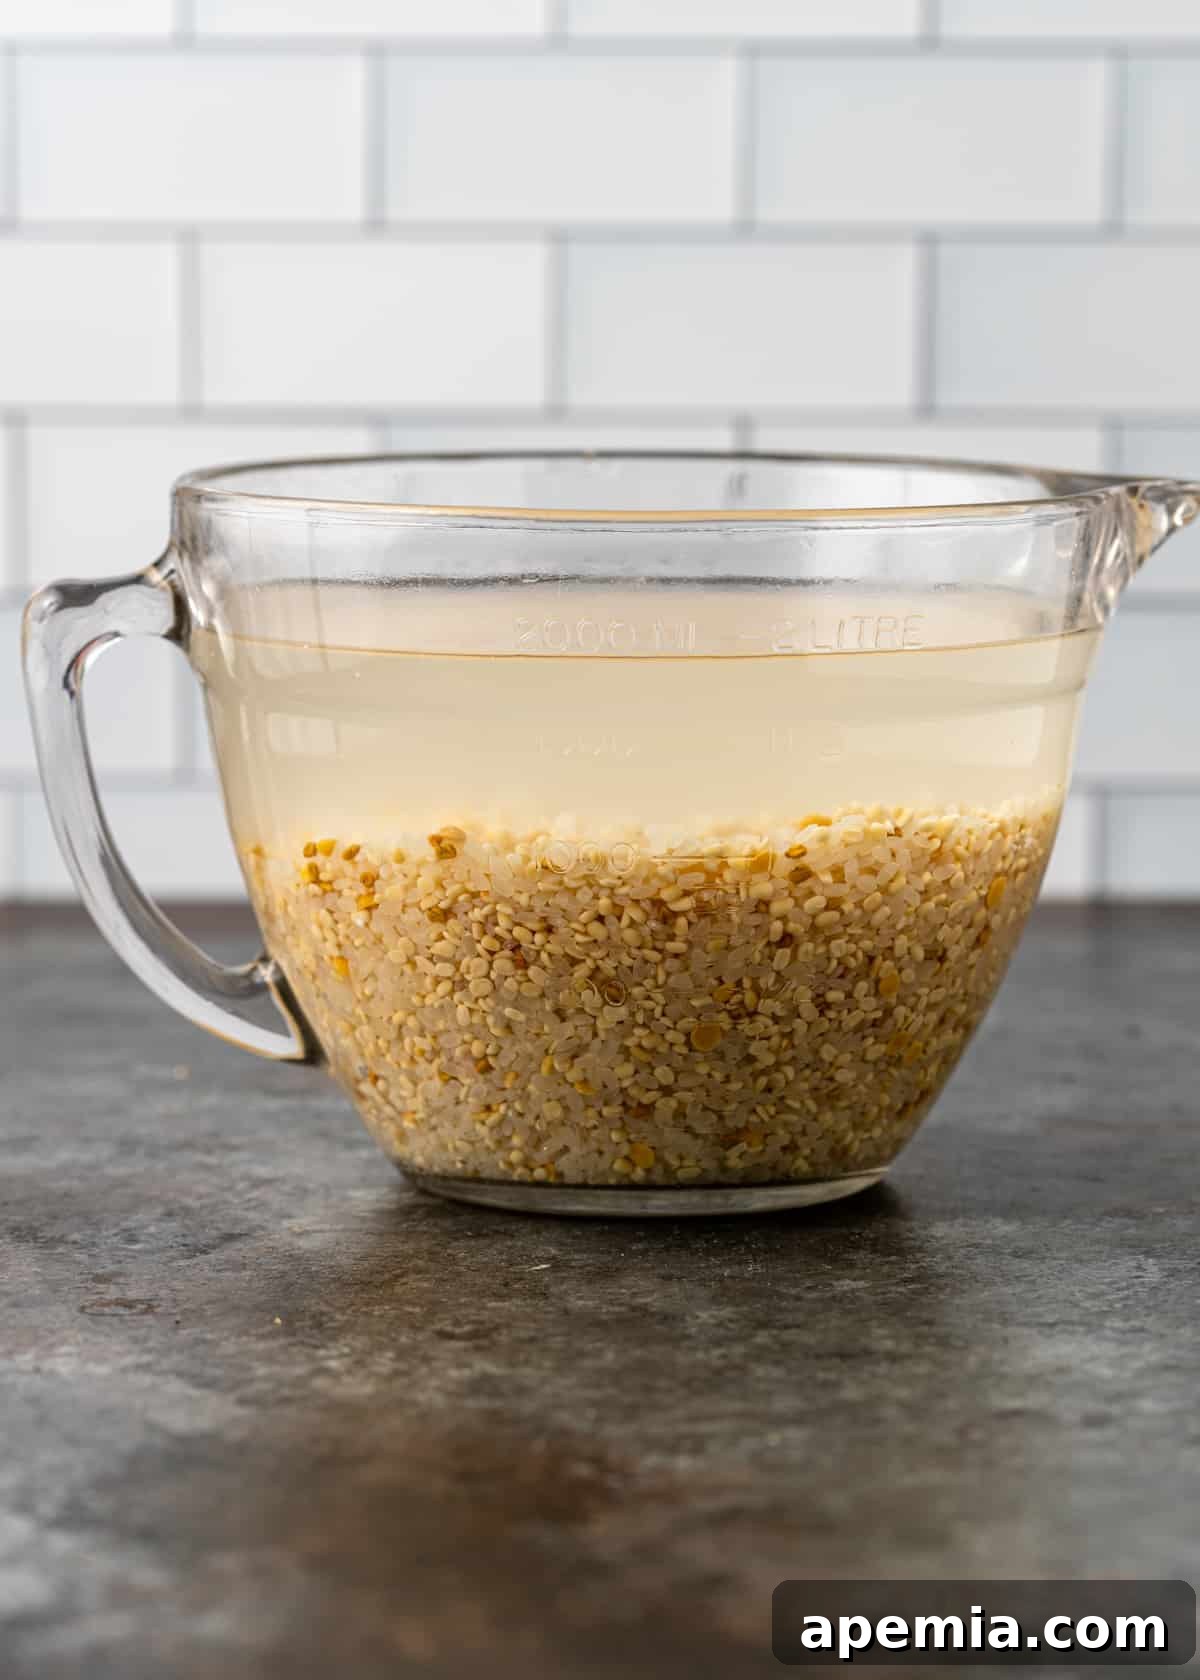
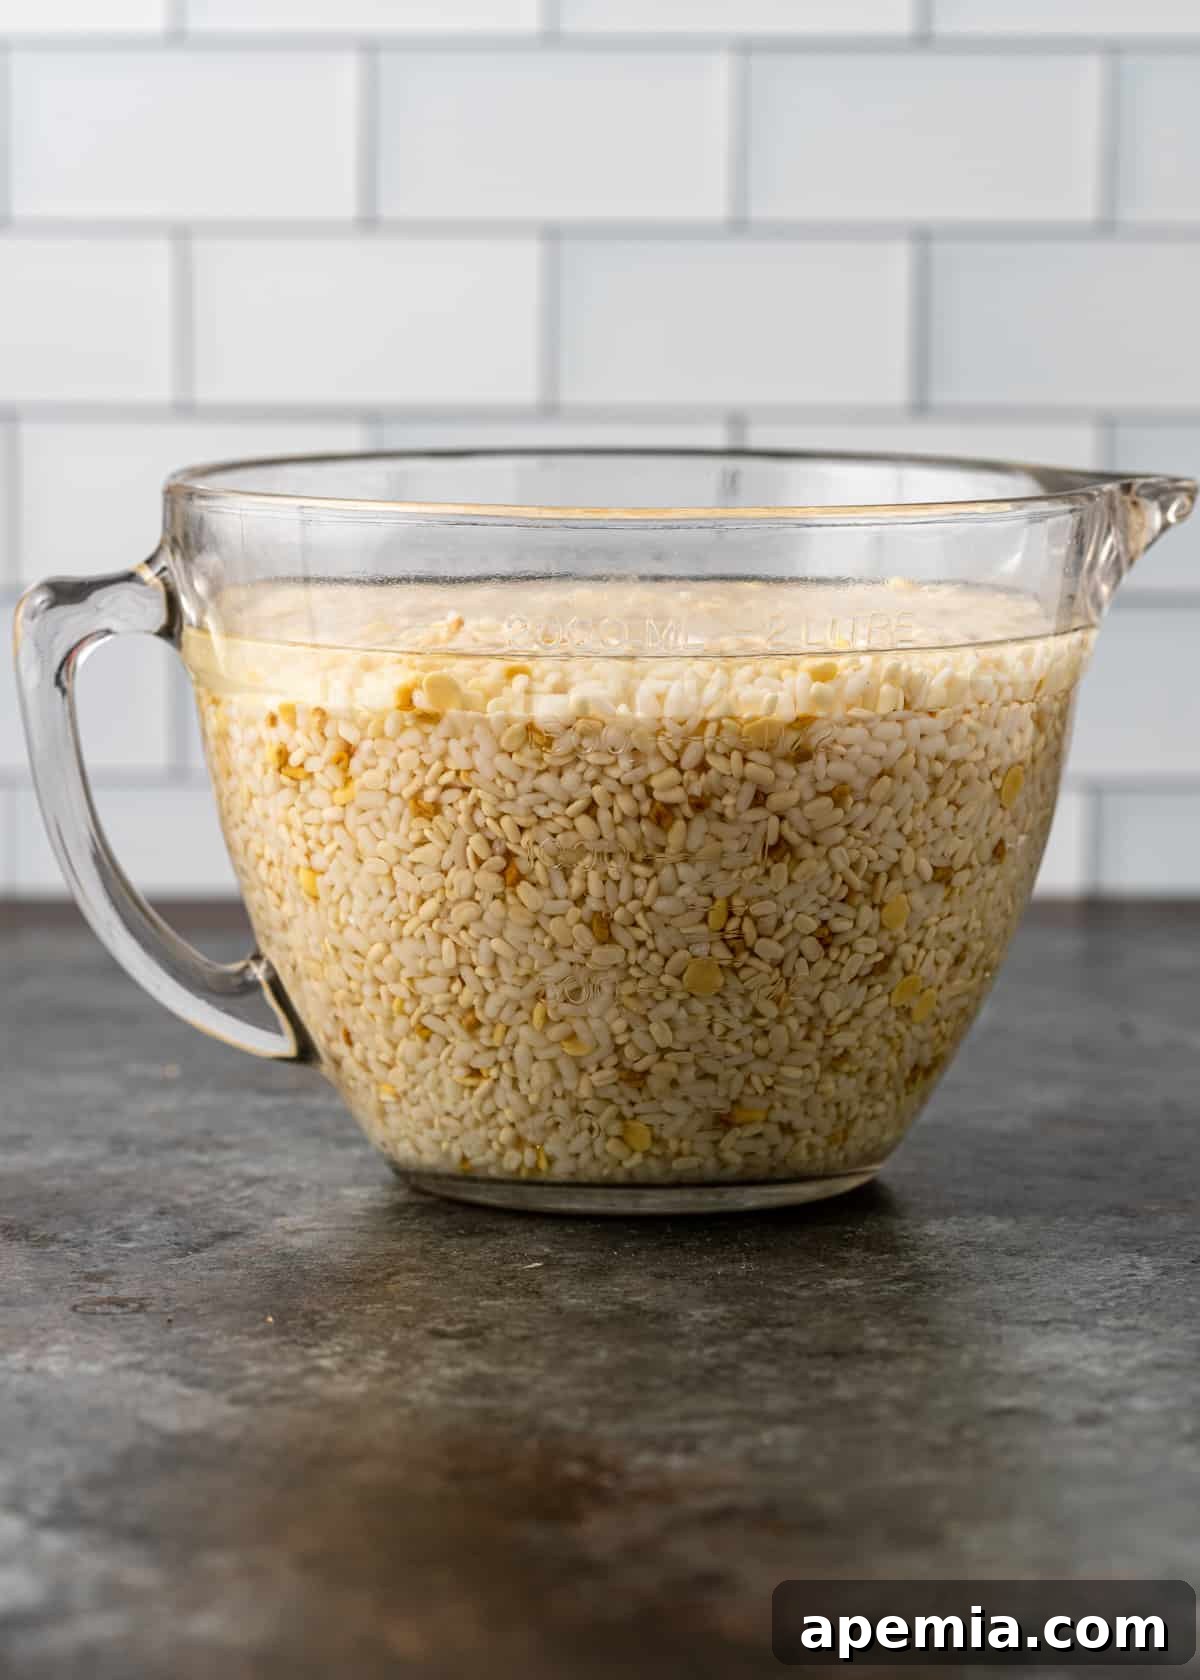
- Thoroughly Rinse and Soak the Rice & Dals: Begin by combining the parboiled rice, urad dal, chana dal, and fenugreek seeds (and poha, if using) in a fine-mesh sieve. Rinse this mixture thoroughly under cool, running water. Use your fingers to gently agitate the grains and lentils, ensuring all impurities are washed away, until the water runs completely clear. This thorough rinsing is vital for clean flavors. Transfer the rinsed mixture to a large, clean bowl – ideally an 8-cup measuring bowl if you have one, to allow for expansion. Cover the mixture with at least 2 inches of fresh, cool water. Allow it to soak undisturbed for a minimum of 4 hours, or even overnight if preferred. Proper soaking ensures the grains and lentils soften sufficiently for easy blending.
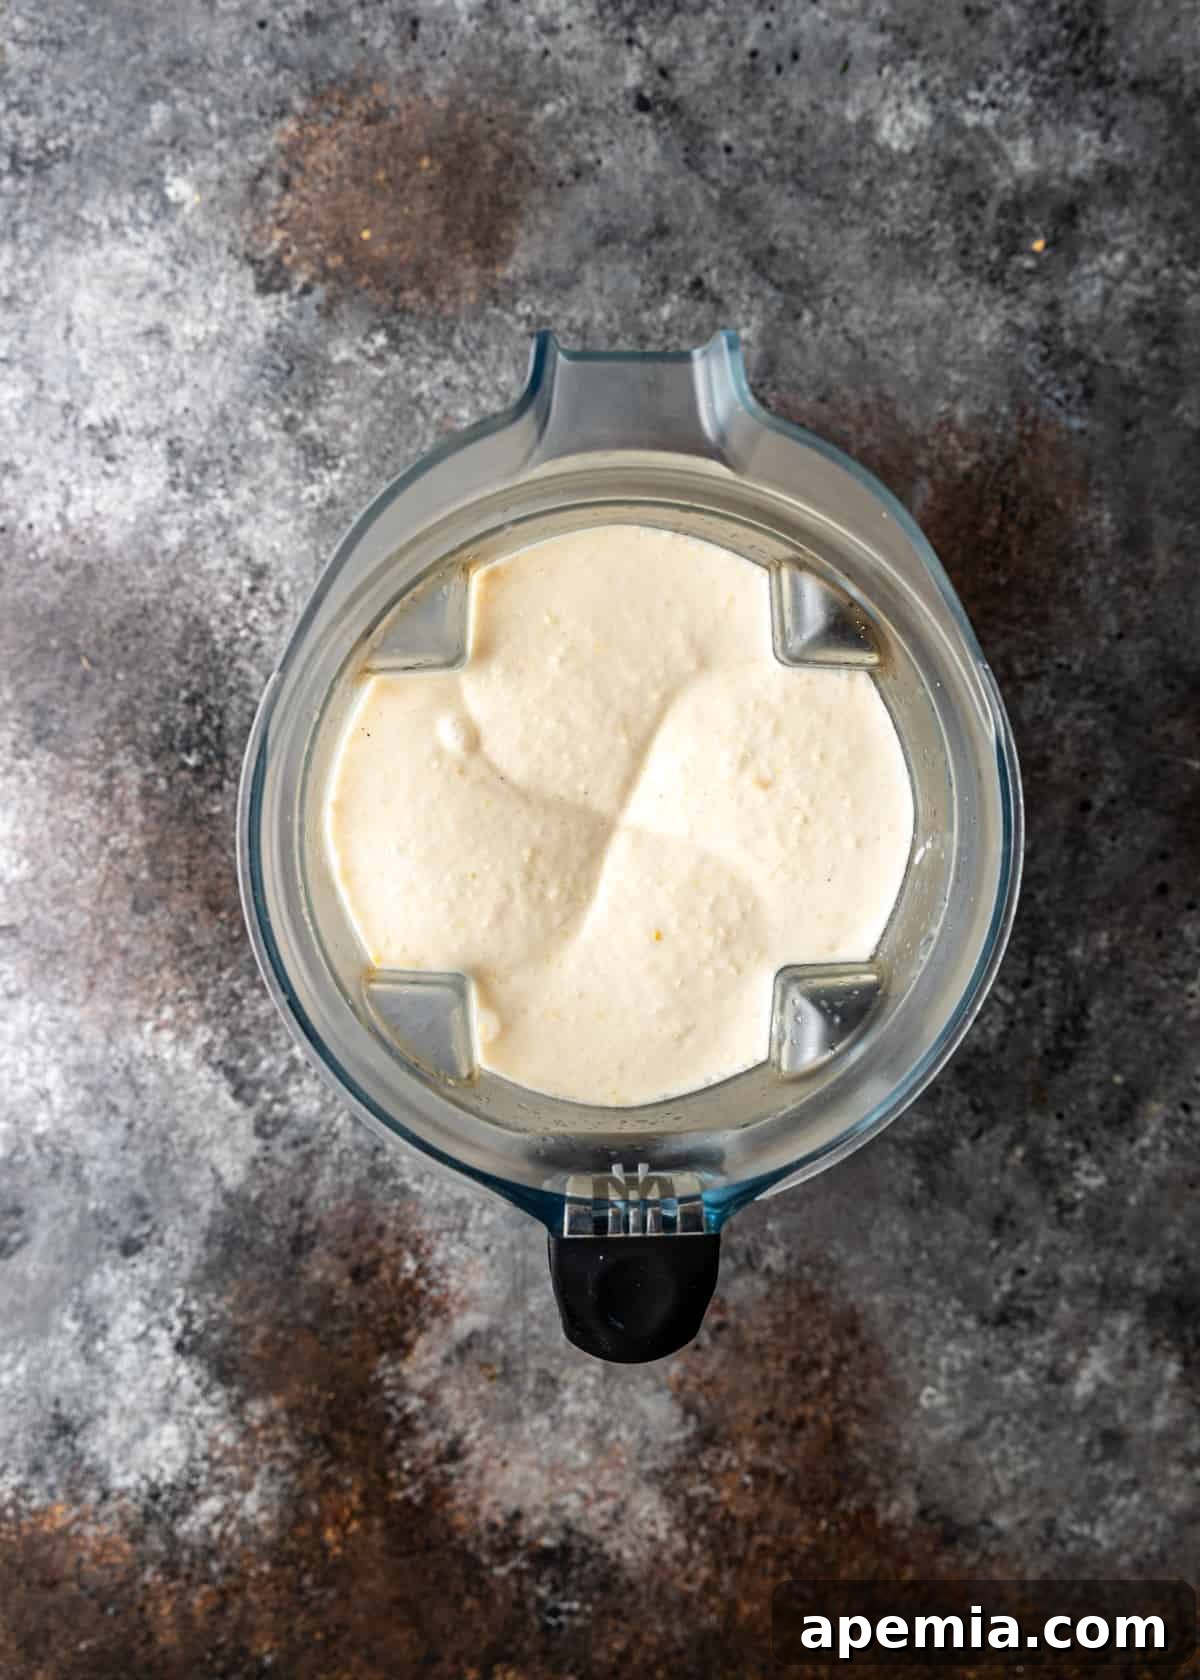
- Achieve Silky Smooth Consistency Through Blending: After soaking, drain the rice and dal mixture completely. Working in batches to avoid overloading your appliance, scoop approximately half of the soaked and drained mixture into a high-powered blender, such as a Vitamix. Add 1 cup of fresh water and 1 teaspoon of sugar to this batch. Blend on high speed until the mixture is utterly smooth, resembling a thin pancake batter. It is paramount that there are absolutely no gritty chunks remaining – run a bit between your fingers to check. The consistency should be free-flowing, not thick or clumpy; a batter that is too thick will struggle to ferment correctly. Repeat this process with the remaining soaked rice and dal, adding another cup of water and teaspoon of sugar to the second batch.
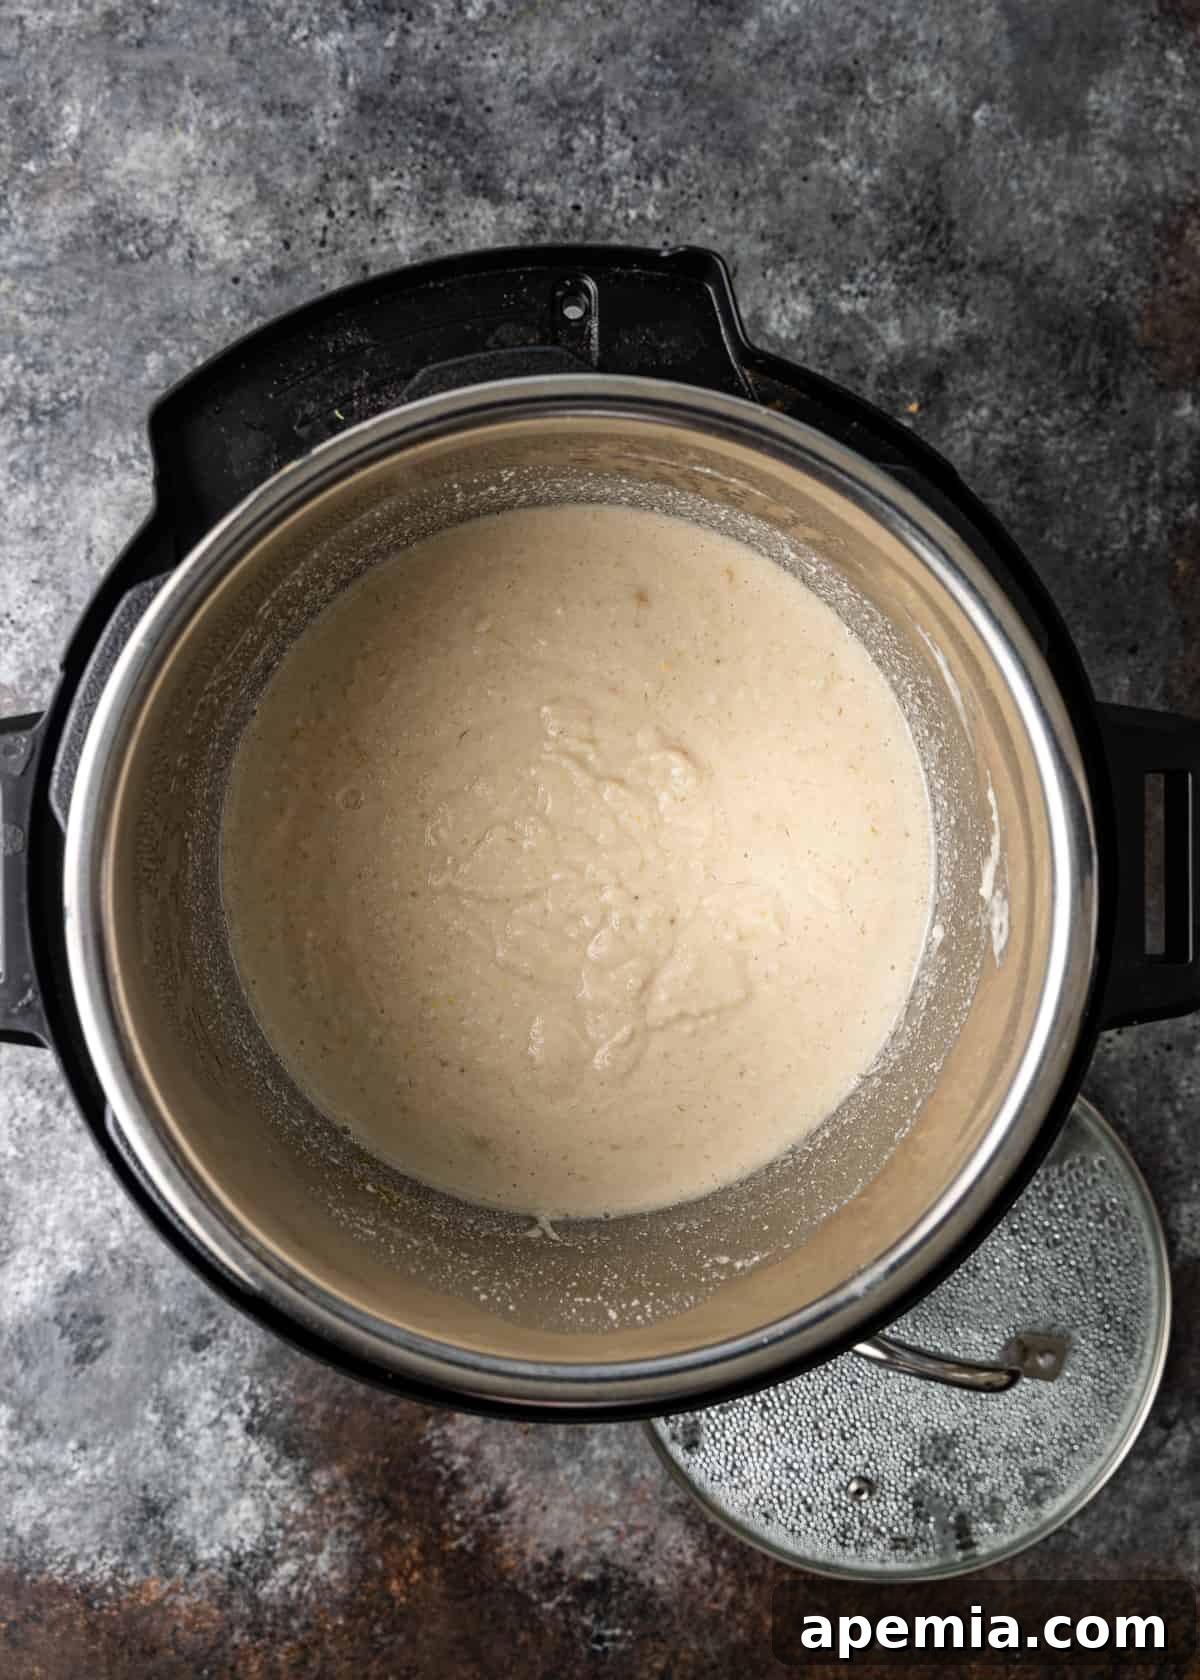
- Optimal Fermentation in an Instant Pot: Carefully pour the freshly blended Dosa batter into the stainless steel inner pot of your Instant Pot. To facilitate proper airflow and prevent excessive pressure buildup, cover the Instant Pot with a clear glass lid or a plate (do NOT use the sealing lid). Select the “Yogurt” setting on your Instant Pot, then adjust the time to 12 hours. This setting provides a consistent, gentle warmth that is ideal for fostering the necessary yeast and bacterial activity for fermentation. The exact fermentation time might vary slightly based on ambient temperature and desired tanginess.
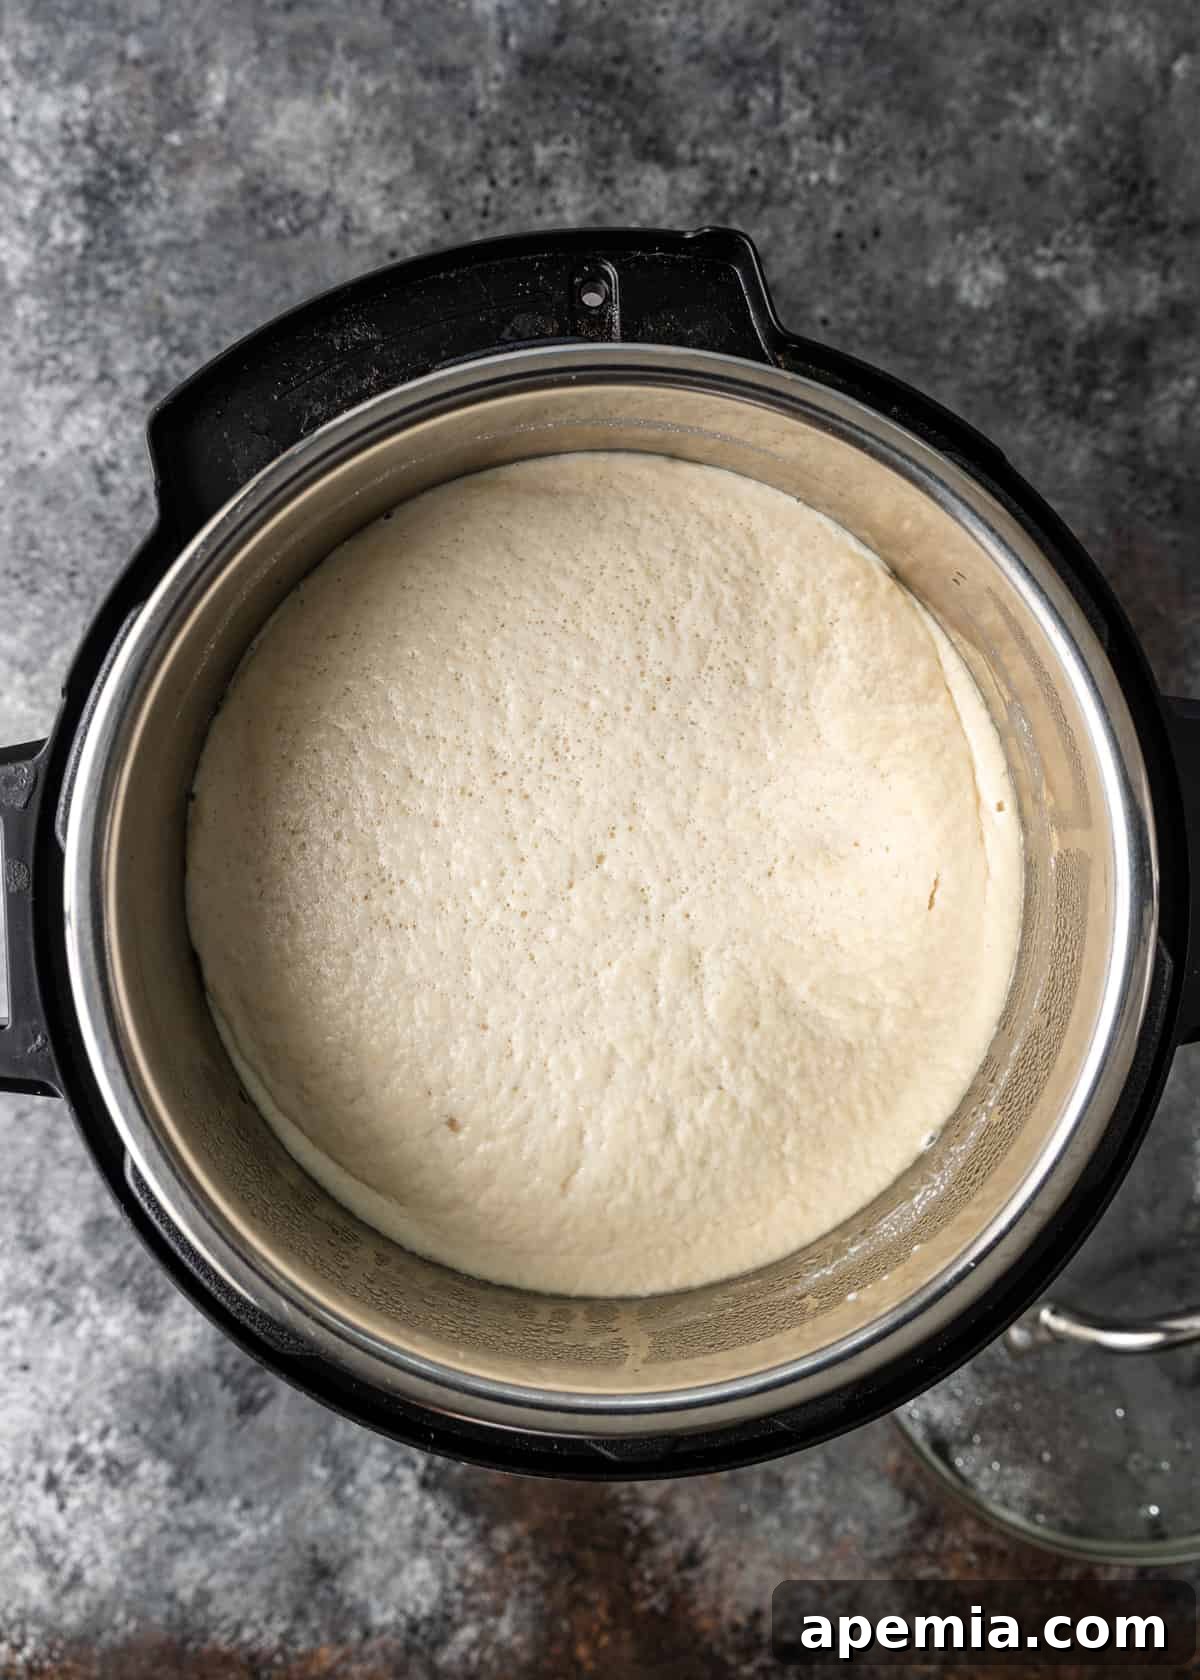
- Evaluate and Season the Fermented Batter: Once the 12-hour fermentation cycle is complete, carefully remove the lid. You should observe several key indicators of successful fermentation: the batter will have noticeably increased in volume, appearing thick and foamy with numerous small air bubbles dotting the surface. A distinct, slightly sour but pleasant aroma will also be present. Now, add the kosher salt (as detailed in the ingredient notes) to the fermented batter. Using your hands or a large spatula, thoroughly stir the salt into the batter for about 1-2 minutes. This final mixing step helps to evenly distribute the salt and provides a last burst of activity to the batter. Before proceeding, perform the “float test” mentioned earlier to confirm optimal fermentation.
With your batter expertly prepared, you’re now ready to move on to the exciting stage of cooking your homemade Dosa!
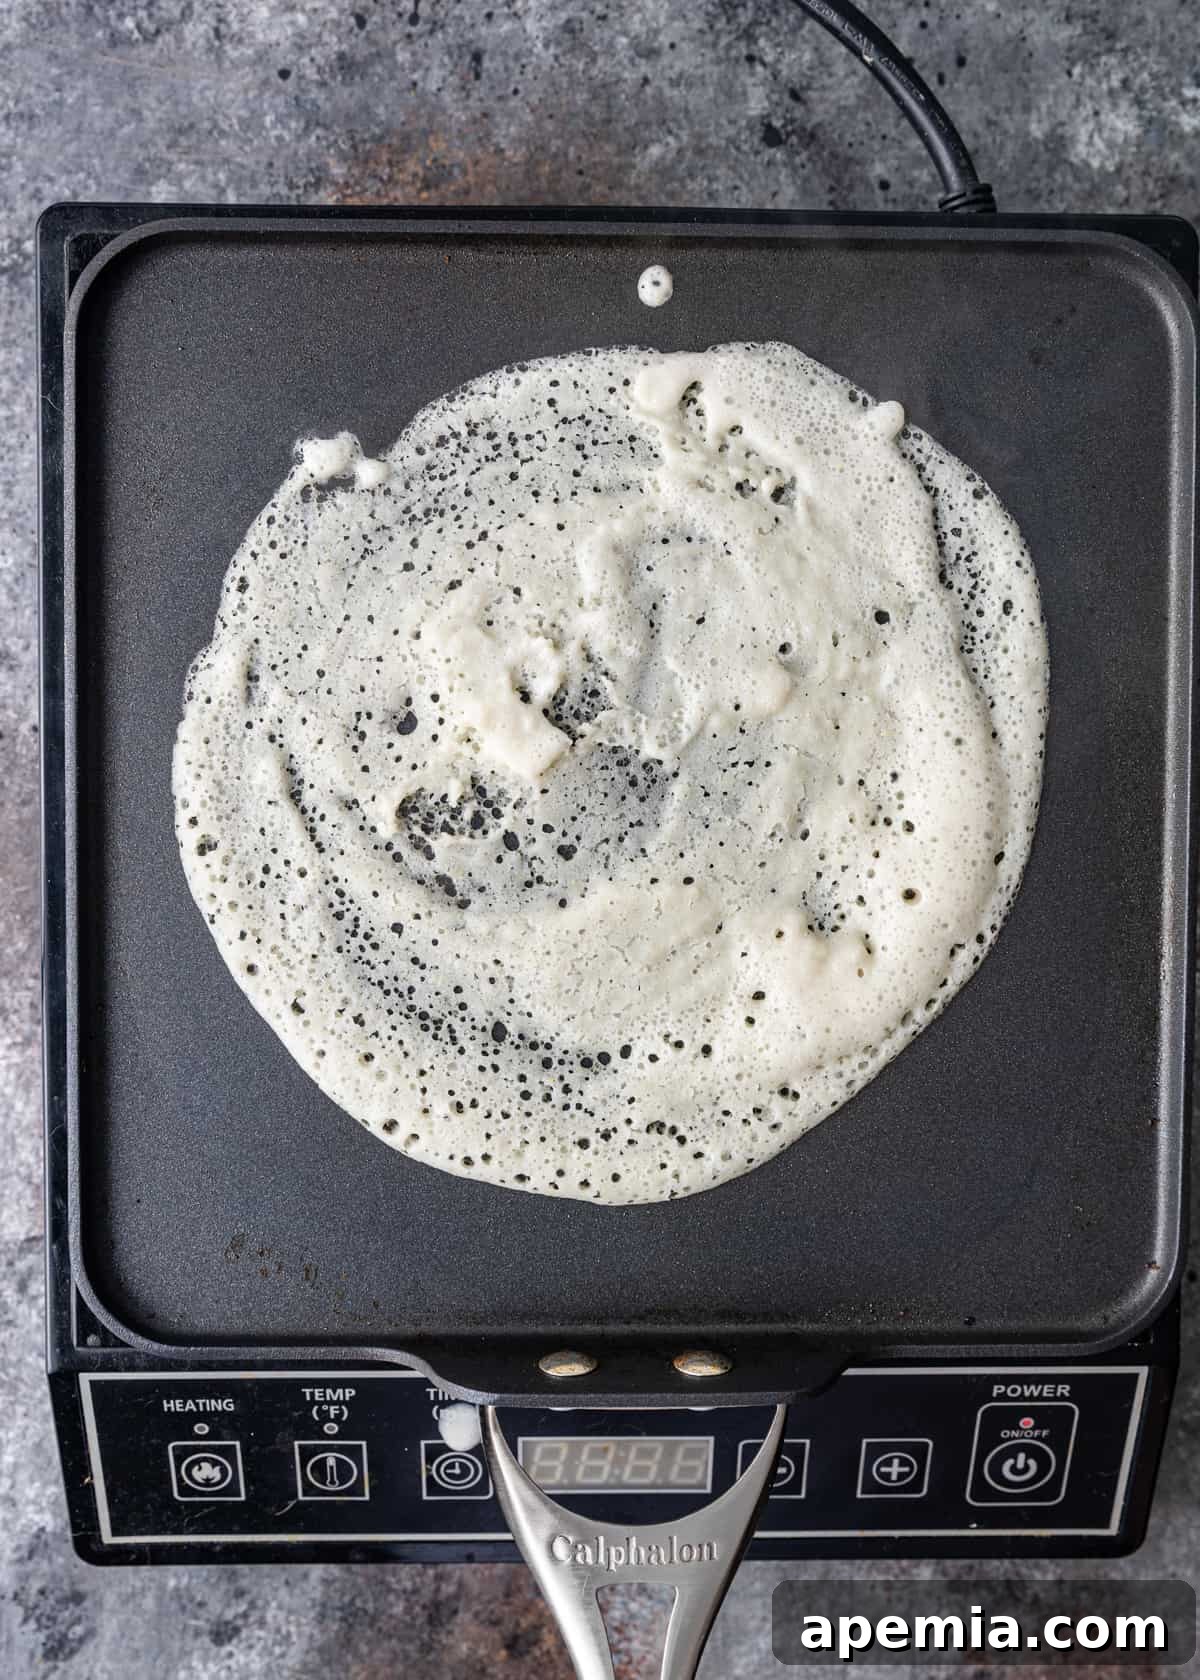
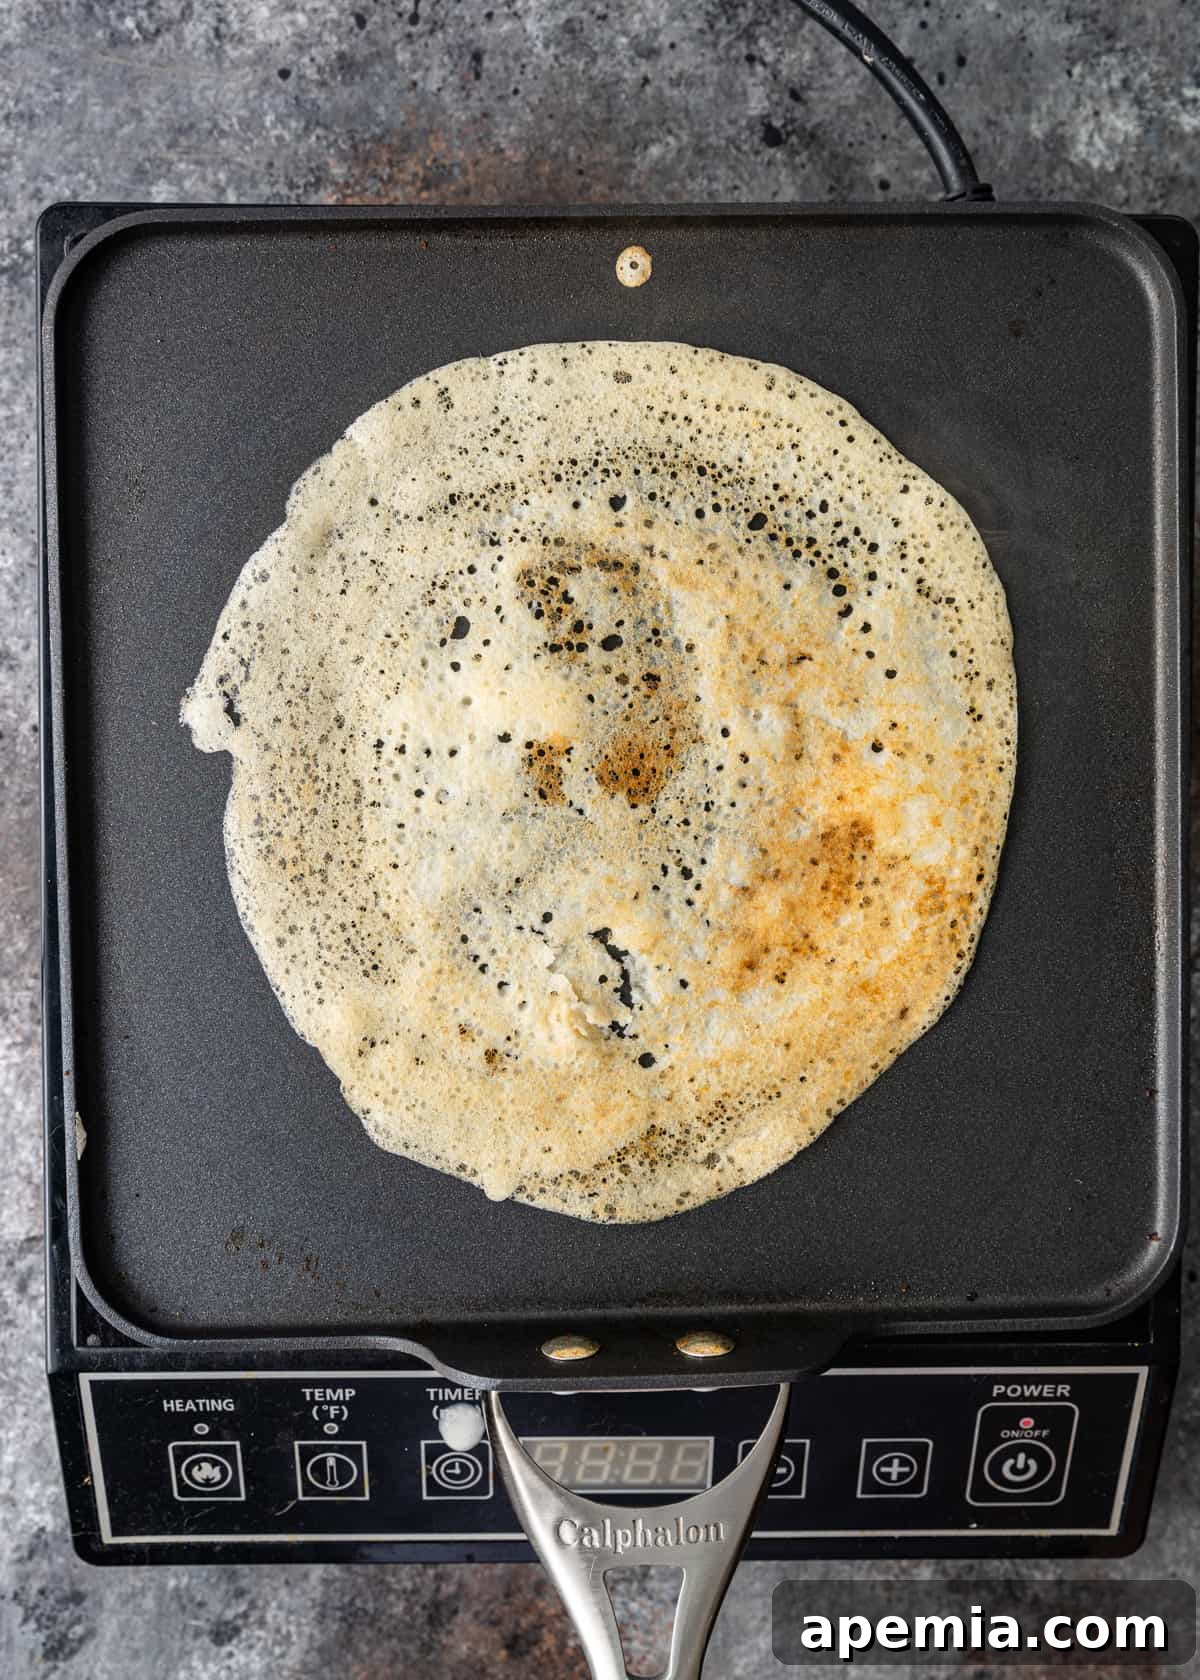
Cooking Dosa to Golden Perfection: Techniques for Crispy Crepes
The moment of truth arrives when you transform your meticulously prepared batter into beautifully crispy Dosa. Here’s how to master the cooking process:
- Prepare and Season Your Pan: Select a large cast iron griddle or a high-quality non-stick pan, ensuring it’s perfectly clean. Preheat it over medium-high heat. To test if the pan is adequately hot, sprinkle a few drops of water onto its surface; they should sizzle vigorously and evaporate almost instantly. This indicates the correct temperature for achieving crispness. Next, take a medium onion, sliced in half, and pierce the cut side with a fork. Dip the flat, cut side of the onion into a small bowl of melted ghee or vegetable oil. Using this onion, rub a thin, even layer of oil or ghee across the entire surface of your hot pan. This traditional method not only seasons the pan and prevents sticking but also imparts a subtle, desirable flavor to the Dosa. Set the onion aside for repeated use.
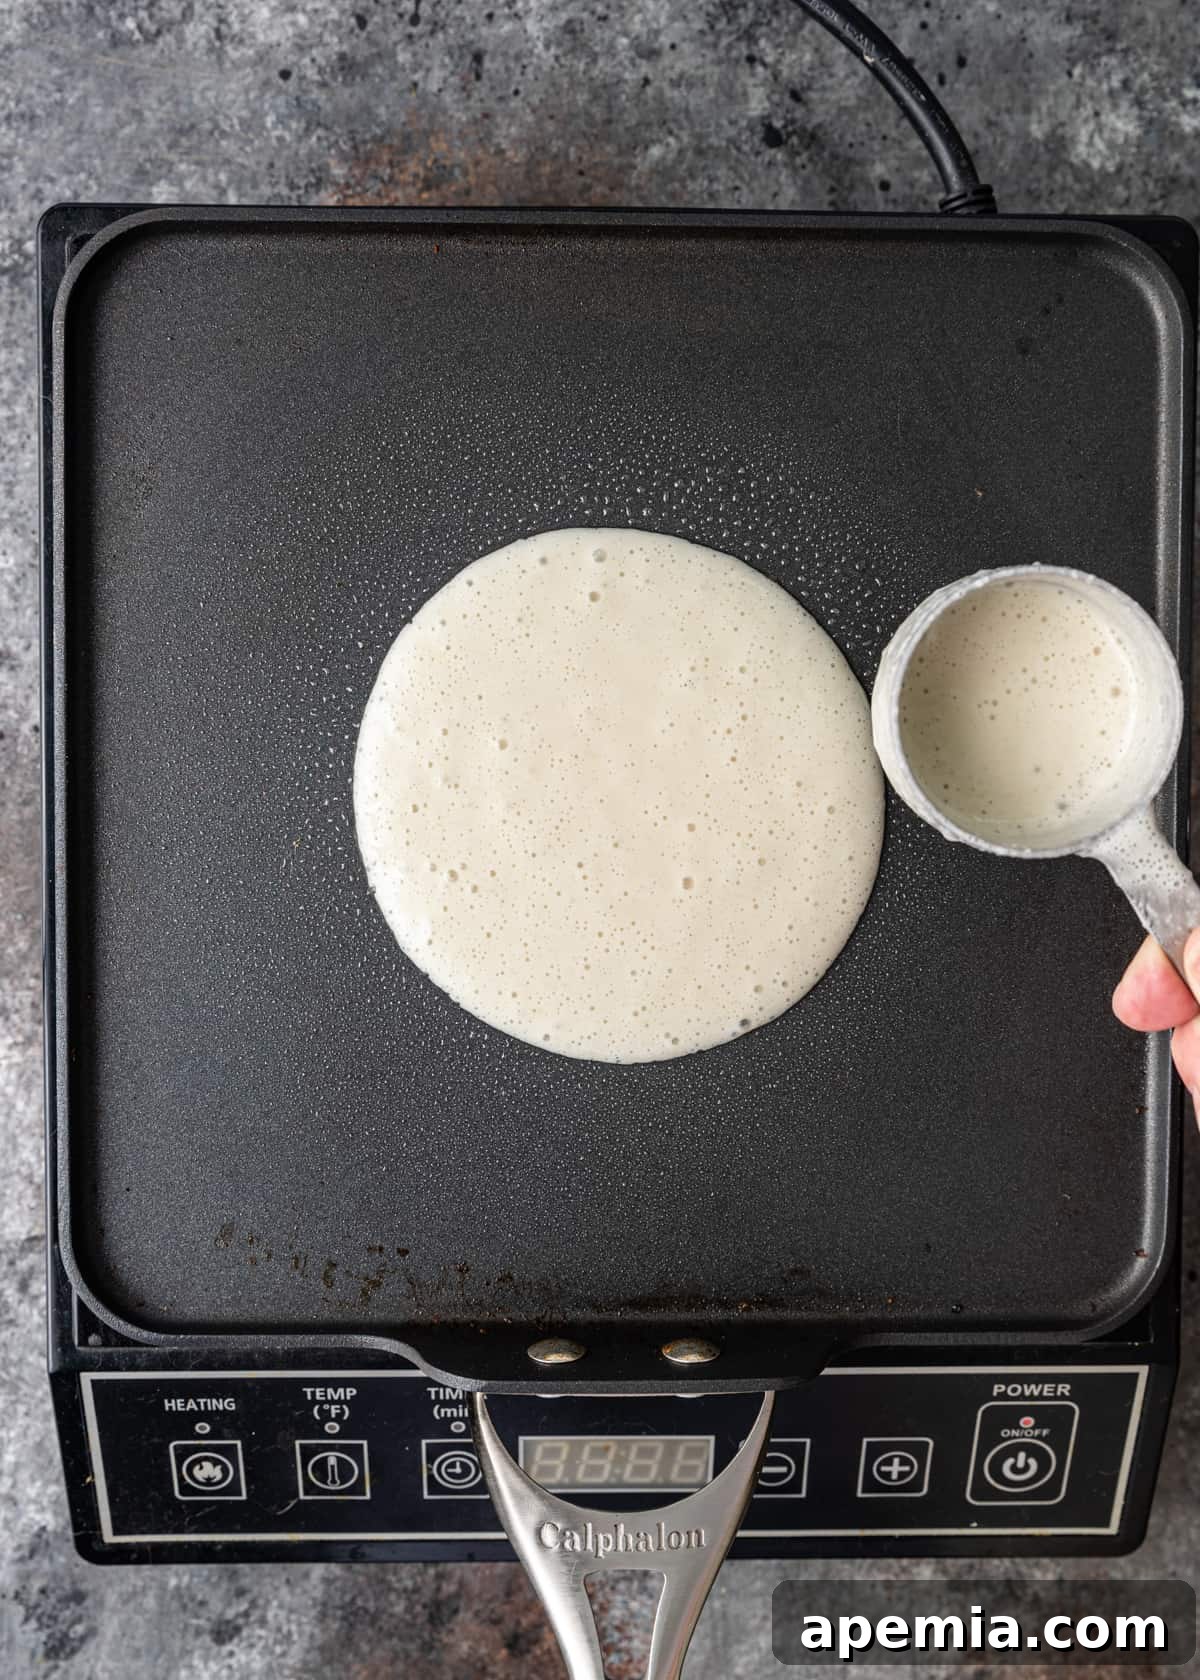
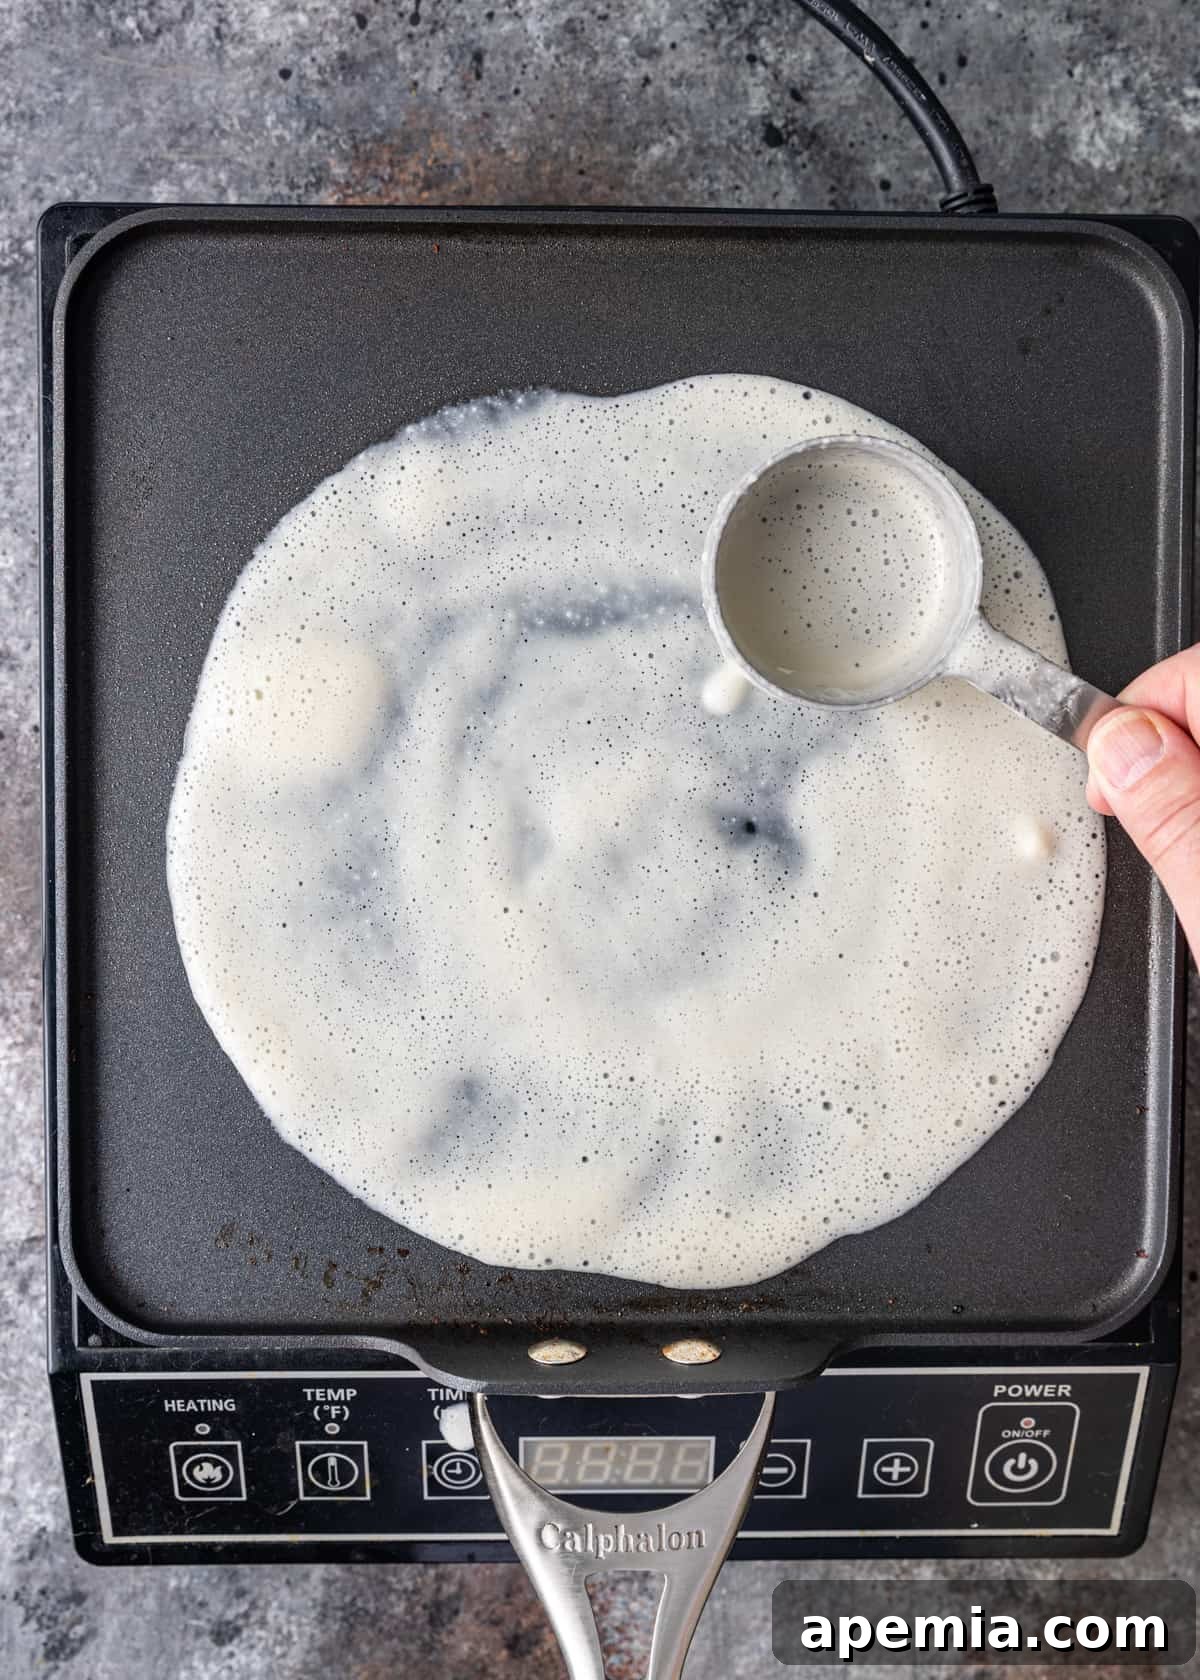
- Pour and Expertly Spread the Dosa Batter: With your pan perfectly prepped, it’s time to pour the batter. Using a ⅓ or ½ cup measuring cup (adjusting based on your griddle size, typically 12-14 inches), pour a ladleful of batter directly into the center of the hot pan. Immediately, using the bottom of the measuring cup, a ladle, or a flat spoon, begin spreading the batter in a swift, continuous circular motion, moving outwards from the center. Your goal is to create the thinnest possible layer, aiming for a delicate, almost translucent crepe. This step requires a gentle but firm hand and consistent pressure. Remember the common kitchen adage about the first pancake – the first Dosa often serves as a practice run. Don’t be discouraged if your initial attempt isn’t flawless; making Dosa takes practice, and thankfully, you have plenty of batter!
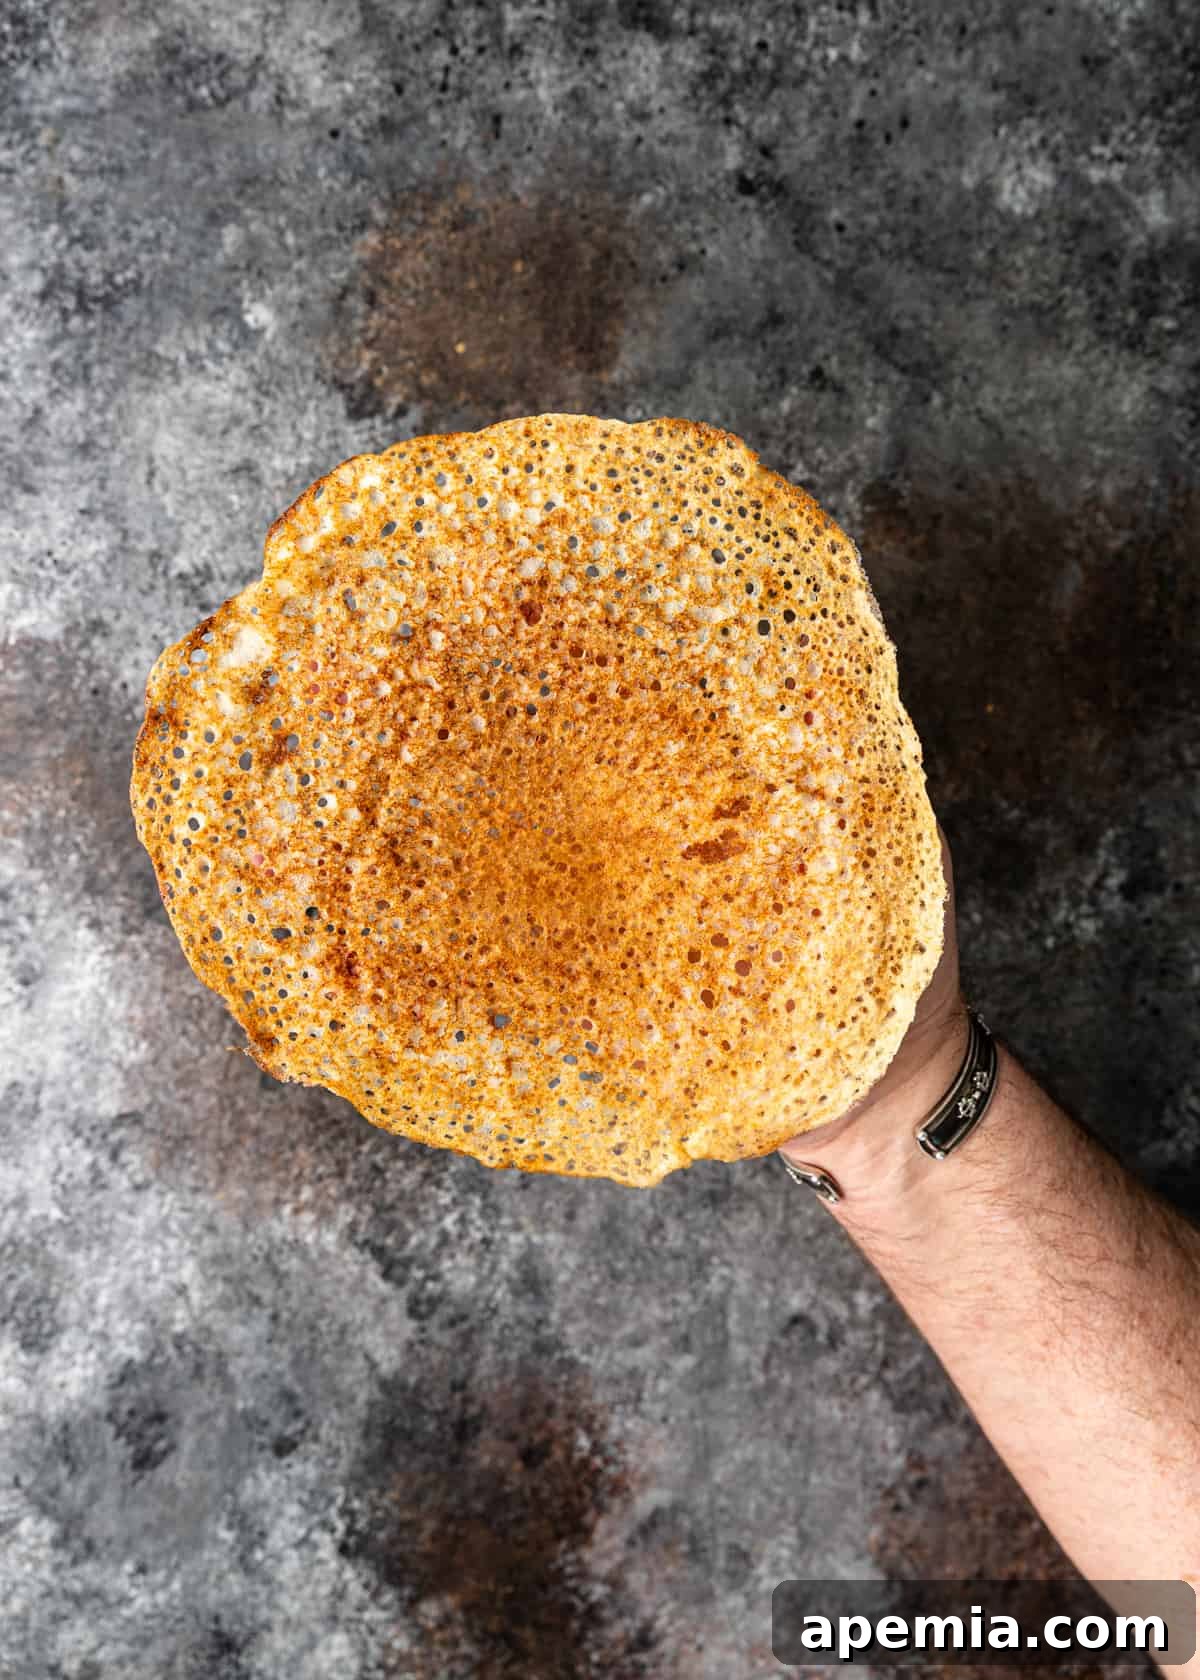
- Cook to Golden Crispness: Once the batter is spread, drizzle a small amount of ghee or oil around the edges and directly onto the center of the thinly spread crepe. Allow the Dosa to cook undisturbed for a few minutes. You’ll observe the edges beginning to lift and turn a beautiful golden-brown, signaling that it’s crisping up. For traditional, paper-thin Dosa, cooking on one side until deeply golden is sufficient. However, if you prefer a slightly more robust crepe or an extra crispy finish, you can carefully flip it and cook the other side for another minute or two until it also achieves a desirable browning.
- Serve and Repeat: Once your Dosa is cooked to your liking, gently slide a spatula underneath it to release it from the pan. Transfer the cooked crepe to a plate and cover it loosely with a clean kitchen towel or foil to keep it warm while you prepare the others. Before cooking the next Dosa, repeat the pan seasoning process: rub the griddle once more with the onion dipped in ghee or oil. Continue this pour, spread, and cook cycle with the remaining batter. Following this recipe, you should be able to produce approximately 12 to 14 delicious, perfectly crispy Dosa.
Enjoy your freshly made Dosa with your favorite fillings or chutneys!
Recommended Tools for Effortless Dosa Making
Having the right kitchen tools can significantly streamline the Dosa-making process and contribute to better results. Here are the essential items I recommend:
- Well-Seasoned Cast Iron Griddle or Pan: While a good non-stick pan can work, a heavy, well-seasoned cast iron griddle or skillet is truly superior for Dosa. Its even heat distribution is crucial for achieving that consistent golden-brown color and irresistible crispiness. Cast iron also develops a natural non-stick surface over time, making it easier to spread the batter thinly and release the Dosa cleanly.
- High-Powered Blender: A robust blender is indispensable for grinding the soaked rice and dals into an ultra-smooth batter. A standard blender might struggle to achieve the desired silky consistency without leaving gritty bits, which can affect the Dosa’s texture. My personal favorite is a Vitamix, known for its powerful motor and ability to create incredibly smooth purees.
- Instant Pot (or a Warm Spot for Fermentation): An Instant Pot is highly recommended for its “Yogurt” setting, which provides a perfectly controlled, warm environment for fermenting the Dosa batter. This consistency is key to a successful rise and tangy flavor development. If you don’t own an Instant Pot, remember to refer to the alternative oven method described earlier for a reliable fermentation solution.
- ⅓ or ½ Cup Measuring Cup: These specific measuring cup sizes are ideal for portioning out the right amount of batter for each Dosa. Consistent portions ensure uniformly sized crepes and easier spreading.
- Sturdy Ladle or Flat Spoon: While you can use the bottom of your measuring cup to spread the batter, a dedicated ladle or a flat, rounded spoon (like a pancake spreader) is often less messy and provides better control. This tool allows you to efficiently spread the batter in smooth, even circles, which is crucial for achieving thin, crispy Dosa.
Storing and Reheating Dosa: Maximizing Freshness and Flavor
While the process of mastering Dosa preparation, especially the fermentation, can be time-intensive, its wonderful aspect is the excellent shelf life of both the batter and the cooked crepes. This means you can invest time once and enjoy delicious Dosa over multiple meals!
Storing Dosa Batter: Once your Dosa batter has successfully fermented, you can easily store any unused portion in the refrigerator. Transfer the batter to a clean, airtight container, ensuring there’s still a little headspace for any continued slight expansion. Stored correctly, the fermented batter will remain fresh and viable for up to two weeks in the fridge. This allows you to prepare a large batch and enjoy freshly made Dosa whenever the craving strikes, without having to start the soaking and grinding process from scratch each time.
Storing Cooked Dosa: Fully cooked Dosa can also be stored for later enjoyment. Allow the crepes to cool completely to room temperature. Then, stack them with parchment paper in between each Dosa to prevent sticking, and place them in an airtight container. Refrigerate for up to 3 days. While they won’t be as crispy as fresh Dosa, they will still retain their delicious flavor.
Reheating Cooked Dosa: For best results when reheating cooked Dosa, a microwave works efficiently to warm them through. Alternatively, for a slightly crisper texture, you can briefly reheat them on a lightly greased griddle over medium heat until warmed and slightly re-crisped.
Share this recipe on Pinterest!
Love this recipe? Share it with the world on Pinterest.
Frequently Asked Questions About Dosa Making
The ratio of rice to urad dal is a key factor in determining the final texture of your Dosa. In this particular recipe, I utilize a 2 cups of parboiled rice to 1 cup of urad dal ratio. This specific configuration is meticulously chosen to yield beautifully golden, exquisitely crispy crepes that are thin and delicate. While other recipes might suggest variations like 3:1 or even 4:1, each yielding a slightly different outcome, my chosen ratio strikes a perfect balance for the paper-thin, restaurant-style Dosa we aim for.
Historically, some traditional Dosa recipes advocate for soaking and then grinding the urad dal and rice separately, citing subtle differences in hydration or grind consistency. However, through extensive experimentation and personal experience, I have found that soaking and processing these ingredients together yields no significant discernible difference in the ultimate taste or texture of the Dosa. To simplify the preparation process, save considerable time, and minimize effort without compromising quality, I consistently recommend soaking and blending them together. This streamlined approach makes homemade Dosa much more accessible for home cooks.
Several clear indicators signal successful fermentation of your Dosa batter. Visually, the batter should have noticeably increased in volume, appearing puffed up and aerated, often doubling in size. The surface will be dotted with numerous small air bubbles. A distinct, pleasant, and slightly sour aroma is another tell-tale sign. For an objective check, perform the “float test”: gently drop about a teaspoon of the batter into a small glass of water. If the batter is adequately fermented, it will float on the surface due to the carbon dioxide gas trapped within. If it sinks, it indicates that further fermentation is needed. In such a case, simply cover the batter again and allow it to ferment for an additional two hours, or until it passes the float test and exhibits the visual and aromatic cues.
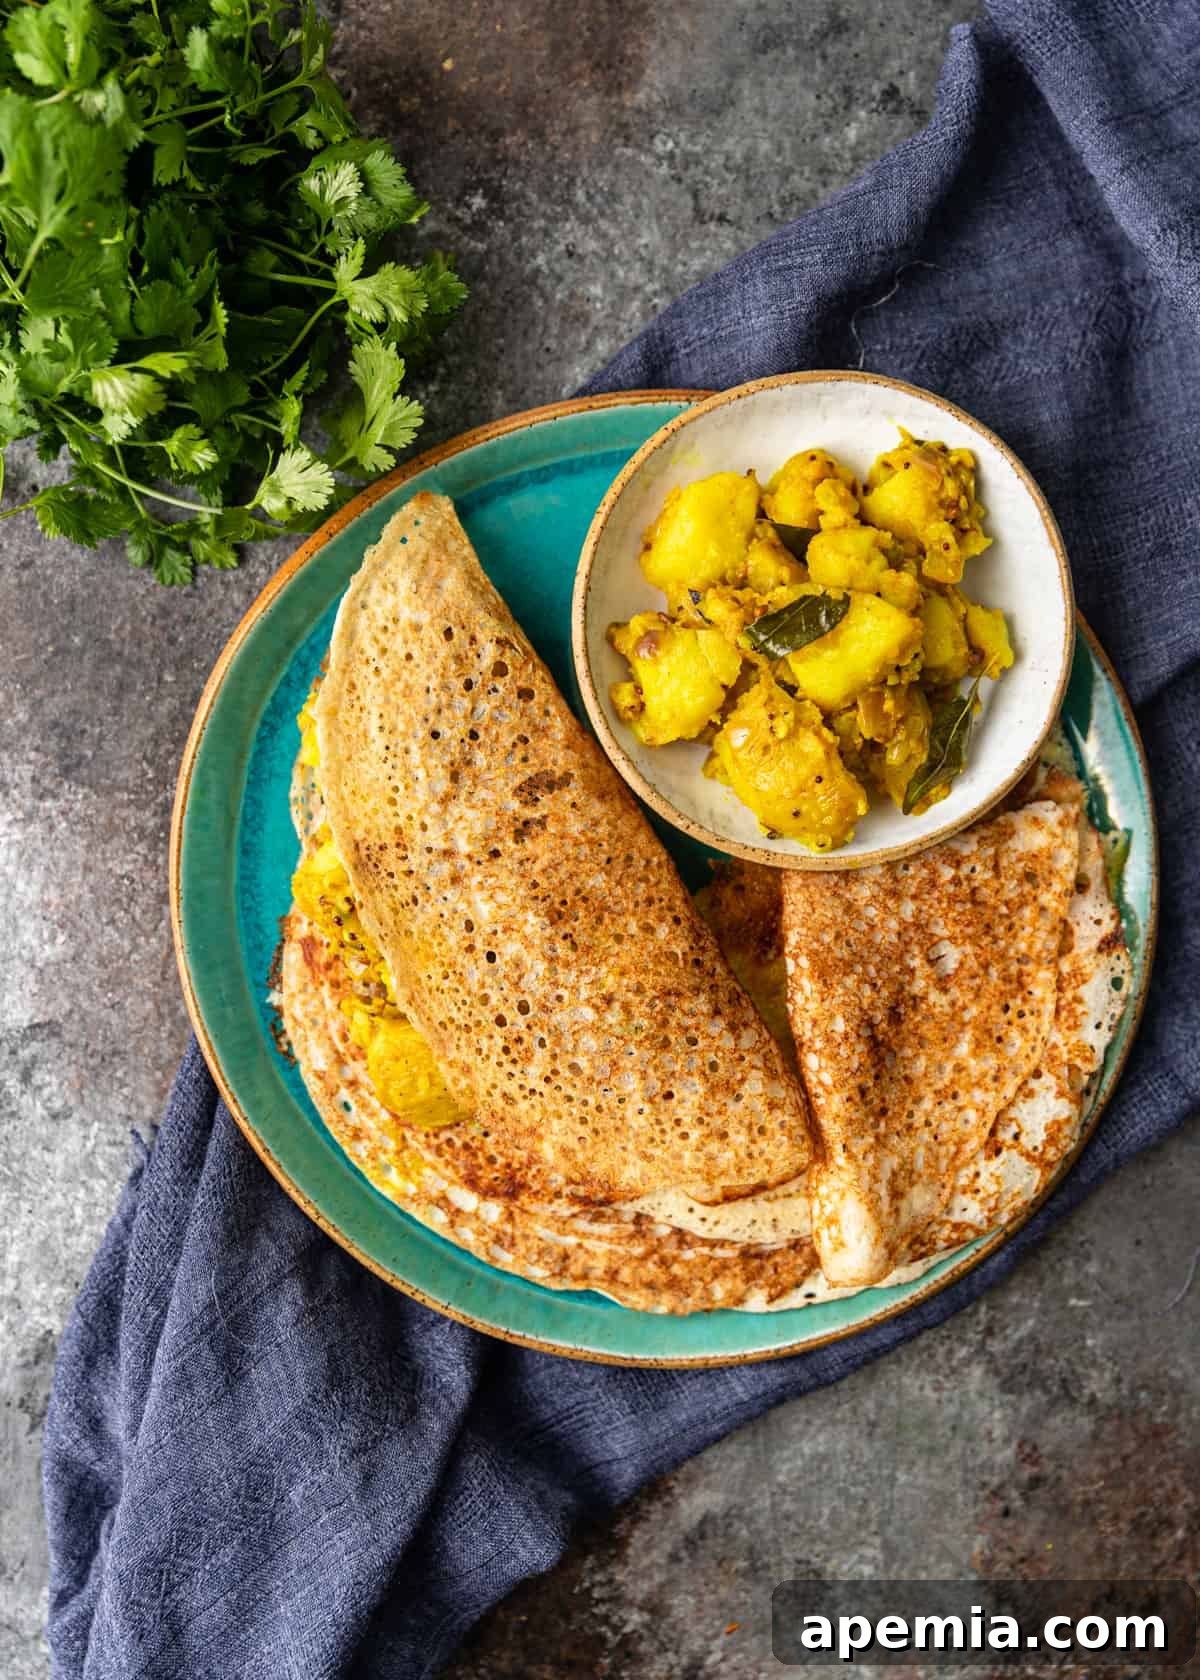
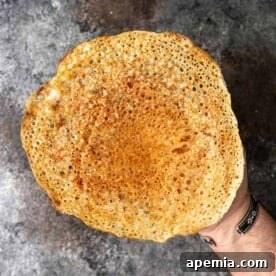
Homemade Crispy Dosa (Indian Fermented Crepes) Recipe
Pin Recipe
PrintRecipe
Ingredients
Batter
- 2 cups Parboiled Rice See Note 1
- 1 cup urad dal
- 2 tablespoon poha flattened rice optional
- 1 tablespoon chana dal
- 1 tablespoon fenugreek seeds
- 2 teaspoon sugar
- 2 teaspoon kosher salt
Cooking
- 1 medium onion optional
- Vegetable oil or ghee
Instructions
Make the Dosa Batter
-
Combine the parboiled rice, urad dal, chana dal, and optional poha in a fine-mesh sieve. Rinse thoroughly under cool running water for about a minute, gently mixing with your fingers, until the water runs clear. Discard the water. Transfer the clean mixture to a large bowl (an 8-cup measuring bowl is recommended) and cover it with fresh water by at least 2 inches. Allow the mixture to soak for a minimum of 4 hours, or ideally overnight, to ensure proper softening. (Refer to Note 2 for soaking details).
-
Working in batches, transfer half of the soaked and drained mixture to a high-powered blender (like a Vitamix). Grind this batch with 1 cup of fresh water and 1 teaspoon of sugar until it reaches a completely smooth consistency. It should resemble a thin, free-flowing pancake batter, with no gritty chunks. A batter that is too thick will hinder proper fermentation. Repeat this process with the remaining soaked rice and dal, adding another 1 cup water and 1 teaspoon sugar for the second batch.
-
Pour all the blended batter into the stainless steel inner pot of your Instant Pot. Cover the pot with a clear glass lid or a plate (do NOT use the Instant Pot’s sealing lid) to allow for air circulation. Select the “Yogurt” setting and set the time for 12 hours to facilitate optimal fermentation. (See Note 3 for alternative fermentation methods).
-
After fermentation, remove the lid. The batter should appear visibly increased in volume, thick and foamy, with numerous air bubbles on the surface, and possess a distinct, slightly sour aroma. (See Note 4 for fermentation test).
-
Add 2 teaspoons of kosher salt to the fermented batter. Using your hands or a spatula, thoroughly mix the salt into the batter for 1-2 minutes. This step is crucial for seasoning and aiding the final stages of fermentation. To confirm readiness, drop a teaspoon of batter into a glass of water; if it floats, it’s perfectly fermented. If it sinks, cover and ferment for an additional 2 hours.
Cook the Dosa
-
Heat a large cast iron skillet (or a high-quality non-stick pan) or griddle over medium-high heat. To check the temperature, sprinkle a few drops of water; they should sizzle and evaporate immediately.
-
Cut a medium onion in half and insert a fork into the root end. Dip the cut side of the onion into some vegetable oil or melted ghee. Use this onion to rub a thin, even layer of oil or ghee over the entire surface of the hot pan. Set the onion aside for repeated use.
-
Using a ⅓ cup or ½ cup measure of batter (depending on your pan or griddle size, typically 12 or 14 inches), pour it into the center of the pan. Immediately, use the bottom of the measuring cup, a ladle, or a flat spoon to spread the batter in a circular motion from the center outwards, creating the thinnest possible layer. NOTE: Achieving a perfectly thin, even layer requires practice with the right amount of pressure. Be patient, as there is ample batter available for learning and perfecting your technique!
-
Drizzle a little more oil or ghee around the edges and onto the center of the Dosa. Allow it to cook for a few minutes until the bottom begins to turn a golden brown and the edges start to lift. For a classic crispy Dosa, cooking one side until golden is sufficient. For extra crispiness, you may carefully flip it and cook the other side briefly.
-
Using a spatula, gently scrape the sides of the Dosa to release it from the pan. Transfer the cooked crepe to a plate and cover to keep warm. Before cooking the next Dosa, re-season the pan with the onion dipped in oil or ghee. Repeat this process with the remaining batter. This recipe typically yields around 12 to 14 delicious Dosa.
Notes
- Parboiled rice is also commonly known as idli rice. If “idli rice” is difficult to locate, check for brands like Mahatma in the USA, which offer parboiled rice in 16oz packages, perfectly suitable for the 2 cups required in this recipe. It’s often labeled as “rice for paella – Parboiled Medium Grain Rice.”
- My extensive testing revealed that soaking the rice and dals separately did not produce any significant difference in the final taste or texture of the Dosa. Therefore, to simplify the preparation and save time, I recommend soaking and mixing all the ingredients together.
- If you do not own an Instant Pot for fermentation, don’t worry! You can create a warm, consistent environment in your oven: Preheat your oven to its lowest setting for 5 minutes, then turn it off completely. Place your bowl of Dosa batter (in a baking tray to catch any spills) loosely covered with a kitchen towel on the lowest rack. Close the oven door and turn the oven light ON. Allow the batter to ferment for a minimum of 8 hours; for colder ambient temperatures, extend the fermentation time to 12 hours.
- To confirm successful fermentation, perform the “float test”: drop a teaspoon of the batter into a small glass or bowl of water. If the batter is adequately fermented, it will float on the surface due to the trapped gases. If it sinks, allow it to ferment for another two hours and re-test.
Nutrition
The information shown is an estimate provided by an online nutrition calculator. It should not be considered a substitute for a professional nutritionist’s advice.