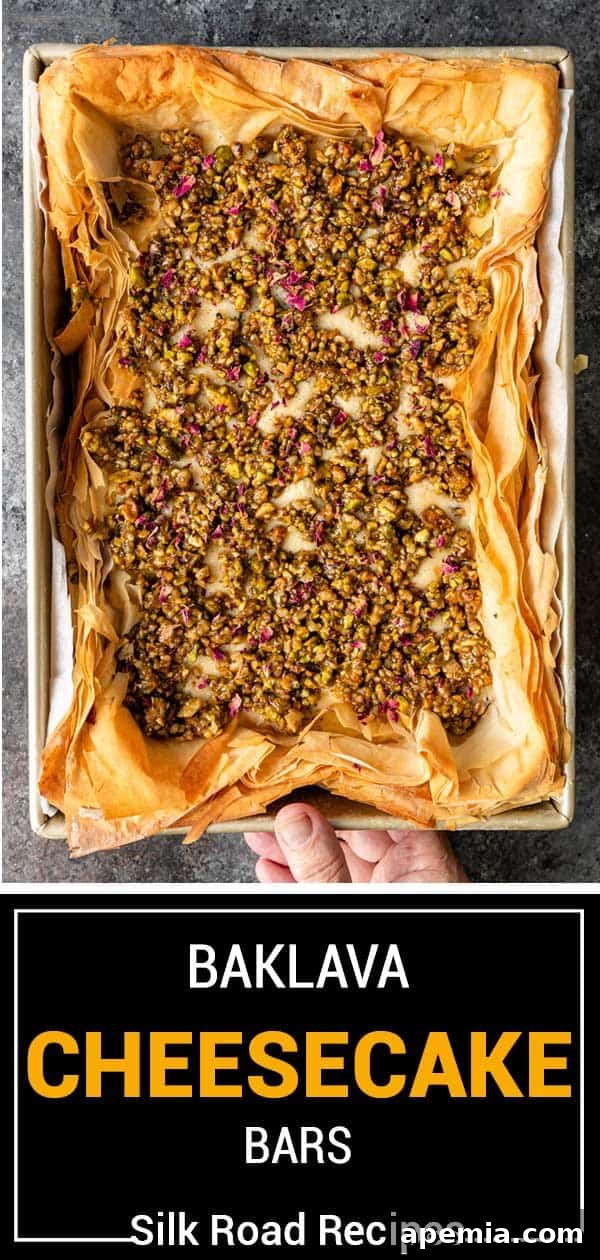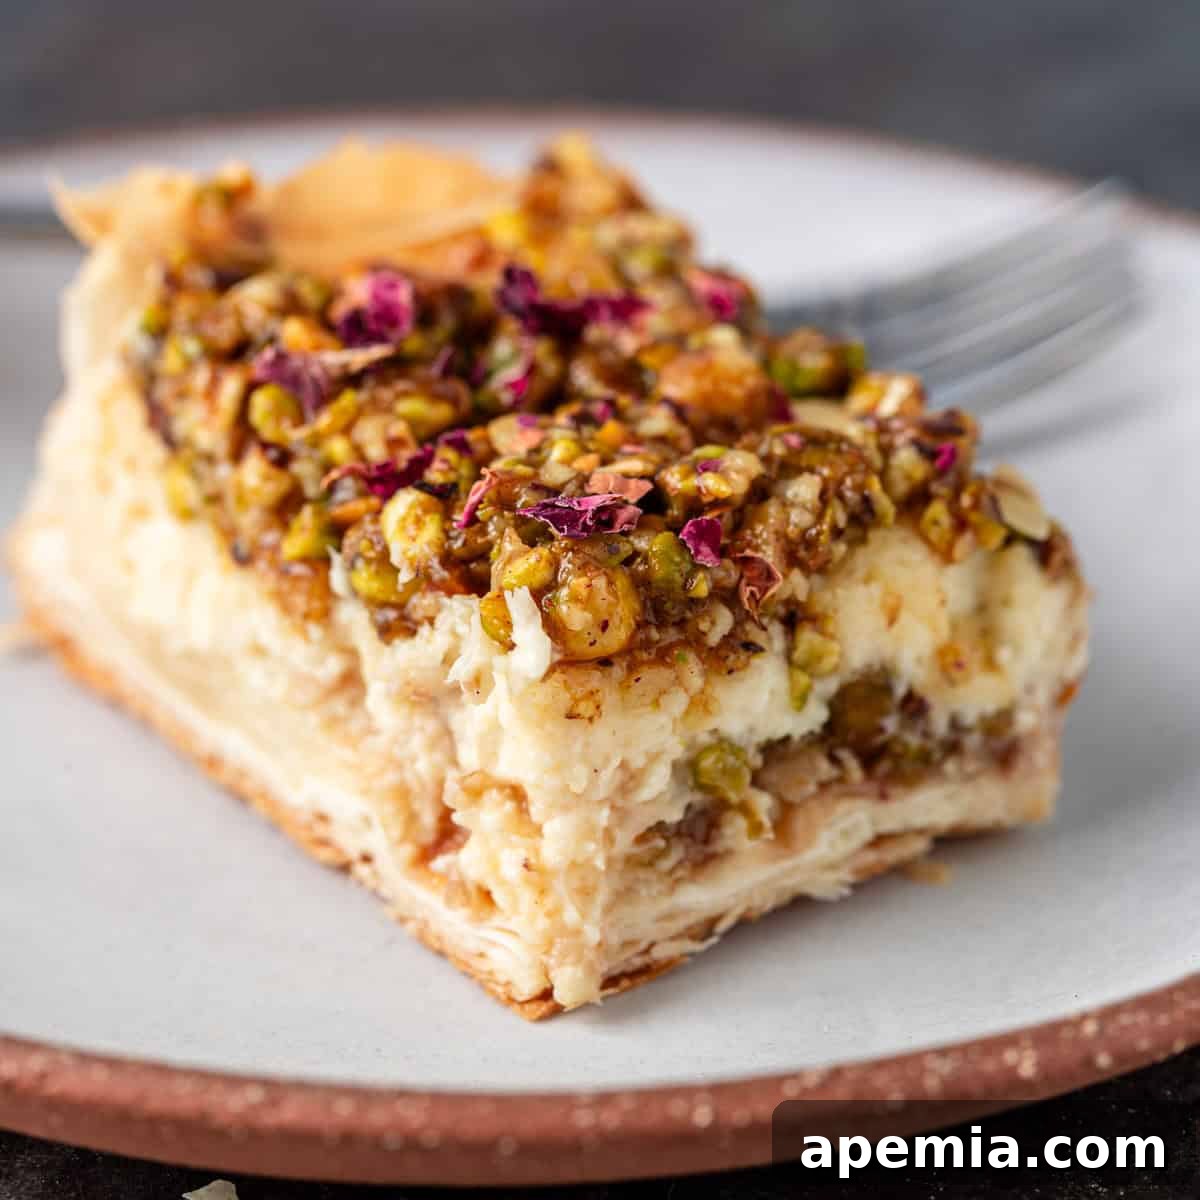
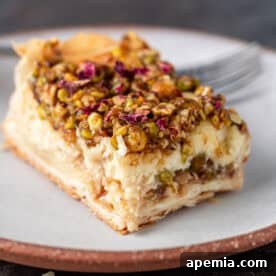
Experience the unparalleled indulgence of our Baklava Cheesecake Bars – a truly luxurious, rich, and creamy dessert that beautifully merges two iconic treats. Crafted into convenient bars, this show-stopping creation features delicate, crispy layers of golden phyllo dough, a decadent nutty topping infused with aromatic spices and sweet honey, all crowned with an elegant sprinkle of dried rose petals. It’s a dessert that captivates both the palate and the eye, promising an unforgettable culinary experience that perfectly balances tradition with a modern twist.
Few desserts command attention quite like traditional baklava and a classic cheesecake. Each holds a cherished spot in the culinary world, beloved for its distinct flavors and textures. But what if you could combine the best elements of both into one magnificent creation? Our Baklava Cheesecake Bars do exactly that, offering a harmonious blend that is surprisingly simple to make and elegantly easy to serve, transforming any gathering into a truly special occasion. This recipe celebrates the rich heritage of both desserts, creating a unique and irresistible treat that will leave a lasting impression.
A Fusion of Sweet Traditions: The Story Behind Baklava and Cheesecake
While many readily associate baklava with its rich heritage in Greece and the broader Middle East, fewer might realize that cheesecake, in its earliest forms, also boasts fascinating ties to ancient Greek culture. The concept of a sweetened cheese cake can be traced back to ancient Greece, where it was served at the first Olympic Games in 776 B.C. as an energy-boosting treat for athletes. Over centuries, this humble delicacy traveled, evolved, and diversified across continents, leading to the myriad of cheesecake variations we know today, from the dense, creamy New York style to the light, fluffy Japanese jiggly cheesecake. Despite these transformations, its core appeal—a rich, satisfying, and often decadent flavor—has remained constant.
Baklava, on the other hand, is a pastry with deeply rooted origins in the Ottoman Empire, widely enjoyed across the Middle East, Central Asia, and the Mediterranean. Its intricate layers of paper-thin phyllo dough, generously buttered and filled with chopped nuts, then drenched in a sweet syrup, represent a pinnacle of dessert craftsmanship. The mere mention of baklava evokes images of bustling bazaars, ancient traditions, and celebratory feasts. Our recipe pays homage to these rich histories by artfully weaving together the crispy, honeyed essence of baklava with the smooth, tangy indulgence of a classic cheesecake, resulting in a dessert that is both familiar and excitingly new. It’s a culinary journey that brings together centuries of flavor into every bite, perfect for those who appreciate both tradition and innovation in their desserts.
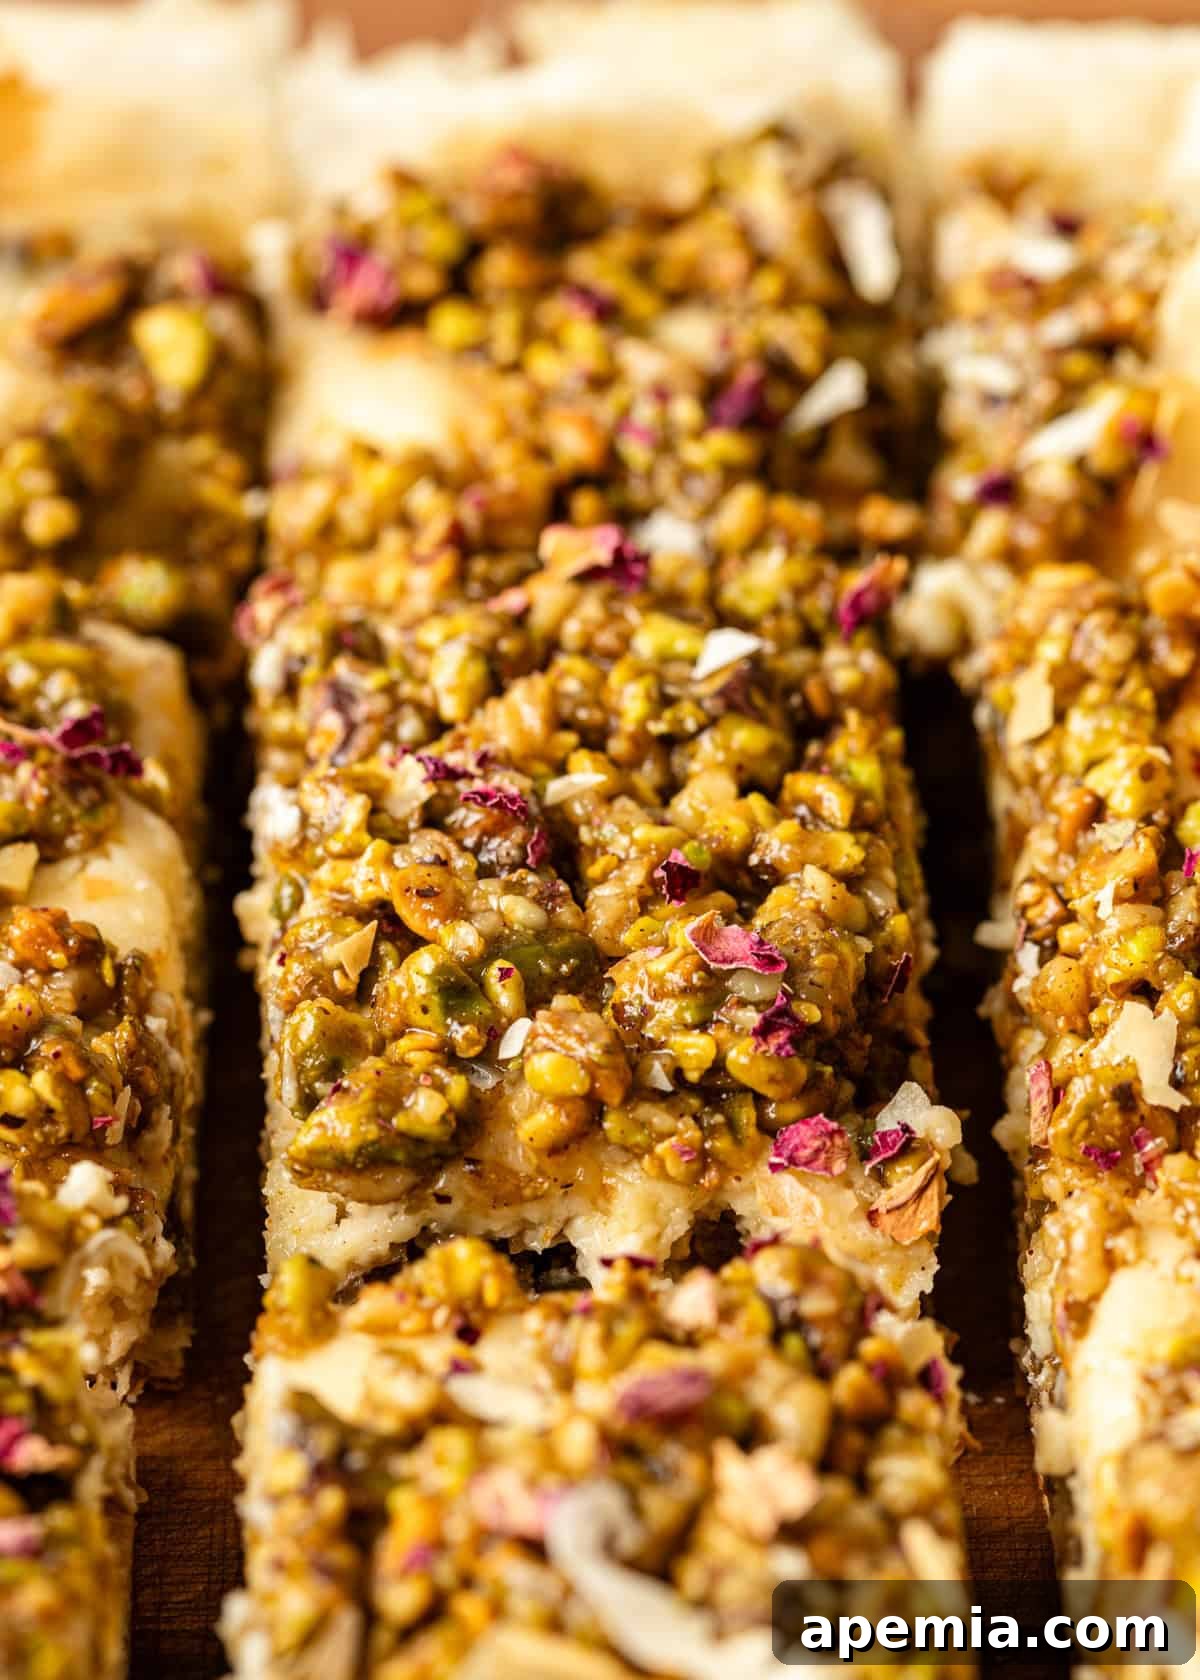
Table of Contents
- The Magic of Baklava Cheesecake Bars
- Achieving Perfect Phyllo Edges
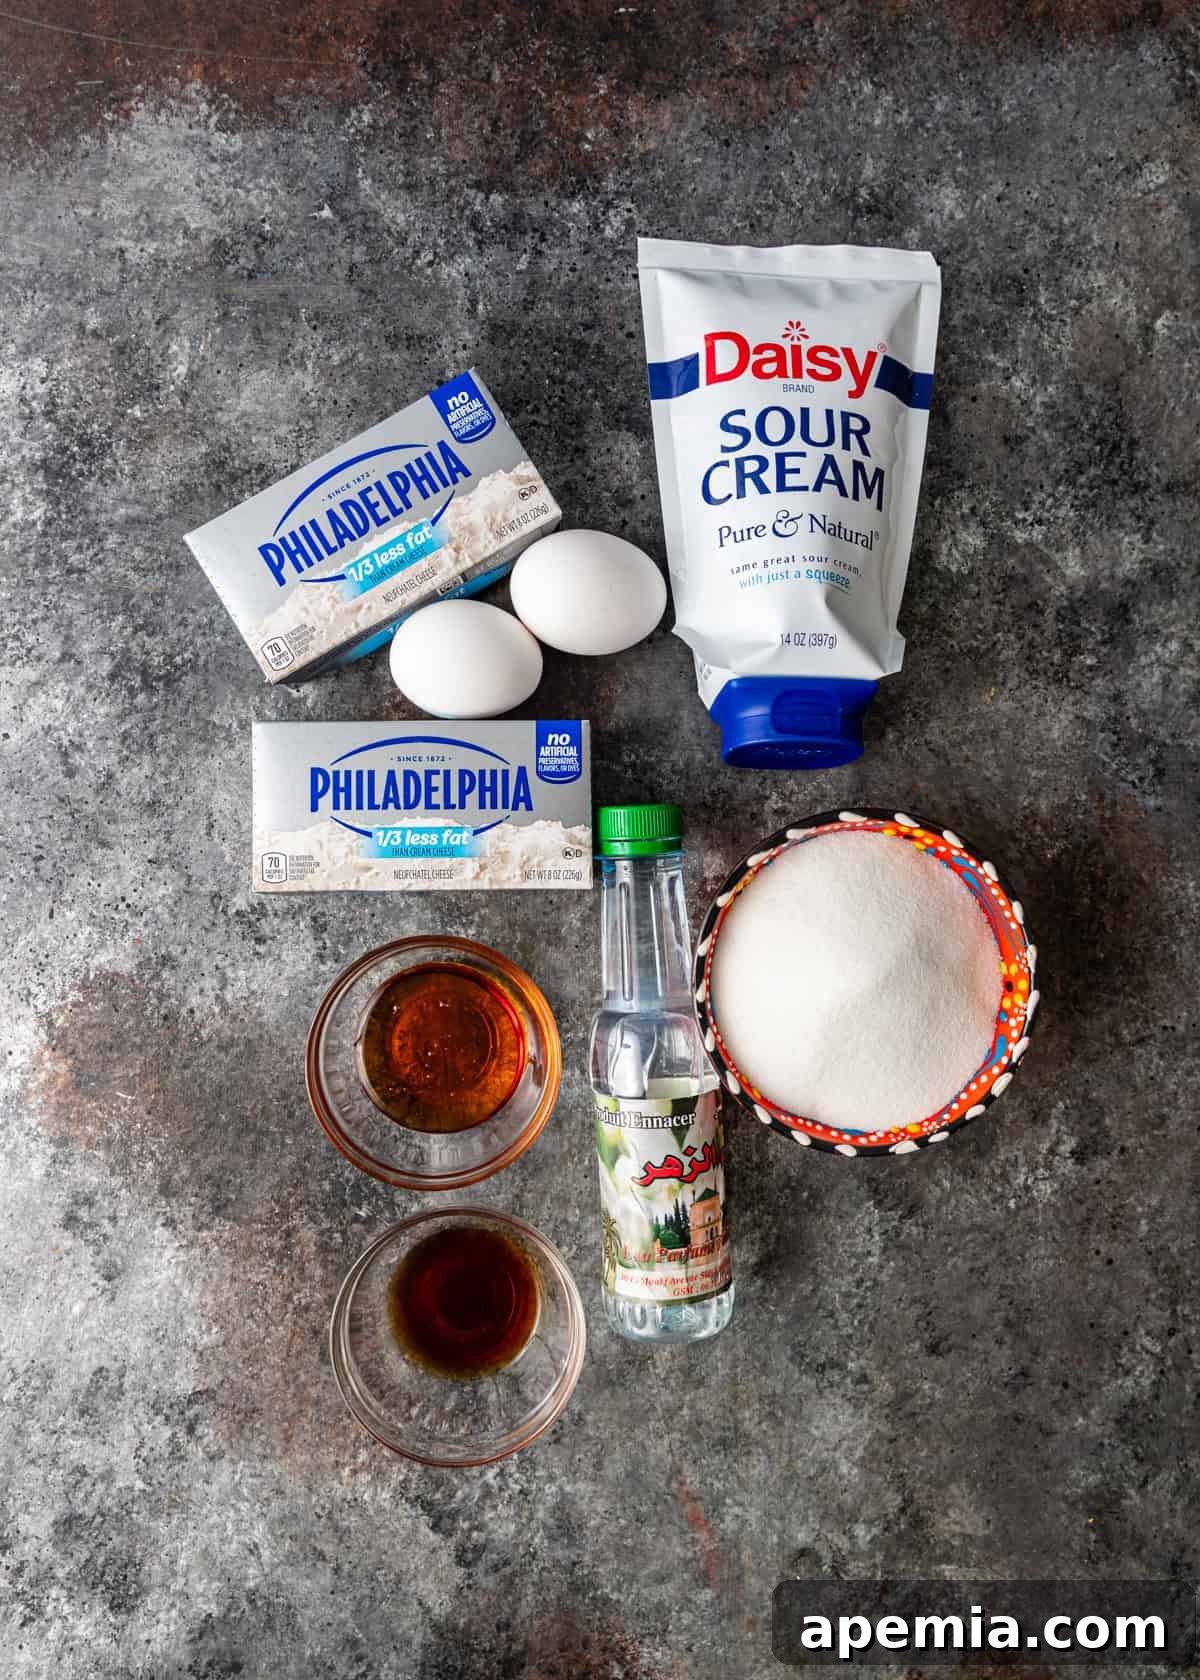
- Essential Ingredients & Smart Substitutions
- Step-by-Step Guide to Making Baklava Cheesecake
- Recommended Baking Tools for Success
- Storing & Freezing Your Cheesecake Bars
- Frequently Asked Questions
- Baklava Cheesecake Bars Full Recipe
The Magic of Baklava Cheesecake Bars: A Symphony of Flavors and Textures
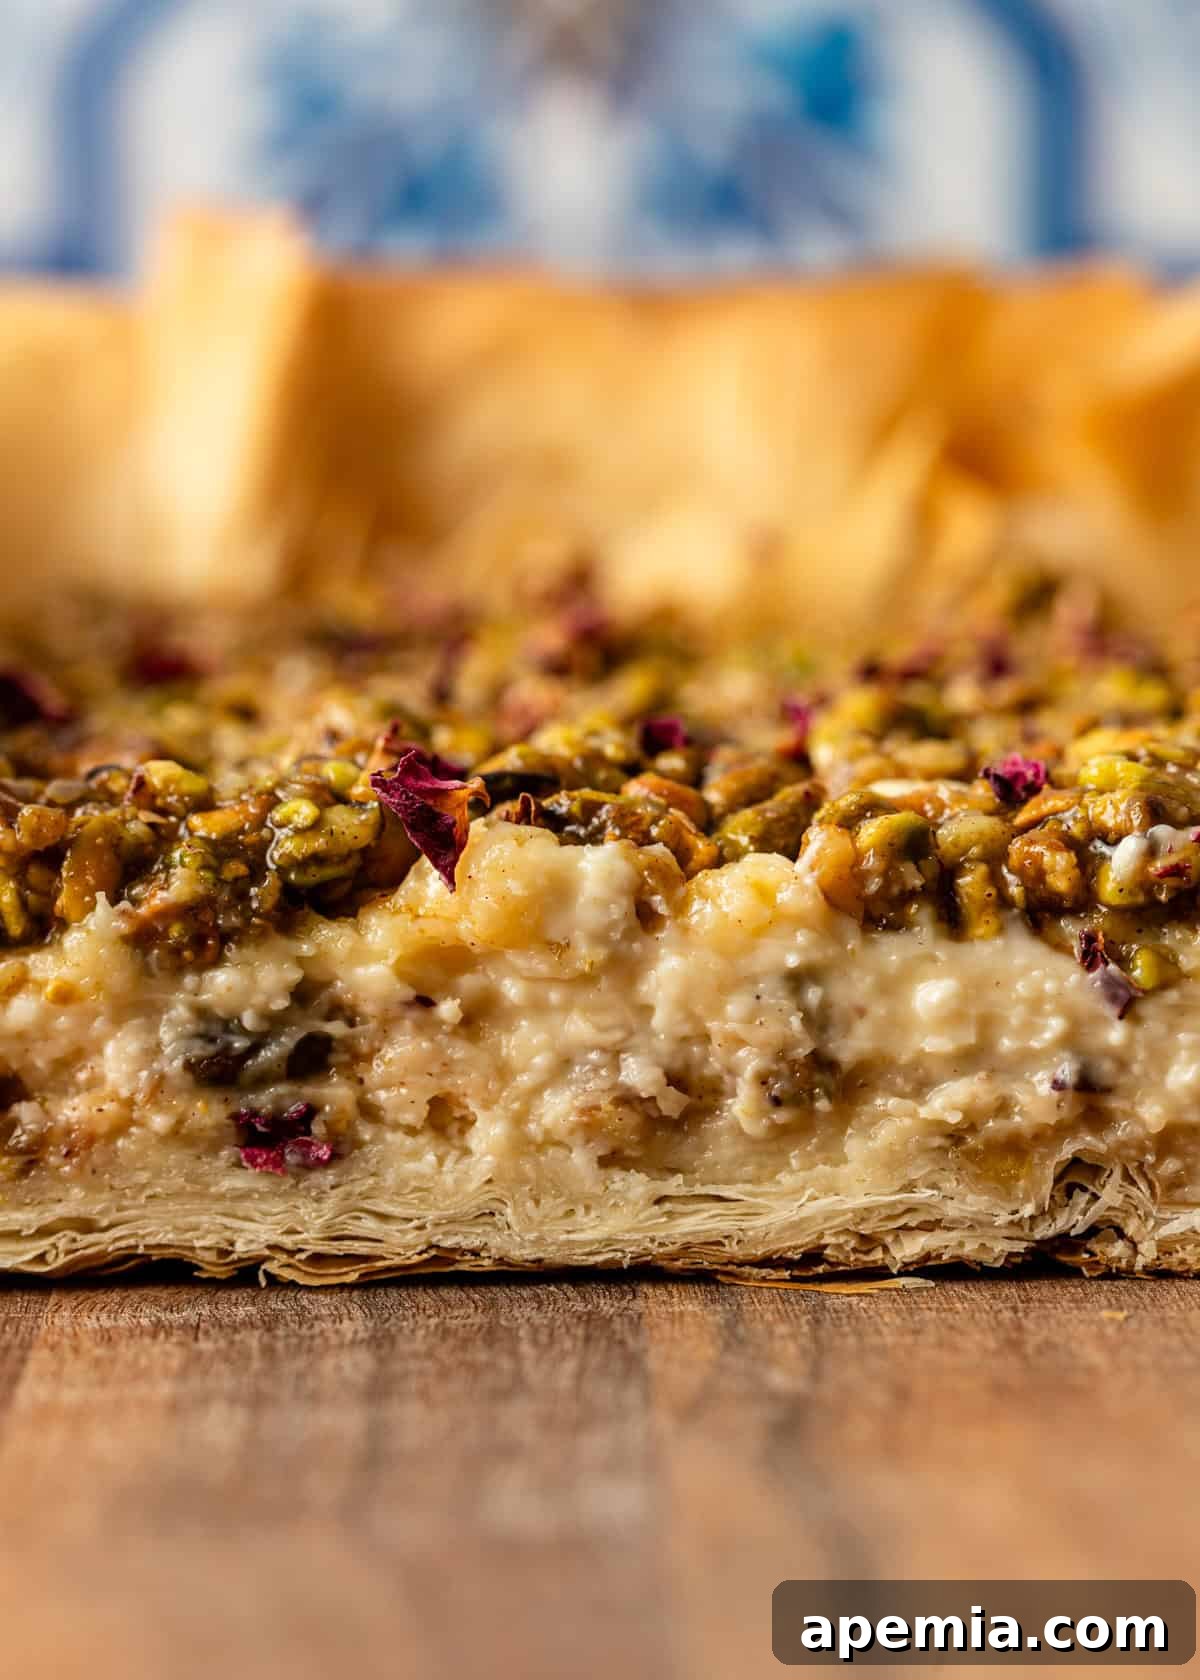
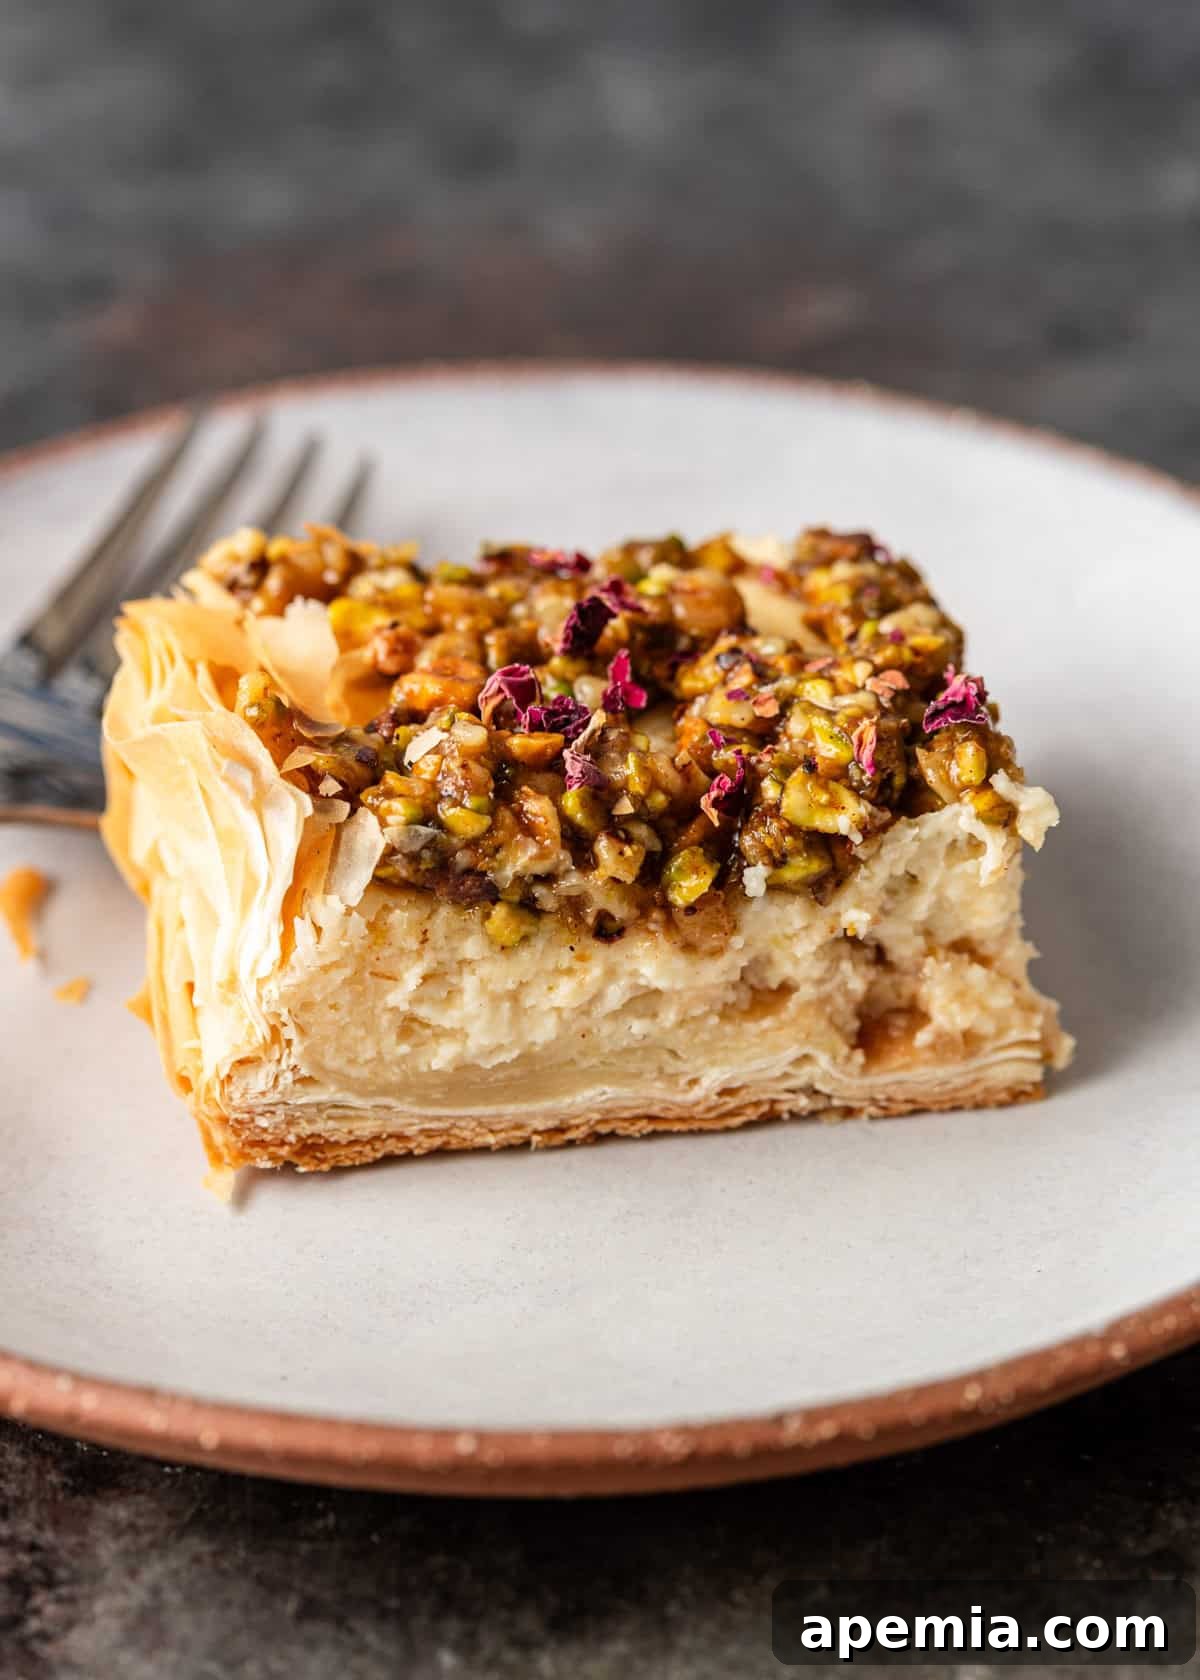
My culinary passion often revolves around finding innovative ways to elevate classic dishes or infuse them with a unique, exciting twist. This baklava cheesecake recipe is a perfect embodiment of that philosophy. The sticky-sweet nut and honey topping, a hallmark of traditional baklava, delivers an exquisite crunch that stands in delightful contrast to the unbelievably smooth and creamy cheesecake layer underneath. Each bite is a journey through layers of flavor and texture – the delicate crispness of the phyllo, the rich, aromatic nut mixture, and the tangy, velvety cheesecake. The warm notes of cinnamon perfectly complement the earthy nuts and sweet honey, while the creamy cheesecake adds a refreshing counterpoint. And for that final touch of elegance and a subtle floral aroma, a sprinkle of delicate dried rose petals elevates each slice, making it look as though it just stepped out of a high-end bakery display case.
Beyond its incredible taste and stunning presentation, serving this dessert in bar form makes it incredibly convenient for entertaining. No need for individual plates and elaborate slicing for a whole round cheesecake; these bars are perfectly portioned and easy to handle, ideal for potlucks, parties, or simply enjoying as a delightful everyday treat. The combination of familiar comfort and exotic flair ensures these Baklava Cheesecake Bars will be the star of any dessert spread, offering a sophisticated yet approachable indulgence.
Expert Tip
Achieving Perfect Phyllo Edges
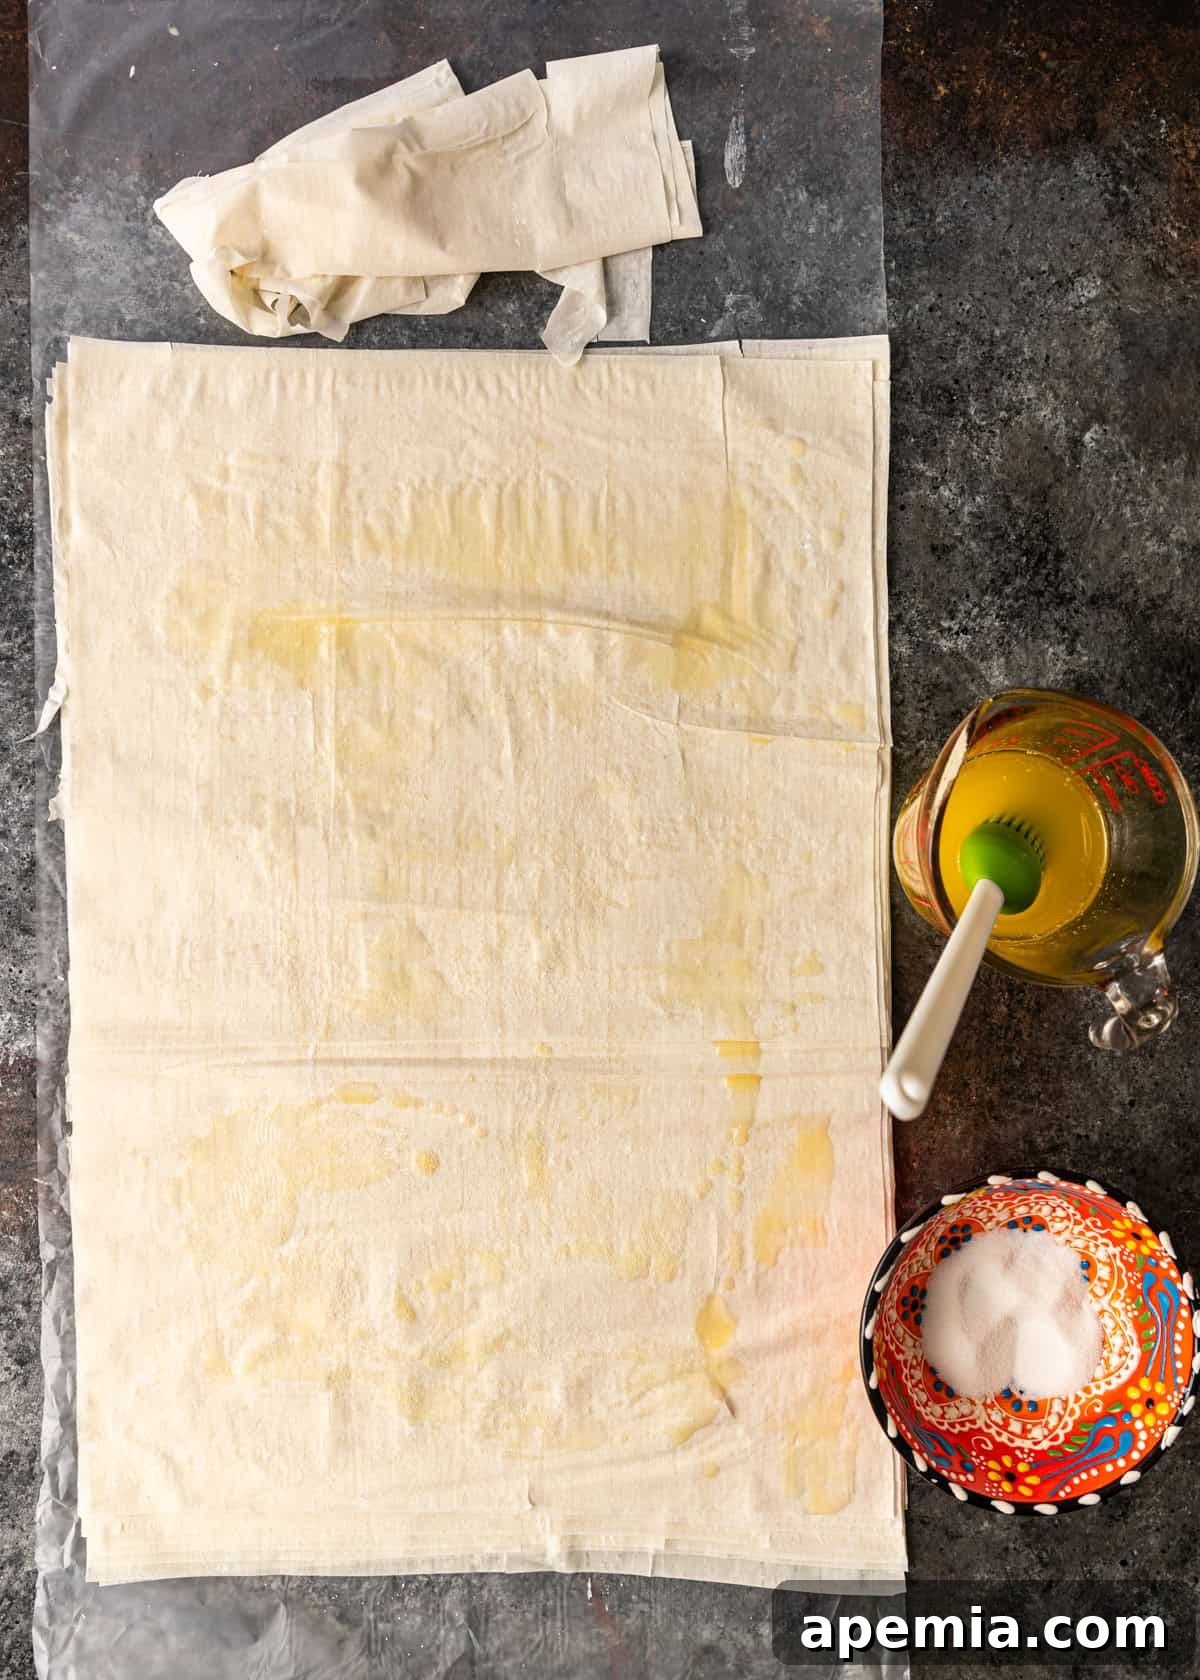
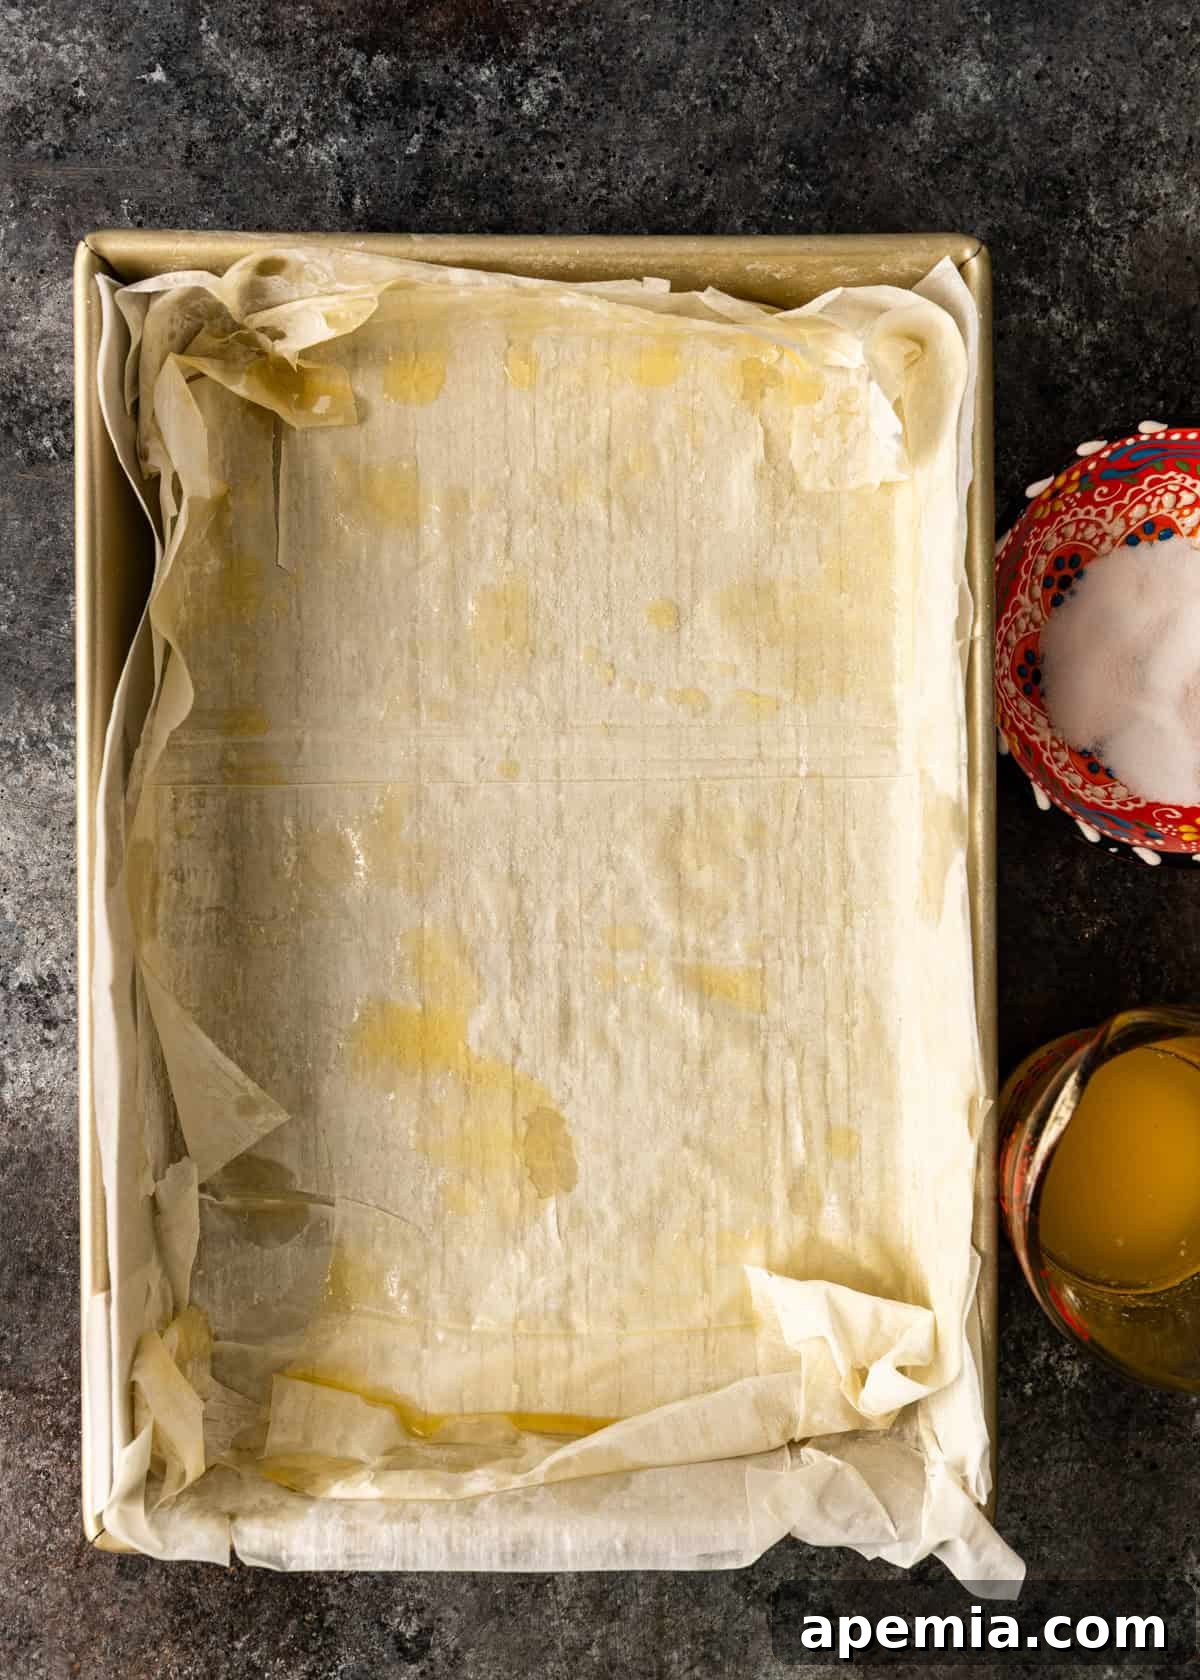
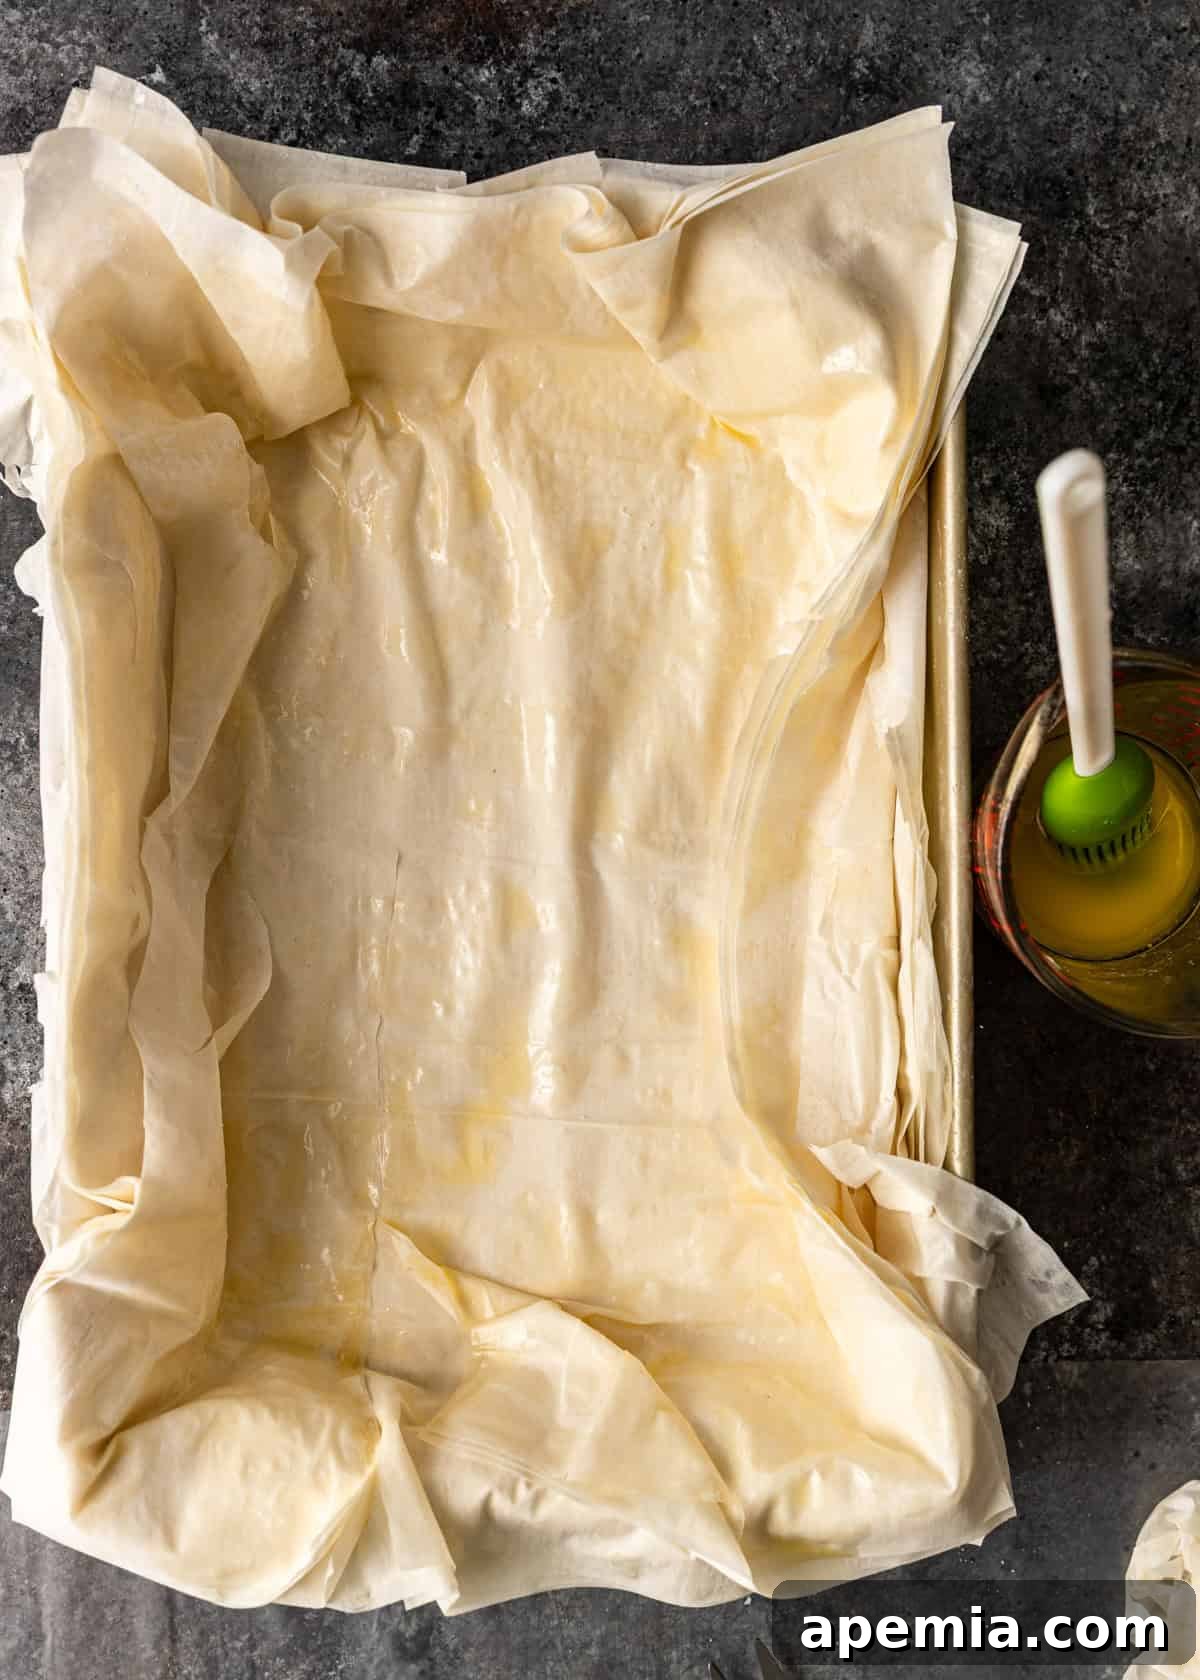
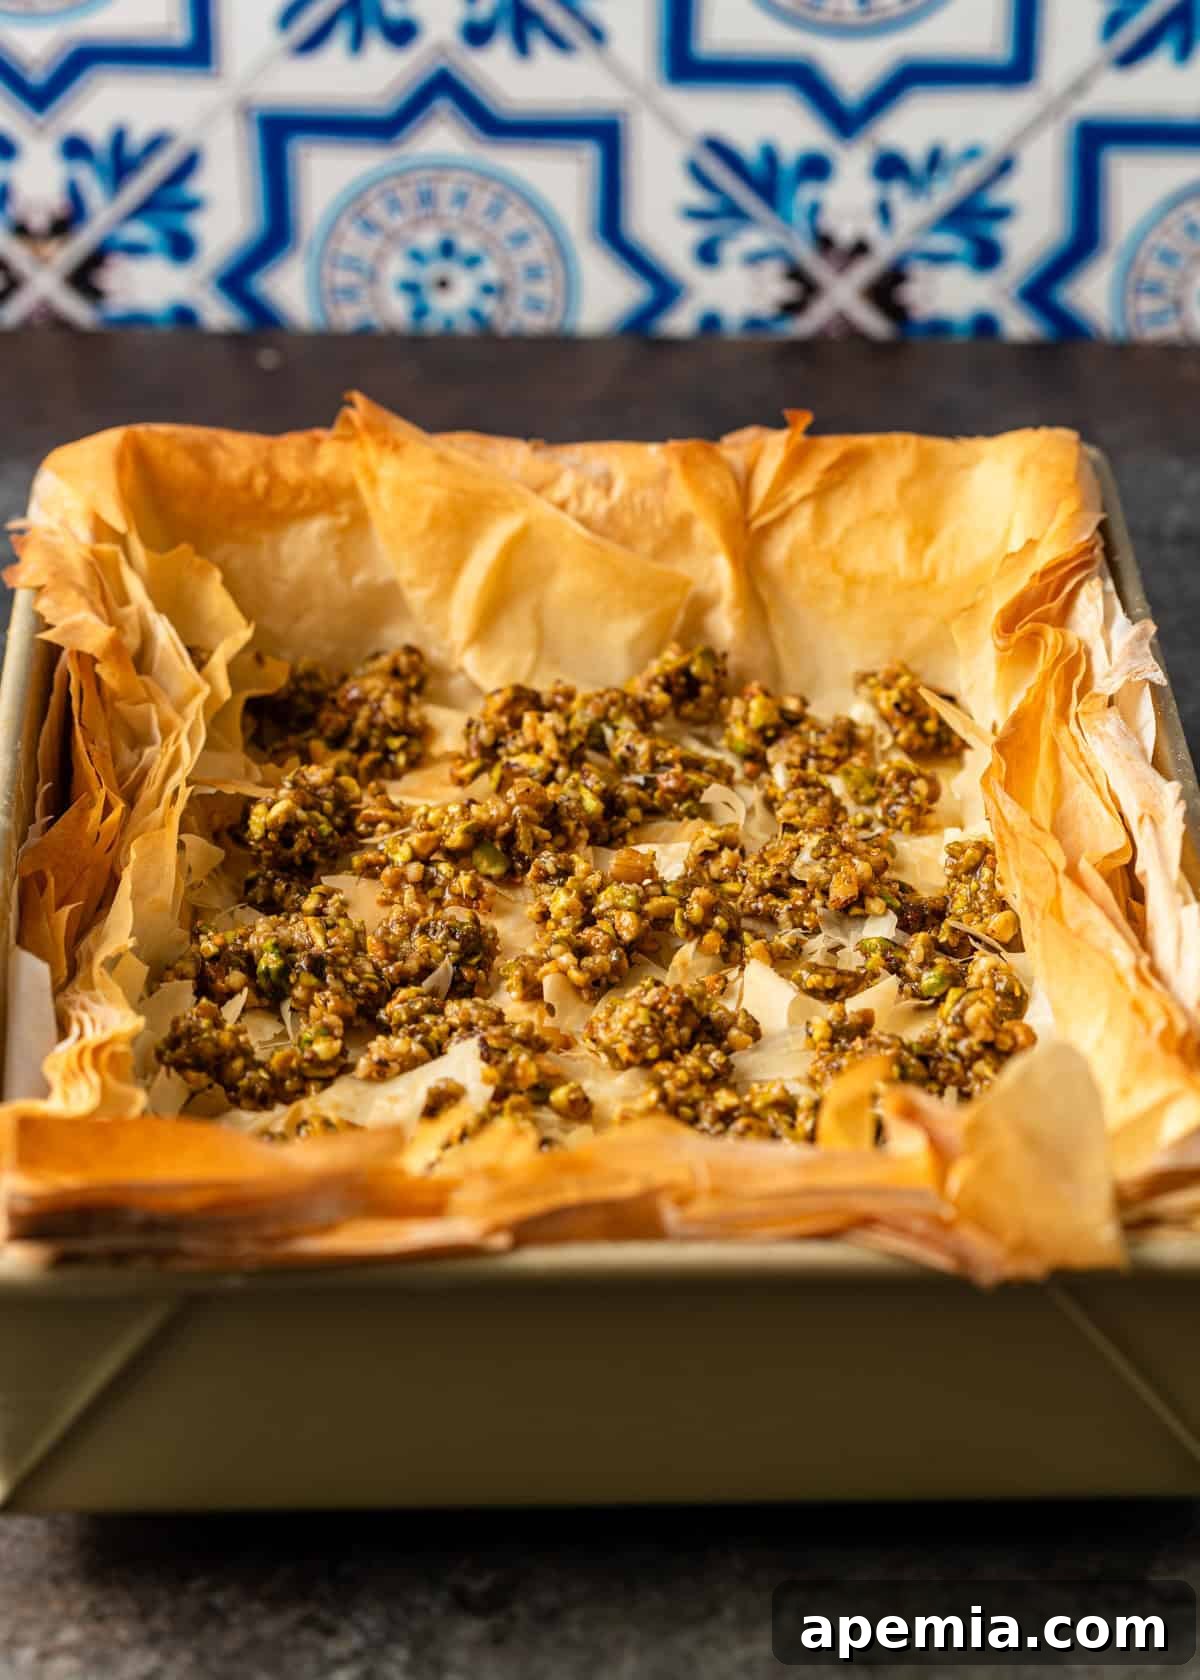
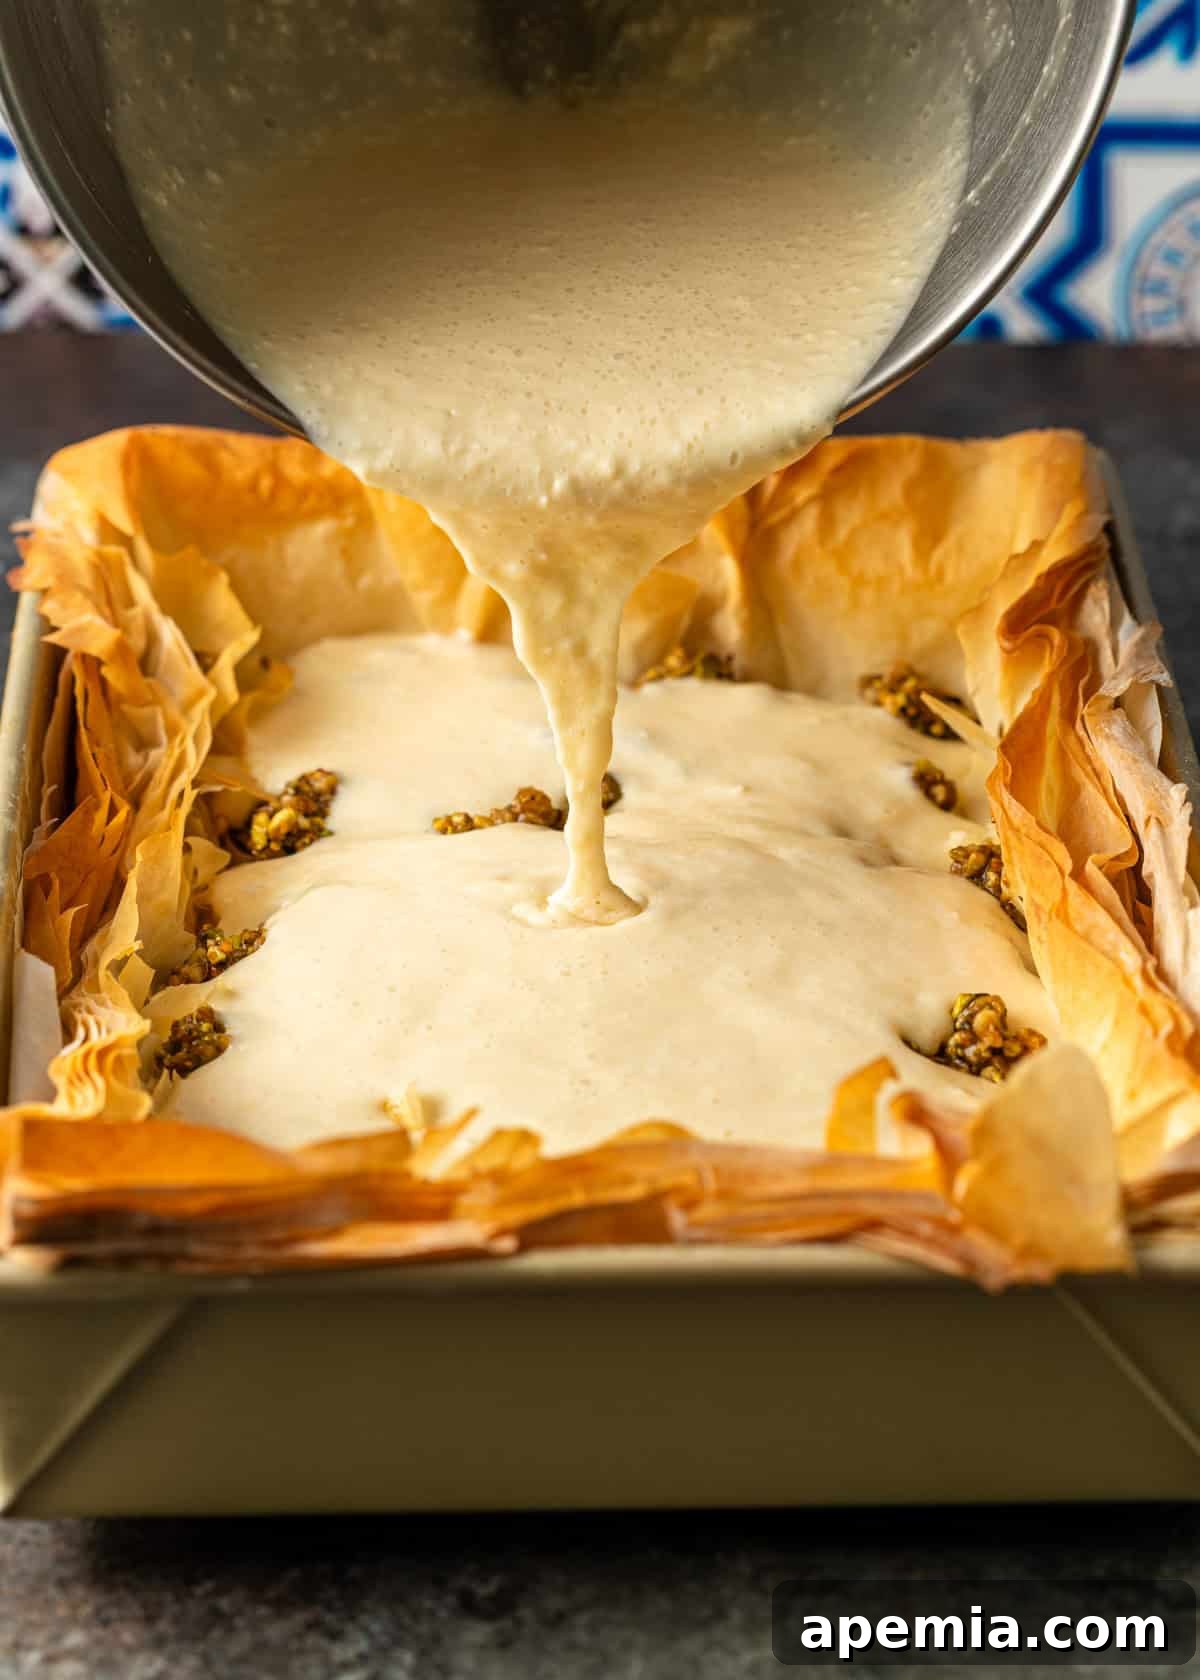
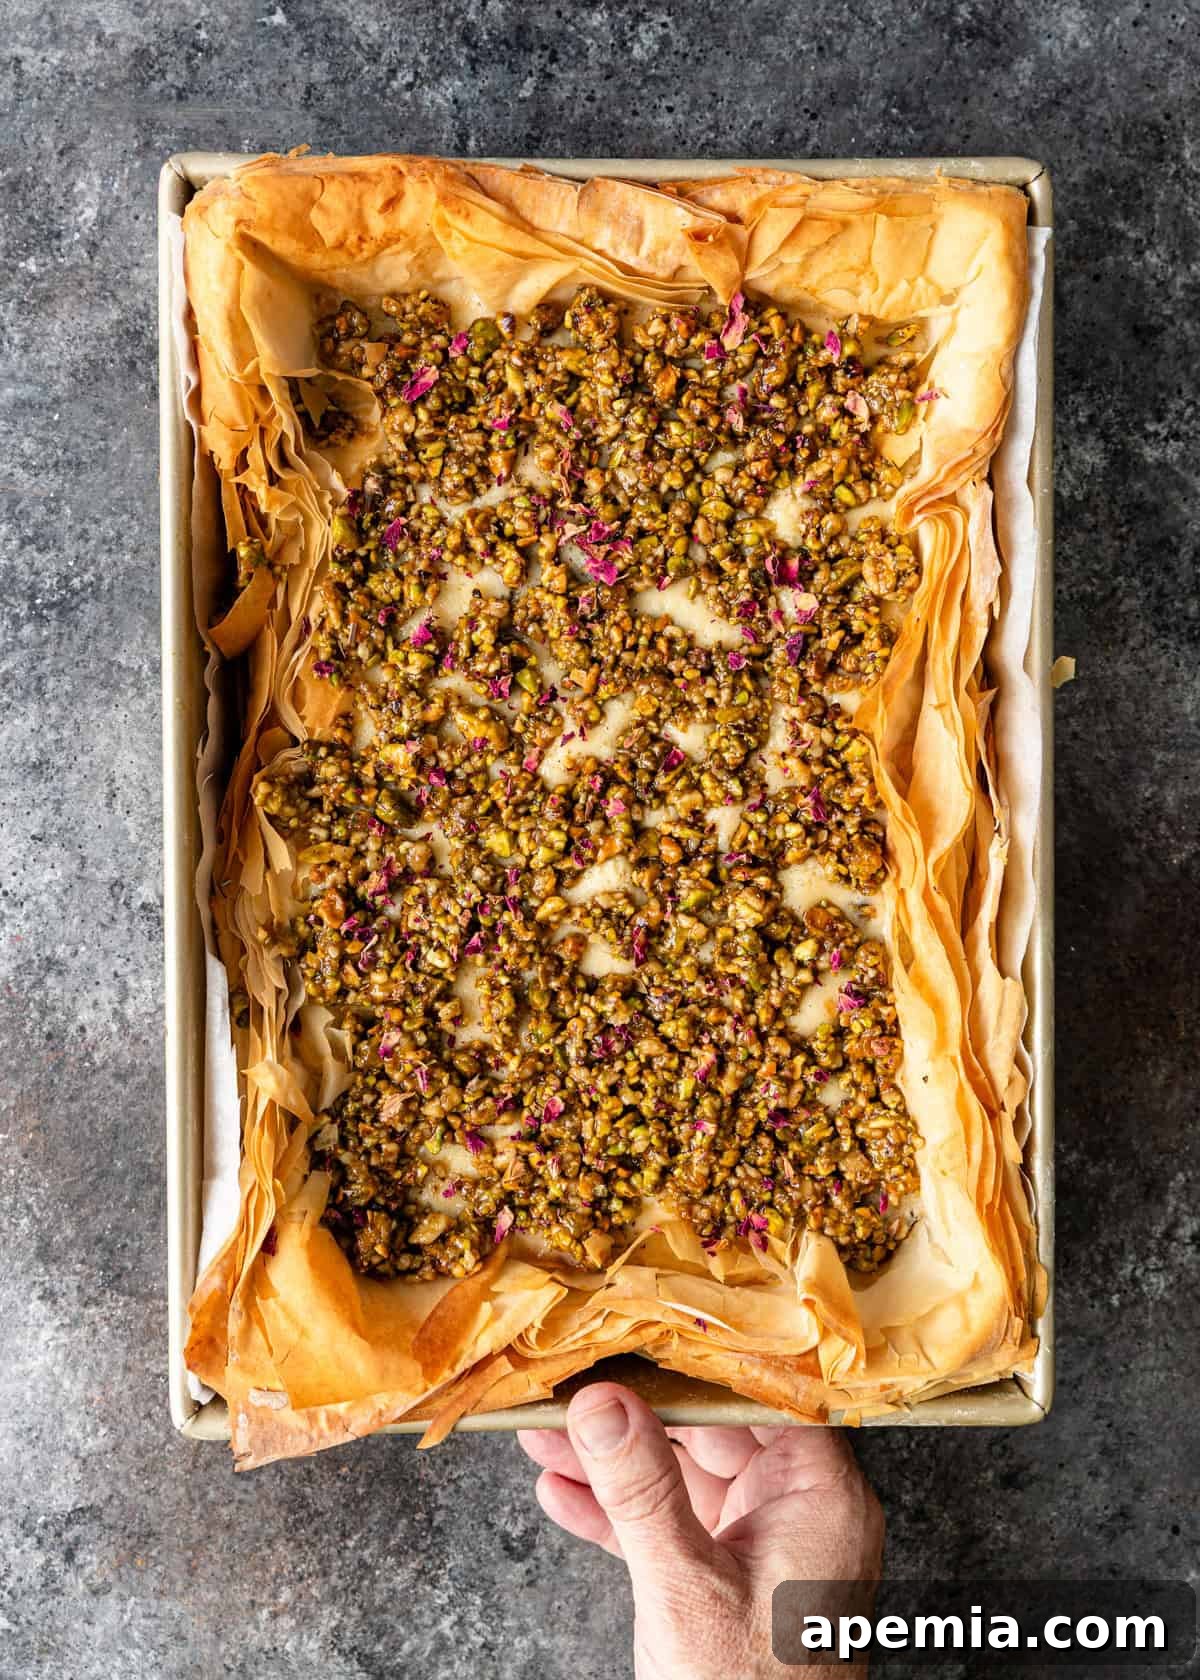
When preparing the phyllo crust, you have a choice in how your edges will turn out, influencing both presentation and texture. For a clean, uniform look without crispy phyllo edges extending upwards after baking: carefully center your baking pan on the stack of phyllo dough and trim all around the pan to match its dimensions precisely. Save these trimmings for later (as detailed in the recipe instructions for crumbling into the base). Then, meticulously follow the butter and sugar layering as directed, ensuring the phyllo stays within the pan’s confines. This method ensures that the entire crust remains neatly contained, preventing any phyllo from curling up or becoming overly crispy on the sides. However, if you adore the delightful, extra-crispy phyllo edges that are a hallmark of traditional baklava (as often pictured), simply allow the phyllo sheets to extend slightly up the sides of the pan. This offers the best of both worlds for those who appreciate either a tidy presentation or an additional textural crunch!
Essential Ingredients & Smart Substitutions
(A full list of ingredients and precise quantities can be found in the recipe card below.)
- Phyllo Dough: This incredibly thin, delicate Greek pastry dough is the secret to the signature crispy, flaky texture that defines baklava. When working with phyllo, remember it dries out incredibly quickly, so always keep unused sheets covered with a slightly damp (not wet) paper towel or a clean kitchen towel. For best results, allow it to thaw completely in the refrigerator overnight before use. Never try to force thaw it at room temperature or in a microwave, as it will stick together and become unusable.
- Unsalted Butter: Use unsalted, melted butter for brushing the phyllo layers and incorporating into the filling. The butter is crucial for achieving that golden-brown crispness and rich flavor in the phyllo. Using unsalted butter allows you to control the overall saltiness of the dessert. Clarified butter (ghee) can also be used for an even purer butter flavor and a superior crispy result, as it has no water content.
- Granulated Sugar: Essential for adding sweetness to both the delicate phyllo layers and the luxurious cheesecake filling. When sprinkled between phyllo sheets, it helps create additional crispness and a subtle caramelization. For a slightly different flavor profile in the cheesecake, you could experiment with a mix of granulated sugar and light brown sugar, though granulated is traditional for a clean, sweet taste.
- Full-Fat Cream Cheese: The cornerstone of a truly rich, smooth, and decadent baklava cheesecake filling. For the smoothest, lump-free mixture, ensure your cream cheese is fully softened to room temperature before mixing. This allows it to blend seamlessly with other ingredients. Low-fat varieties are not recommended as they can significantly alter the texture, often leading to a less creamy and more watery cheesecake.
- Sour Cream: This ingredient is vital for deepening the flavor of the creamy filling and introducing a subtle, refreshing hint of tang that beautifully cuts through the sweetness. It also significantly contributes to the cheesecake’s overall smooth, velvety texture and helps prevent surface cracks during baking. Like the cream cheese, it’s best to bring sour cream to room temperature before mixing for optimal blending.
- Large Eggs: Eggs act as the primary binding agent for the creamy cheesecake mixture, helping it set into a smooth, slightly fluffy, yet firm texture during baking. Ensure they are at room temperature to prevent the batter from curdling and to achieve a uniformly smooth and well-emulsified mixture.
- Pure Vanilla Extract: A generous splash of pure vanilla extract is essential for rounding out all the flavors and enhancing the overall sweetness of the baklava cheesecake, providing a comforting, familiar warmth that balances the exotic notes.
- Orange or Rose Water: While optional, the addition of orange blossom water or rose water is highly recommended. These exquisite floral essences provide an authentic Mediterranean/Middle Eastern aromatic note that truly elevates the dessert, making it more reminiscent of traditional baklava. A little goes a long way, so use sparingly to impart a delicate fragrance without overpowering.
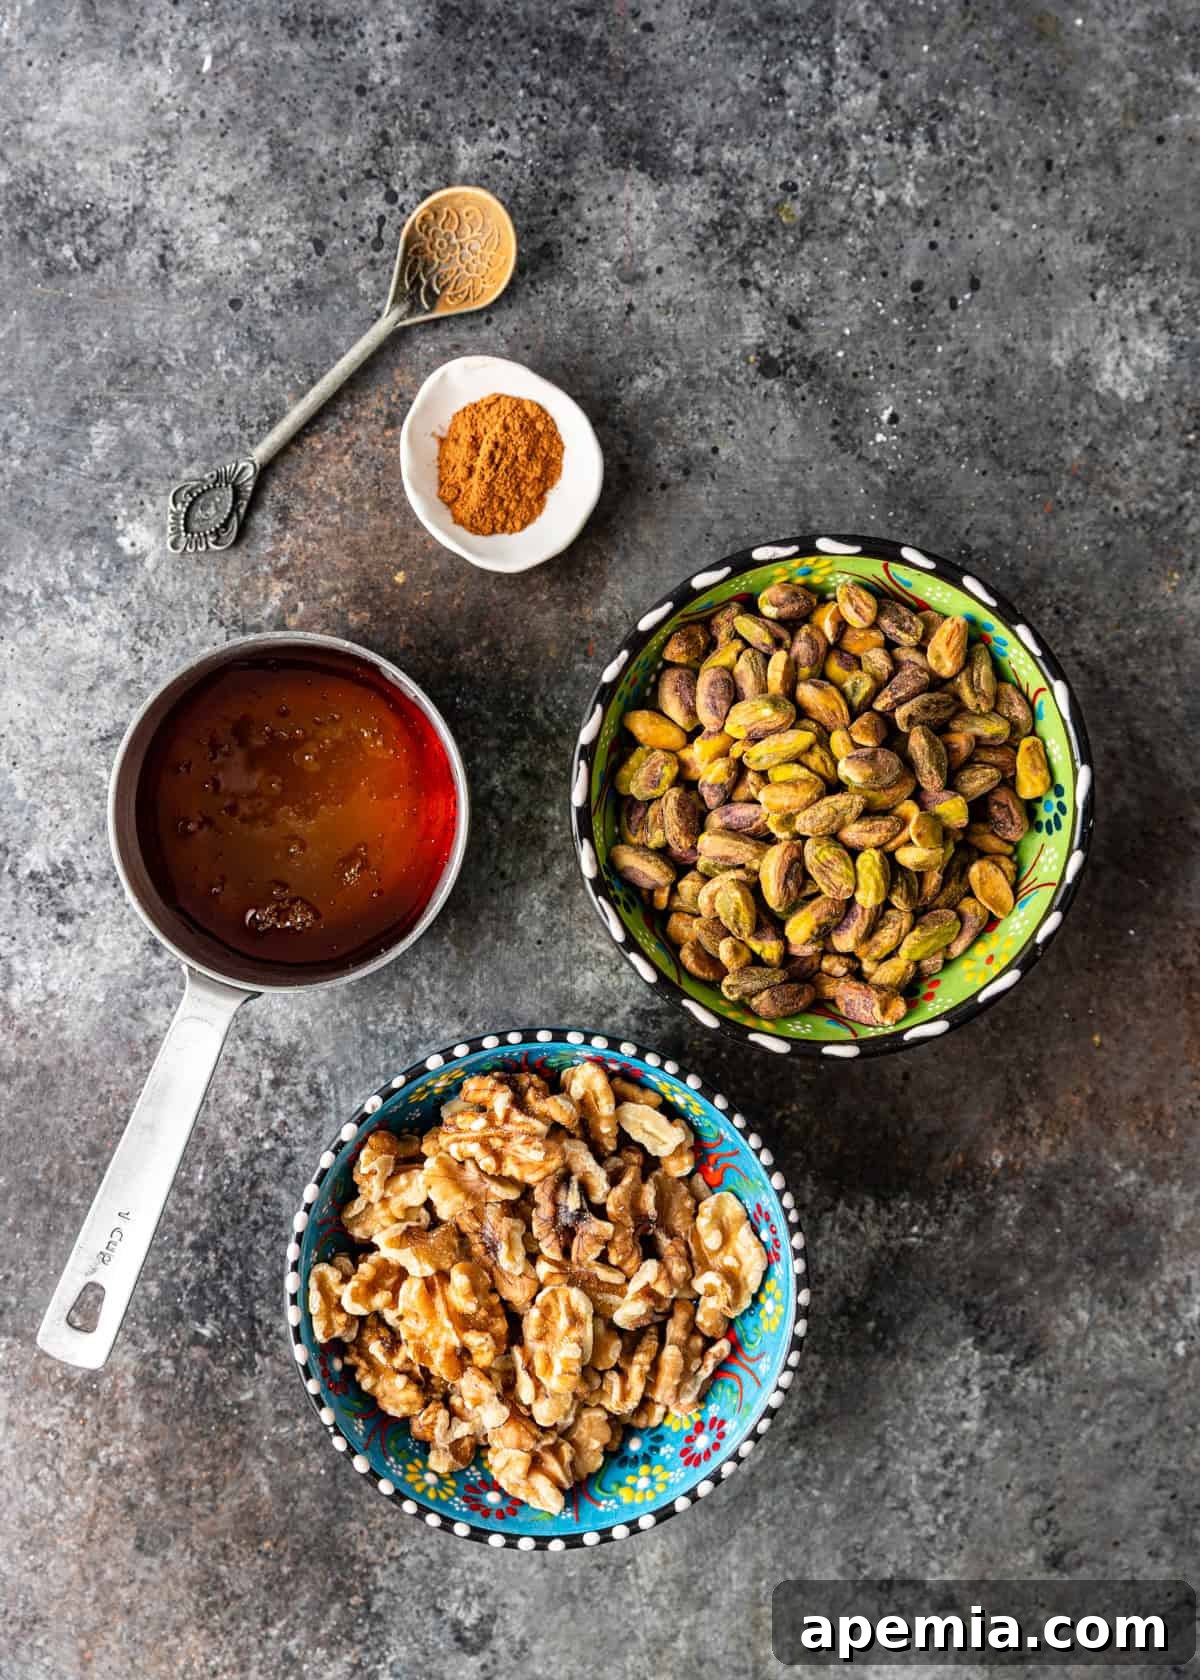
- Baklava Filling/Topping:
- Ground Cinnamon: This warming spice provides an incredible depth of flavor and aromatic complexity to the nut mixture, perfectly complementing the sweet honey and rich nuts. It’s a classic flavor pairing in Greek baklava.
- Pistachios: Known for their buttery, earthy flavor and vibrant green hue, pistachios add a delightful crunch and slightly creamy texture to the topping. For optimal flavor and color, use unsalted, shelled pistachios. Lightly toasting them before chopping can further enhance their nutty aroma.
- Walnuts: Offering mild, earthy notes and a hint of bitterness, walnuts help to balance out the sweetness of the honey and other ingredients in the topping, creating a more complex and robust flavor profile. Ensure they are fresh; stale walnuts can taste bitter.
- Pure Honey: Honey not only imparts its natural, rich sweetness to the baklava topping but also acts as a crucial binder, helping to form the perfect crumbly yet cohesive paste that adheres beautifully to the cheesecake. Choose a good quality, flavorful honey like clover or wildflower for the best results.
- Dried Edible Rose Petals: Crushed edible rose petals are an optional but highly recommended garnish for this baklava cheesecake recipe. I personally never skip them! They contribute a delicate, delightful hint of floral taste and an absolutely stunning dash of color, elevating the dessert’s aesthetic appeal from delicious to truly gourmet. Look for culinary-grade dried rose petals at specialty food stores or online.
Step-by-Step Guide to Making Baklava Cheesecake
- Prepare the Oven & Baking Pan: Begin by preheating your oven to a precise 425°F (220°C). This initial high temperature is crucial for achieving that perfectly golden, crispy phyllo crust, mimicking the crispness of traditional baklava. Line the bottom and sides of a standard 9×13-inch baking dish with parchment paper, ensuring ample overhang on the sides. This parchment paper overhang will act as convenient handles, allowing you to effortlessly lift the cooled and set cheesecake out of the pan later, ensuring clean removal. Lightly grease the parchment paper with cooking spray to prevent any sticking.
- Layer the Phyllo Crust: Carefully unroll your defrosted phyllo dough onto a clean, dry work surface. Using a serrated knife, trim the phyllo sheets to fit the length of your baking pan. (Refer to our “Achieving Perfect Phyllo Edges” tip above for options regarding edge crispness.) Gently brush two sheets of phyllo generously with melted butter, then sprinkle lightly and evenly with granulated sugar. Immediately transfer these buttered and sugared sheets into your prepared pan, pressing them gently but firmly into the bottom and slightly up the sides (if aiming for crispy edges). Repeat this delicate layering process with the remaining phyllo sheets, ensuring each pair is thoroughly brushed with butter and then sprinkled with sugar. It’s crucial to always keep any unused phyllo covered with a slightly damp paper towel to prevent it from drying out and becoming brittle while you work. Speed and gentle handling are key.
- Pre-Bake the Bottom Layer: Gather any leftover phyllo scraps and trimmed ends and crumble them evenly over the layered phyllo in the bottom of the pan. This adds extra texture and body to the crust. Drizzle any remaining melted butter over these crumbs. Bake this bottom phyllo layer in the preheated 425°F (220°C) oven for approximately 5 to 8 minutes, or until it achieves a beautiful light golden-brown color and is wonderfully crispy. Once baked, carefully remove the pan from the oven and place it on a wire rack to cool slightly while you prepare the filling. Immediately reduce the oven temperature to 350°F (175°C) to prepare for the cheesecake layer.
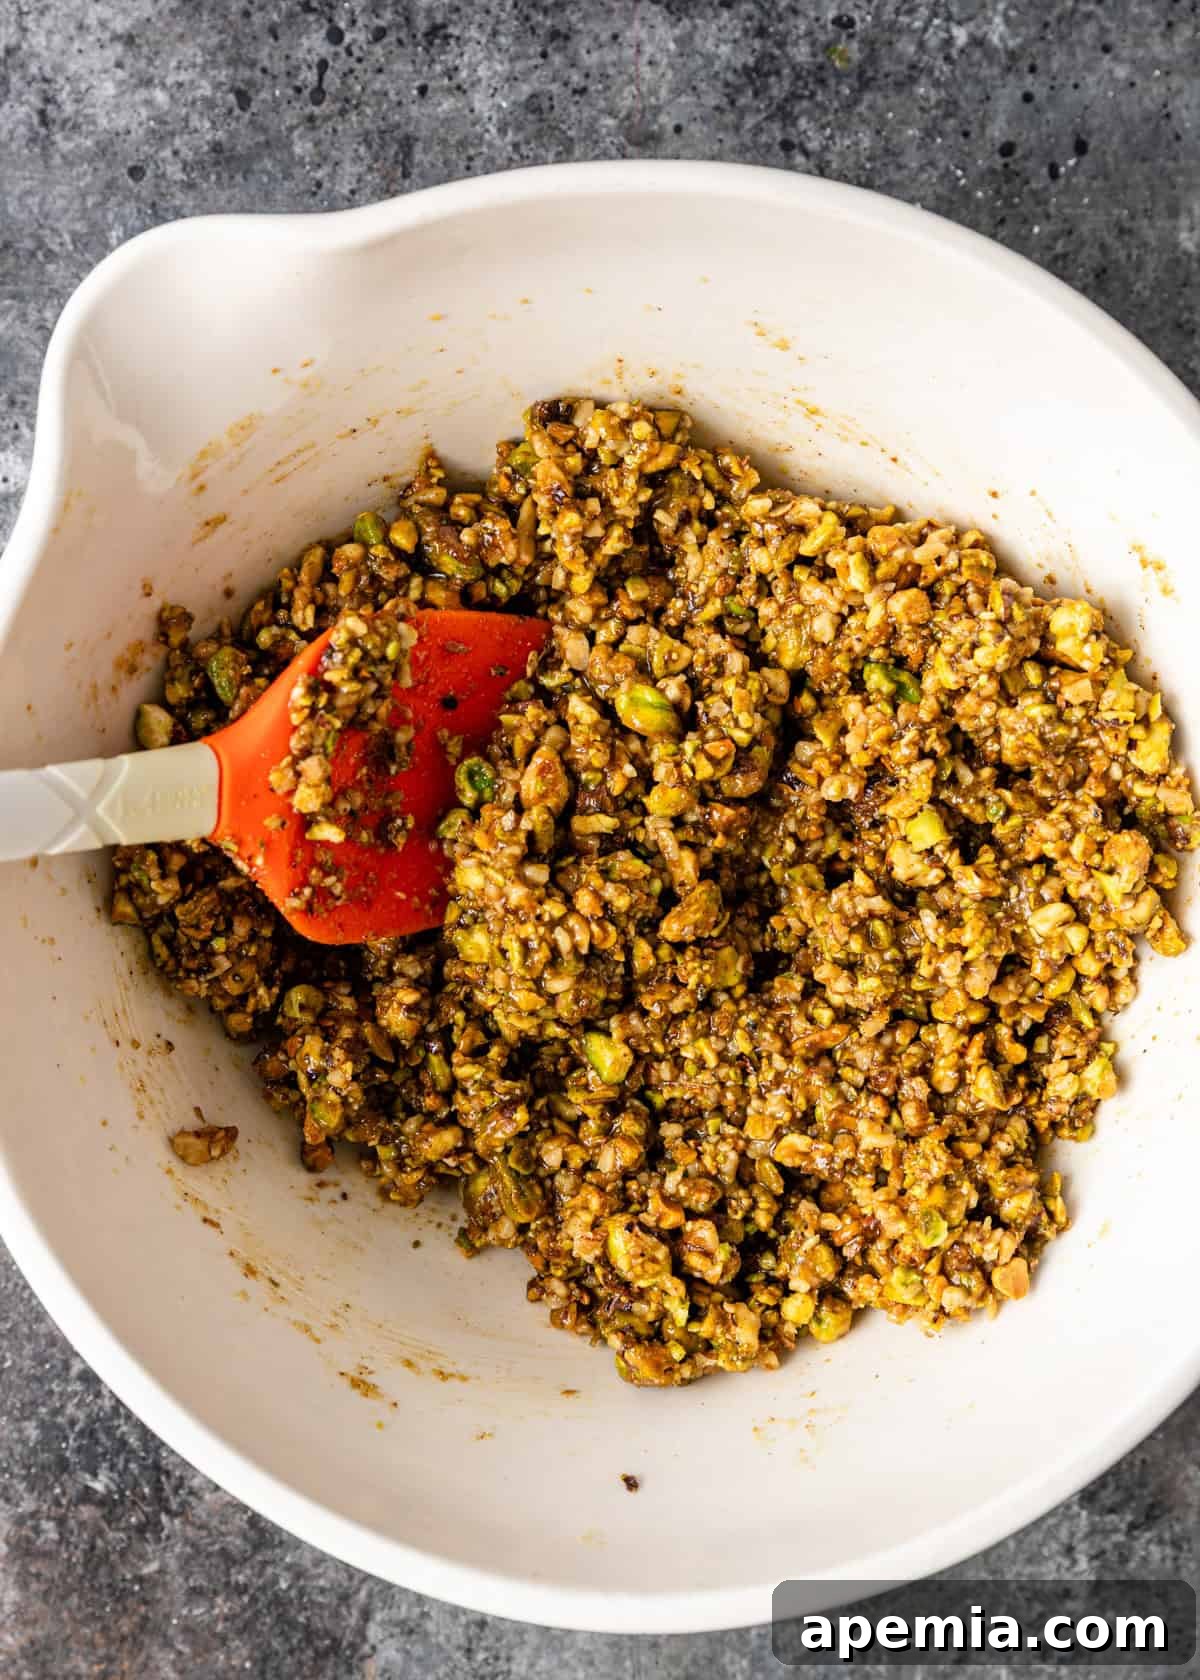
- Craft the Aromatic Nutty Topping: In a food processor, combine the ground cinnamon, shelled pistachios, and walnuts. Pulse the mixture until the nuts are finely chopped but still retain a slightly chunky texture – aim for a coarse meal rather than a fine powder, as the chunks provide a satisfying bite. Transfer this aromatic nut mixture to a medium-sized bowl. Add the honey and mix thoroughly using a spoon or your hands until a smooth, cohesive paste forms. This paste will be divided for both a delightful surprise layer within the cheesecake and the final decorative topping. Set aside.
- Whip the Creamy Cheesecake Mixture: In the bowl of an electric mixer (either a stand mixer with a whisk attachment or a large bowl with a hand mixer), combine the fully softened cream cheese, room temperature sour cream, large eggs, granulated sugar, pure vanilla extract, and the optional orange or rose water. Begin mixing on low speed to incorporate ingredients without splashing, then increase to medium speed, whipping until the mixture is completely smooth, creamy, and visibly free of any lumps. It is paramount not to overmix the batter, especially once the eggs are added, as incorporating too much air can lead to cracks forming on the cheesecake surface during baking and cooling.
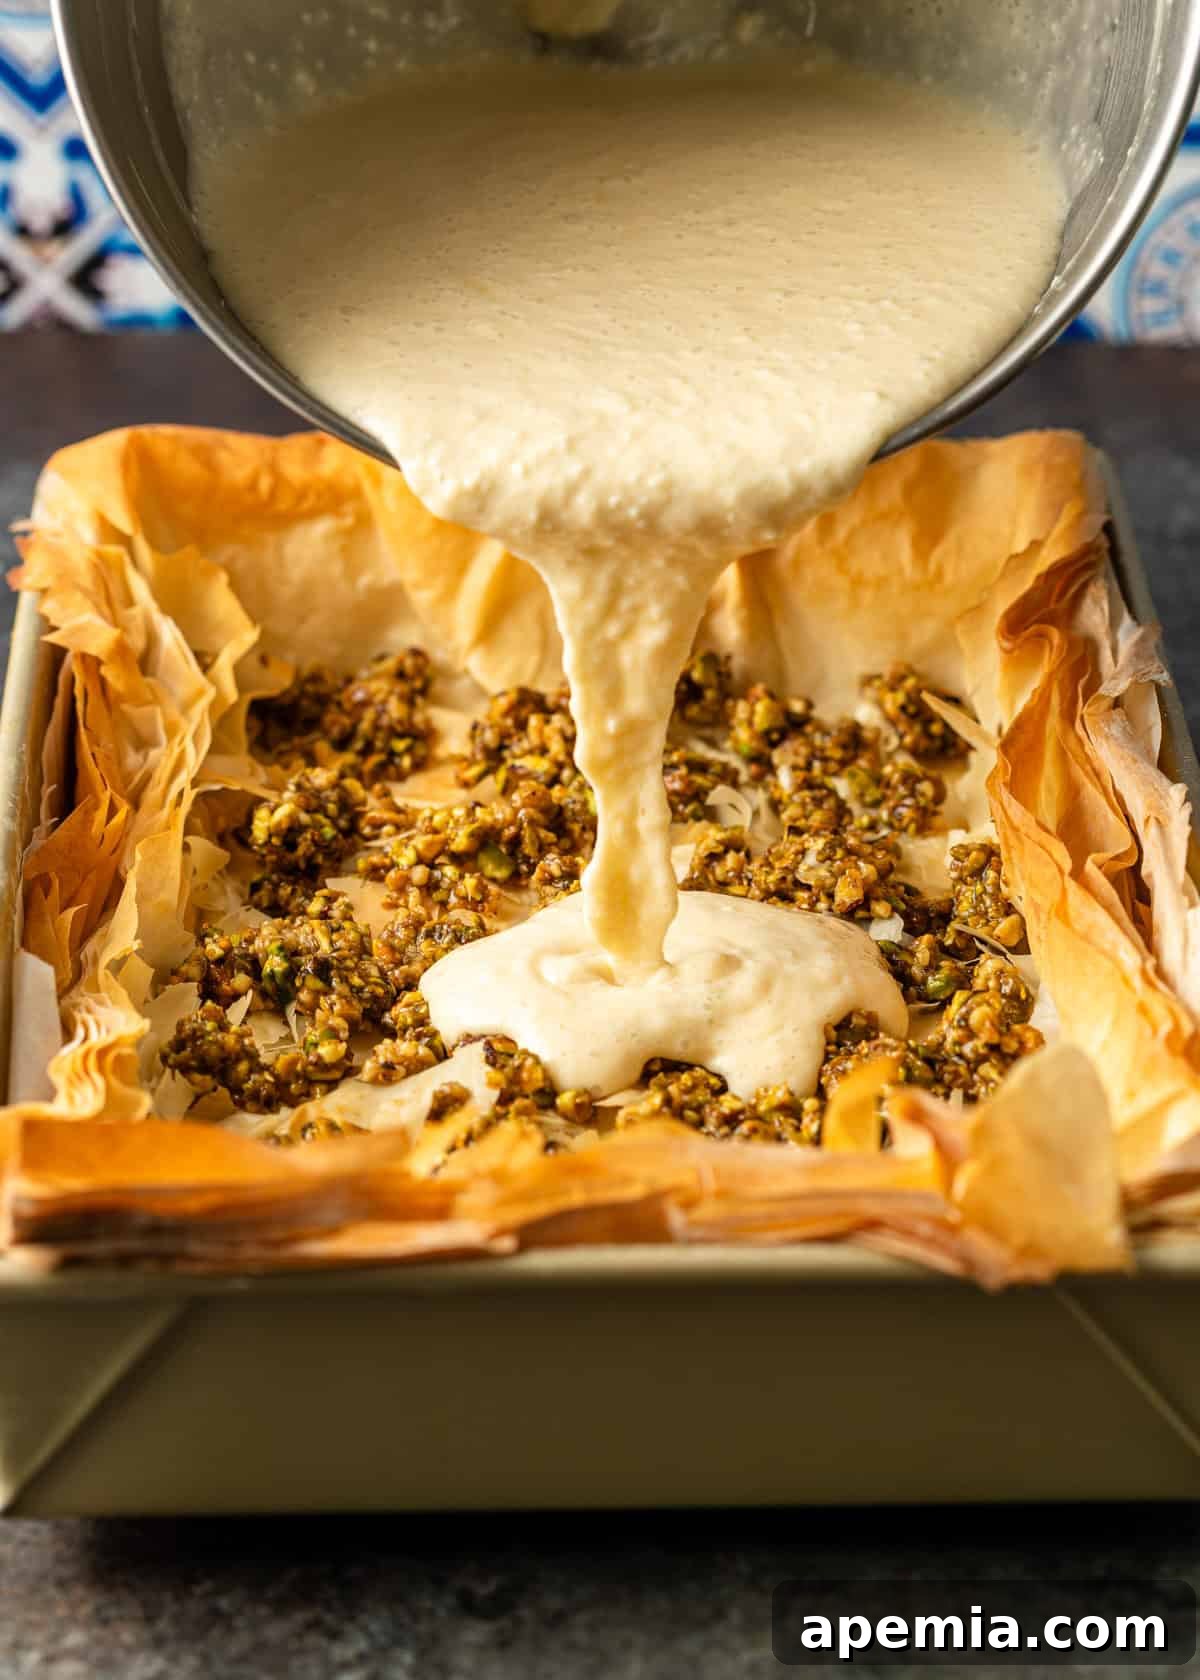
- Assemble & Bake the Cheesecake: Evenly crumble about one-third (⅓) of your prepared baklava nut mixture over the slightly cooled phyllo crust in the baking pan. This layer will provide an unexpected burst of flavor and texture within the creamy cheesecake. Carefully pour the smooth cream cheese mixture over the nuts, gently spreading it into an even layer using a spatula. Transfer the baking dish to the middle rack of the now 350°F (175°C) oven and bake for approximately 40 minutes. At this stage, the edges of the cheesecake should appear set, but the very center will still have a slight “jiggle” when you gently shake the pan – this is perfectly normal and indicates it’s done without being overbaked.
- Cool Gradually for Perfection: Once the baking time is complete, immediately turn off the oven but resist the urge to remove the cheesecake. Instead, open the oven door slightly, leaving it ajar by a few inches. Allow the baklava cheesecake to cool gradually inside the oven for at least 60 minutes. This slow cooling process is absolutely essential for preventing dramatic temperature changes that can cause the cheesecake to crack. After this crucial gradual cooling period, remove the cheesecake from the oven and let it cool completely on a wire rack at room temperature.
- Add the Final Topping & Chill: Once the cheesecake has fully cooled to room temperature, gently crumble the remaining two-thirds (⅔) of the baklava nut topping over the entire surface. Lightly wet your hand (or use the back of a spoon) and gently press the nuts down into the cheesecake layer to ensure they adhere well and create a cohesive top. Refrigerate the baklava cheesecake for a minimum of 1 hour (preferably longer, up to 4 hours, or even overnight for best results) before lifting it out of the pan using the parchment paper overhang. Carefully cut it into desired bar sizes. If desired, sprinkle with additional crushed dried rose petals just before serving for an extra touch of beauty and delicate aroma. Serve chilled and enjoy this exquisite fusion dessert!
Recommended Baking Tools for Success
Having the right tools can make all the difference in ensuring your Baklava Cheesecake Bars turn out perfectly every time, simplifying the process and guaranteeing professional-looking results. Here are a couple of essential items:
- Electric Mixer (Stand or Handheld) & Whisk Attachment: This is an invaluable tool for combining all the ingredients for the cheesecake filling. An electric mixer ensures a perfectly smooth, lump-free batter and efficiently incorporates just the right amount of air for that light, fluffy, yet dense and creamy cheesecake texture. It greatly reduces the effort and time involved in mixing.
- Food Processor: Achieving the ideal consistency for the baklava nut topping – finely chopped but still with a pleasing slight chunkiness – is effortless and consistent with a food processor. It saves significant time compared to hand-chopping and ensures a uniform breakdown of your pistachios and walnuts, creating the perfect base for the honey paste.
- 9×13-inch Baking Dish: A sturdy ceramic, glass, or metal baking dish of this precise size is essential for ensuring even baking and provides the perfect dimensions for easily slicing your finished cheesecake into individual, uniformly sized bars.
- Parchment Paper: Don’t skip this crucial lining material! Lining your pan with parchment paper, especially with an overhang on the longer sides, makes for incredibly easy and clean removal of the entire cheesecake from the pan once it’s cooled and set. This prevents sticking and keeps your beautiful bars intact.
- Pastry Brush: A good quality pastry brush is indispensable for evenly applying melted butter to the delicate phyllo sheets, ensuring each layer crisps up beautifully and absorbs the flavors.
Storing & Freezing Your Cheesecake Bars
Proper storage is key to preserving the deliciousness and freshness of your Baklava Cheesecake Bars. These decadent treats are best enjoyed chilled, and they store wonderfully, making them a fantastic make-ahead dessert for entertaining or simply enjoying throughout the week.
- Refrigeration: Any leftover baklava cheesecake bars should be stored in an airtight container in the refrigerator. When stored correctly, they will maintain their exquisite flavor, creamy texture, and the pleasant crispness of the phyllo base for up to 4 days. An airtight container is crucial to prevent the cheesecake from absorbing other food odors present in the fridge and, most importantly, to keep the delicate phyllo crust from drying out prematurely, which can quickly diminish its texture.
- Freezing for Later: If you’re looking to extend their shelf life beyond a few days, these bars freeze beautifully for up to 2 months. For best results, allow the entire cheesecake to cool and set completely in the refrigerator first, then cut it into individual bars. Wrap each individual bar tightly in plastic wrap before carefully stacking them in a freezer-safe bag or an airtight container. This individual wrapping helps prevent freezer burn and makes it incredibly convenient to thaw just one or two bars as needed, without having to defrost the entire batch. To enjoy, simply thaw them in the refrigerator overnight, or for a quicker option, at room temperature for an hour or two until soft enough to eat. While the phyllo might lose some of its initial crispiness after freezing and thawing, the overall flavor and creamy texture of the cheesecake remain outstanding.
Share this recipe on Pinterest!
Love this recipe? Share it with the world on Pinterest.
Frequently Asked Questions
Phyllo dough is notoriously delicate and dries out very quickly when exposed to air, making it difficult to work with. The key to keeping it pliable and fresh while you work is to keep it continuously covered. After you unroll it from its package, place the entire stack of phyllo sheets under a slightly damp (but not wet or dripping) paper towel or a clean kitchen towel. Only uncover the two sheets you are actively working with, replacing the towel immediately over the rest. This simple yet crucial trick will help maintain its essential moisture and elasticity throughout the layering process.
Both Greek and Turkish baklava are exquisite pastries, yet they often feature distinct characteristics. Greek baklava is traditionally made with walnuts and frequently incorporates warming spices like cinnamon and cloves into its nutty filling. It also often features a honey-lemon or orange blossom syrup. On the other hand, Turkish baklava typically emphasizes a rich pistachio flavor as its dominant nut and tends to be less spiced, often relying on a lighter sugar syrup (sometimes with lemon). My baklava cheesecake recipe beautifully bridges these two traditions, utilizing a delightful combination of both pistachios and walnuts, along with the comforting warmth of cinnamon, to create a universally appealing and rich flavor profile that everyone can enjoy!
You’ll know your cheesecake is perfectly baked when the phyllo crust has achieved a beautiful golden brown color and the edges of the cheesecake filling appear set and slightly puffed. Crucially, the very center of the cheesecake will still have a slight “jiggle” when you gently shake the pan. Don’t worry if it doesn’t look completely firm at this stage – this is absolutely normal! The cheesecake will continue to set and firm up significantly as it cools gradually in the oven and then chills thoroughly in the refrigerator, resulting in that signature creamy texture without being overbaked or dry.
Absolutely! These baklava cheesecake bars are an excellent make-ahead dessert, making them perfect for parties, holidays, or meal prep. You can prepare them a full day or even two days in advance and store them, covered tightly, in an airtight container in the refrigerator. In fact, chilling the cheesecake overnight often enhances its overall flavor and allows the layers to meld together beautifully, making for cleaner, more precise slices. Just add the final rose petal garnish right before serving for the freshest and most vibrant look.
Cheesecake cracks are a common baking woe, often caused by rapid temperature changes or overbaking. To prevent cracking, ensure all your dairy ingredients (cream cheese, sour cream, eggs) are at room temperature before mixing; this creates a smooth, uniform batter. Crucially, avoid overmixing the cheesecake batter once the eggs are added, as this can incorporate too much air, which expands during baking and contracts rapidly upon cooling, causing cracks. Most importantly, follow the gradual cooling method outlined in the instructions: turn off the oven and leave the cheesecake inside with the door slightly ajar for an hour. This allows it to cool down slowly, reducing thermal shock. Finally, a proper refrigeration period helps the cheesecake set beautifully without cracks, yielding that perfect, pristine surface.
Baklava Cheesecake Bars
24
30 minutes
48 minutes
2 hours
3 hours
18 minutes
Pin Recipe
PrintRecipe
Video
Ingredients
- 12 sheets phyllo dough defrosted
- 1/4 cup unsalted butter melted
- 2 tbsp granulated sugar
- 16 oz full-fat cream cheese room temperature
- 1/3 cup sour cream room temperature
- 2 large eggs room temperature
- 1 cup granulated sugar
- 2 tsp pure vanilla extract
- 2 tsp orange or rose water optional
- 2 tbsp honey
Baklava Filling/Topping
- 1/2 tsp ground cinnamon
- 1 1/2 cups pistachios
- 1 1/2 cups walnuts
- 1/2 cup honey
- 1 tbsp dried edible rose petals crushed (optional for garnish)
US Customary
Instructions
-
Preheat the oven to 425°F (220°C). Line the bottom and sides of a 9×13-inch baking dish with parchment paper, ensuring excess overhang on the sides to easily lift out the cheesecake after baking. Lightly grease the parchment with cooking spray.
-
Using a serrated knife, carefully cut the length of the phyllo dough to match the length of your pan (refer to the “Achieving Perfect Phyllo Edges” tip above for options). On a clean work surface, brush 2 phyllo sheets with some melted butter, then sprinkle evenly with granulated sugar. Transfer these sheets into the prepared pan, gently pressing them into the bottom and up the sides. Repeat this layering process with the remaining phyllo sheets, brushing each layer with butter and then sugar. Remember to keep any unused phyllo covered with a damp paper towel to prevent it from drying out while you work.
-
Crumble any remaining phyllo scraps and trimmed ends evenly over the bottom of the pan. Drizzle any remaining melted butter on top. Bake for 5-8 minutes, or until the phyllo is light golden brown and crispy. Immediately place the pan on a wire rack to cool slightly and reduce the oven temperature to 350°F (175°C).
-
In a food processor, combine the ground cinnamon, pistachios, and walnuts. Pulse until they form small, slightly chunky crumbs. Transfer this mixture to a bowl and mix in the honey thoroughly until a smooth, cohesive paste forms. Set aside.
-
In an electric mixer fitted with a whisk attachment, whip the room temperature cream cheese, sour cream, eggs, granulated sugar, vanilla extract, and the optional orange or rose water on medium speed until the mixture is completely smooth and creamy. Be careful not to overmix.
-
Crumble one-third (⅓) of the prepared nut mixture evenly over the slightly cooled phyllo crust. Carefully pour the creamy cheesecake mixture over the nuts, spreading it into an even layer. Transfer the baking dish to the middle rack of the 350°F (175°C) oven and bake for 40 minutes. The center of the cheesecake will still have a slight jiggle at this point. Immediately turn off the oven and open the door slightly. Leave the cheesecake in the oven for 60 minutes with the door ajar, allowing it to cool down gradually and prevent cracks.
-
After the cheesecake has completely cooled to room temperature, crumble the remaining baklava nut topping over the cheesecake filling. Lightly wet your hand and gently press the nuts down into the cheesecake layer to ensure they adhere well. Refrigerate for a minimum of 1 hour (or longer for best results) before lifting the dessert out of the pan using the parchment paper overhang and cutting it into slices. If desired, sprinkle with additional crushed rose petals just before serving.
Notes
- For Clean vs. Crispy Phyllo Edges: As mentioned in the “Achieving Perfect Phyllo Edges” tip, you can customize your crust. For a clean look, trim the phyllo to fit the pan exactly. For extra crispy edges, allow the phyllo to extend slightly up the pan sides. The choice is yours to create the perfect texture for your Baklava Cheesecake Bars.
- Room Temperature Ingredients: Always ensure your cream cheese, sour cream, and eggs are at room temperature before mixing. This is crucial for a smooth, lump-free cheesecake batter and helps prevent cracks during baking by allowing ingredients to emulsify properly.
- Don’t Overmix: When preparing the cheesecake filling, mix until just combined and smooth. Overmixing can incorporate too much air, leading to a cracked surface during baking and cooling, and a less dense, creamy texture.
Nutrition Information (Estimated Per Serving)
Carbohydrates: 95g |
Protein: 14g |
Fat: 26g |
Saturated Fat: 8g |
Polyunsaturated Fat: 6g |
Monounsaturated Fat: 9g |
Trans Fat: 0.1g |
Cholesterol: 40mg |
Sodium: 765mg |
Potassium: 258mg |
Fiber: 4g |
Sugar: 17g |
Vitamin A: 413IU |
Vitamin C: 3mg |
Calcium: 57mg |
Iron: 5mg
The information shown is an estimate provided by an online nutrition calculator. It should not be considered a substitute for a professional nutritionist’s advice.
Dessert
Mediterranean, Middle Eastern
Kevin
Have You Made This Recipe? Let Me Know on InstagramTag @keviniscooking or tag me #keviniscooking!