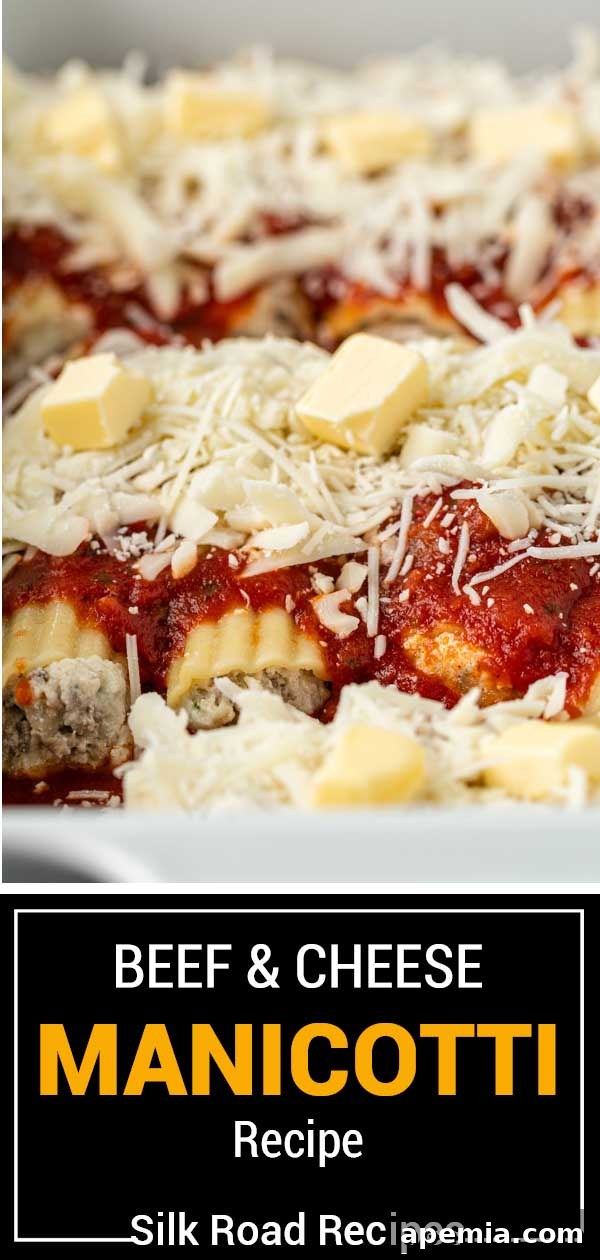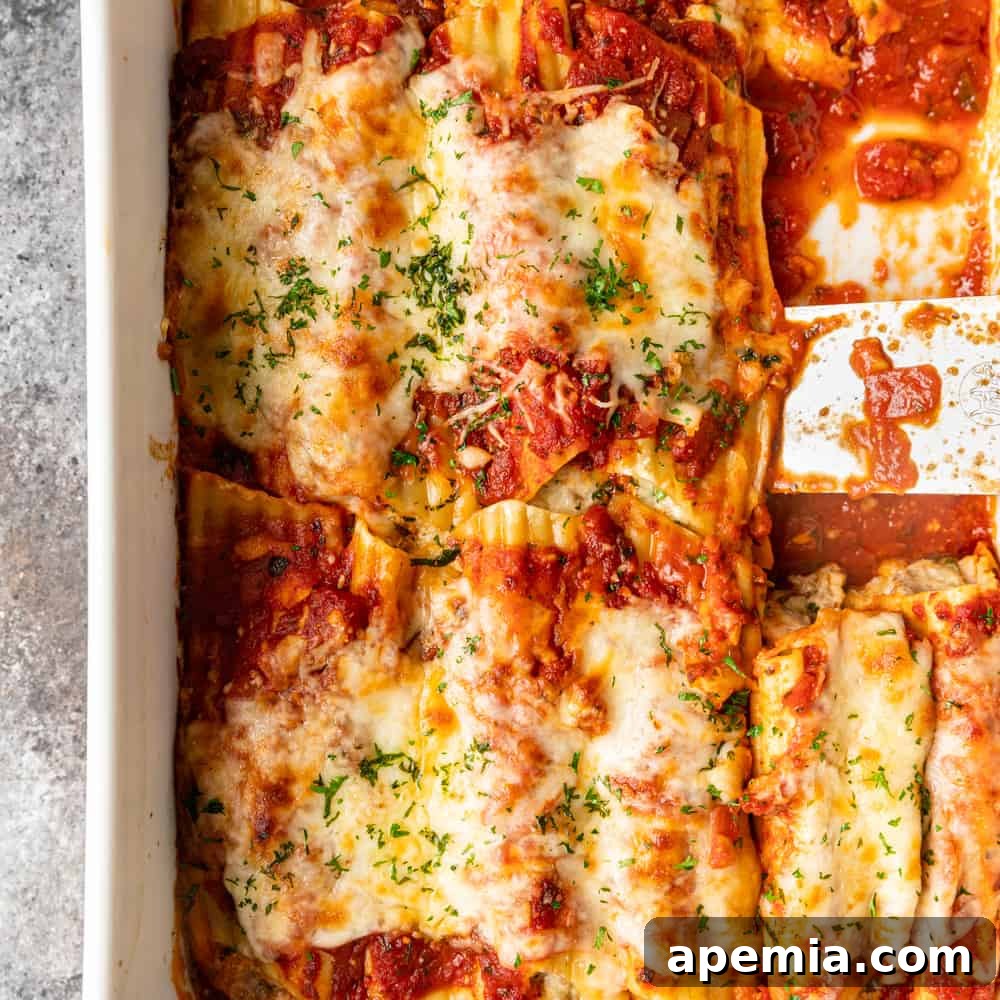
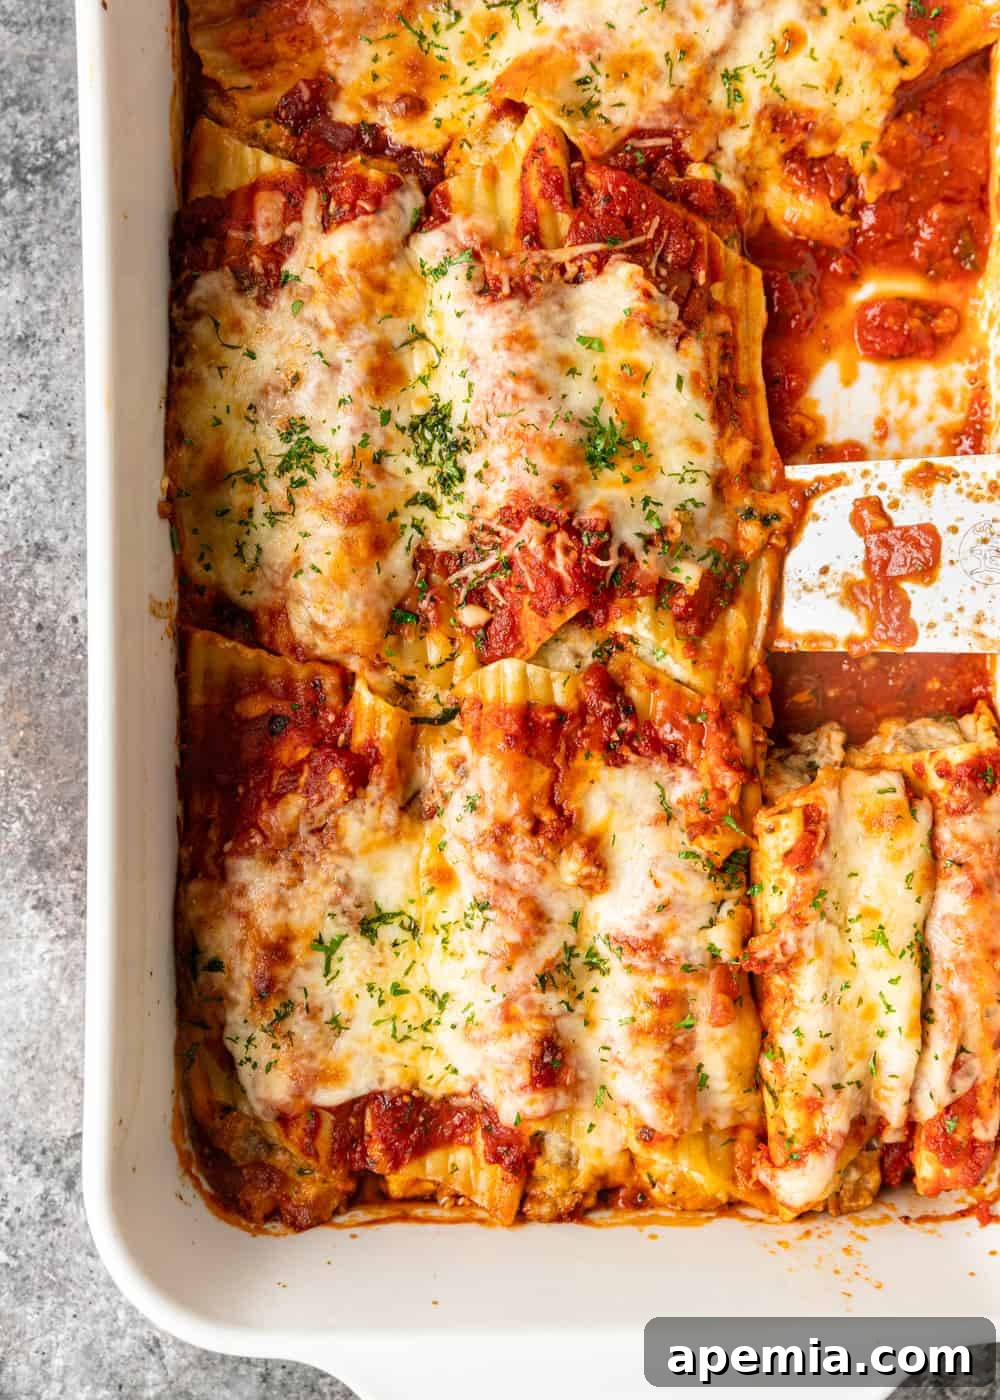
Indulge in the rich flavors of Italy with this incredible manicotti recipe! In just over an hour, you can create 14 perfectly saucy, authentic Italian manicotti. Each tender pasta tube is generously stuffed with a savory, seasoned blend of meat, cheeses, and aromatic herbs, then lovingly smothered in a vibrant homemade marinara sauce and baked until bubbling and golden brown. This dish embodies everything we adore about Italian cooking—comforting, cheesy, and utterly delicious—all in one easy pasta bake!
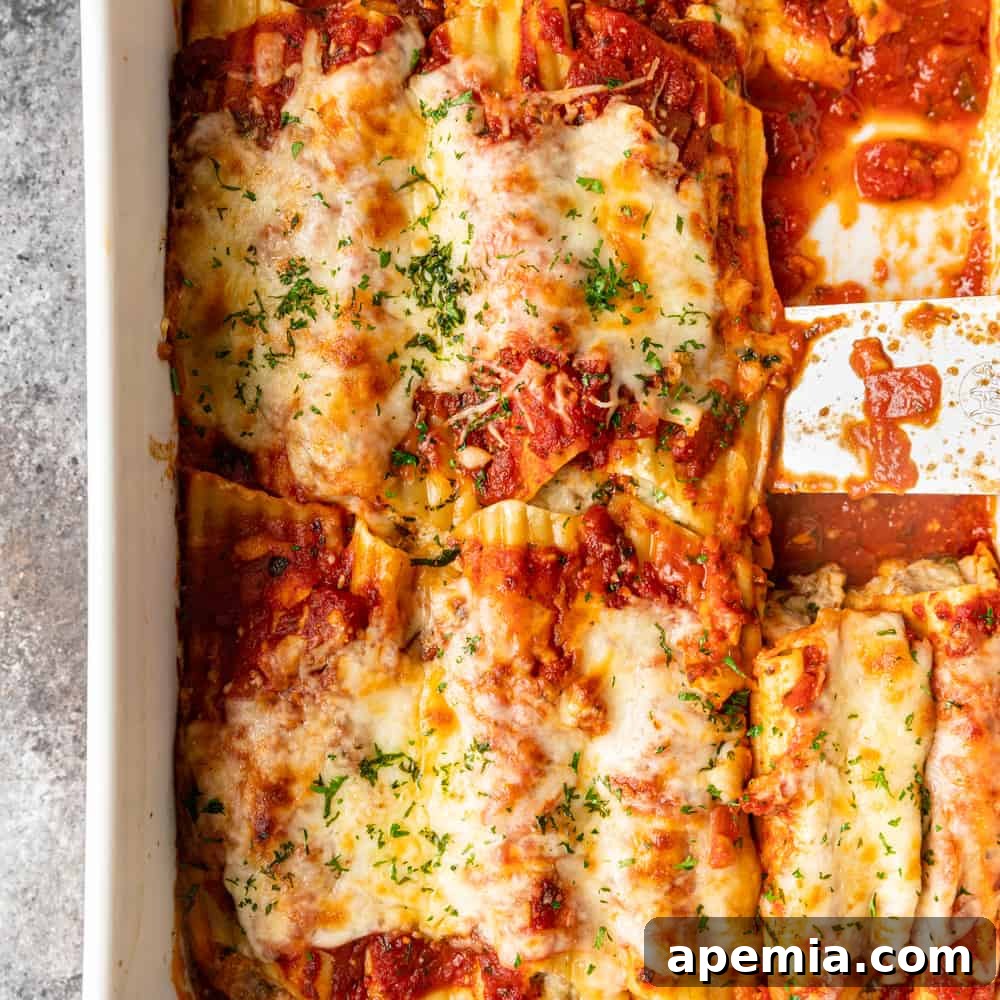
When it comes to authentic Italian manicotti, the experience is all about generous amounts of rich sauce, an abundance of perfectly melted cheese, and delectable pasta tubes overflowing with savory filling. This isn’t just a meal; it’s an invitation to gather your loved ones around the table, perhaps with some crusty Italian bread to soak up every last drop of sauce, and a fine glass of wine to complete the culinary journey. It’s a classic comfort food that truly brings joy to any occasion, whether it’s a weeknight dinner or a festive celebration.
This particular manicotti recipe elevates the traditional dish by using thick, ridged tubular pasta, creating the perfect vessel for its incredibly flavorful stuffing. Our filling is a harmonious blend of ground beef and succulent ground pork, which together offer a depth of flavor and a wonderfully moist texture that single meats often lack. This robust meat base is then combined with creamy ricotta, rich mozzarella, and sharp Parmesan cheese, creating a multi-layered cheese experience. To infuse that unmistakable Italian aroma, we season the filling with finely minced onion and garlic—essential ingredients for any truly authentic Italian creation—along with a hint of warm nutmeg and fresh, vibrant herbs. Every stuffed noodle is then nestled in a tangy, robust marinara sauce, generously topped with *more* cheese, and baked until it achieves that irresistible gooey, browned crust that’s crispy on top and perfectly melted underneath.
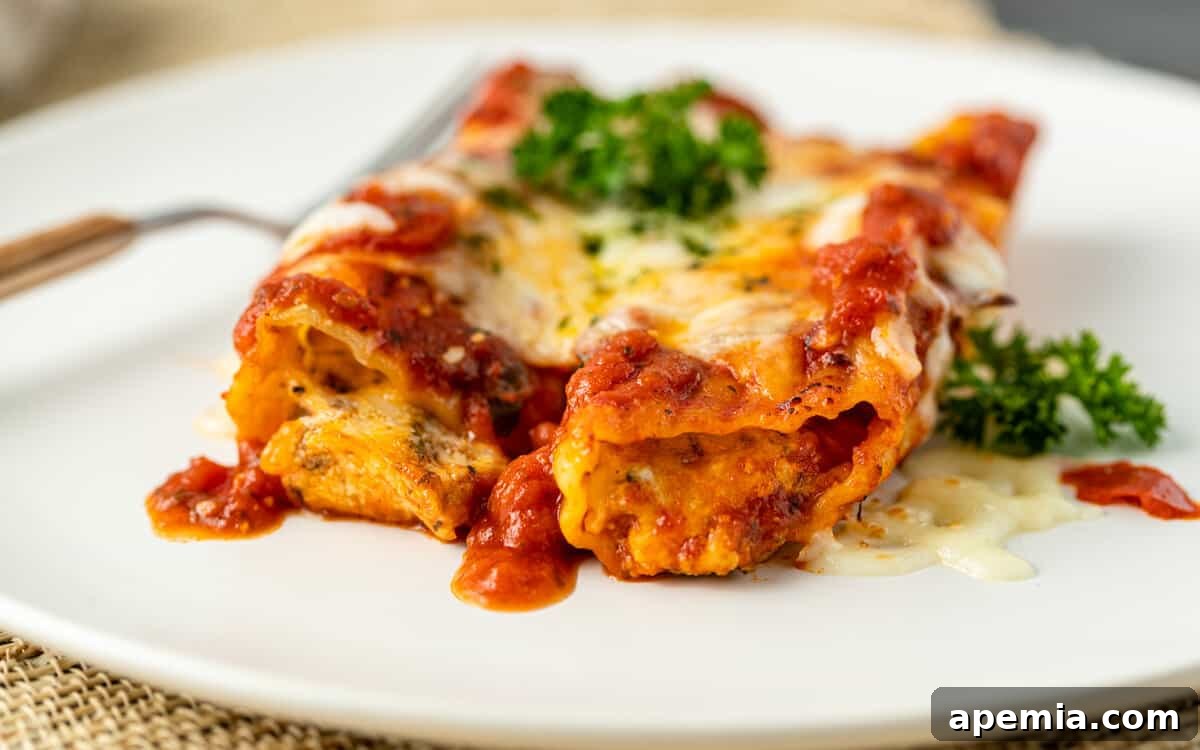
While making manicotti involves a little bit of enjoyable prep time, the effort is truly worth it, especially considering it’s a fantastic one-dish meal capable of feeding a crowd. It’s ideal for family gatherings, potlucks, or simply when you want to enjoy delicious leftovers throughout the week. If you’re a fan of hearty pasta bakes, you absolutely must try this next! For those who love exploring different culinary traditions, our Greek pastitsio offers a delightful change of pace with its unique spiced meat and béchamel sauce layers. Alternatively, if you prefer to stick to the comforting and familiar flavors of Italy, consider whipping up these enticing shrimp scampi, creamy pasta with vodka sauce, or the elegant white pesto pasta recipes, all offering distinct yet equally satisfying Italian experiences.
Table of Contents
- Manicotti vs. Cannelloni: Understanding the Difference
- Ingredient Notes and Expert Substitutions
- How to Make this Easy Manicotti Recipe
- Essential Tools for Manicotti Preparation
- Storing and Reheating Your Manicotti
- Frequently Asked Questions About Manicotti
- Beef and Cheese Manicotti Recipe Card
Manicotti vs. Cannelloni: Understanding the Difference
Many people often wonder about the distinction between manicotti and cannelloni, and while they are quite similar, there are subtle differences, particularly across regions. Manicotti, commonly found and popularized in the United States, is essentially the Italian-American interpretation of cannelloni. Both refer to large, tubular pasta shapes designed for stuffing and baking. However, traditional manicotti tubes are typically larger, slightly thicker, and feature distinctive exterior ridges, which help to capture and hold more sauce. Cannelloni, on the other hand, are generally smoother, a bit smaller, and somewhat thinner. In Italy, cannelloni can often refer to flat sheets of pasta that are filled and then rolled into a tube, much like a lasagna noodle. The good news is that for this particular recipe, both manicotti and cannelloni tubes would work beautifully, allowing you flexibility in your pasta choice. Just ensure whichever you choose is robust enough to hold the delicious filling!
Ingredient Notes and Expert Substitutions for Perfect Manicotti
- Manicotti Pasta Shells: For that truly authentic Italian manicotti experience, large, ridged tubular noodles are the ideal choice. Their sturdy structure holds the rich filling perfectly and creates wonderful texture. If manicotti shells are unavailable, a clever workaround is to use large lasagna noodles. Simply cook them al dente, spread with the filling, and then roll them up to create your own makeshift cannelloni-style tubes.
- Marinara Sauce: A high-quality marinara sauce is the backbone of this dish. While I highly recommend using my own homemade marinara for its fresh, vibrant flavor, you can certainly prepare this manicotti recipe with your favorite store-bought spaghetti sauce. Just ensure it’s a good quality brand that you enjoy.
- Filling:
- Ground Protein: My secret to a truly outstanding filling lies in using equal parts ground beef and ground pork. This combination not only deepens the overall flavor profile of the stuffed pasta, but the higher fat content of the pork ensures the meat remains incredibly moist and tender throughout the baking process, preventing a dry filling. For a leaner option, you can use ground turkey or chicken, but you might want to add a touch more olive oil to the pan when browning.
- Ricotta: This creamy, mild cheese is absolutely essential for authentic Italian manicotti. It provides the signature light, fluffy texture to the filling and balances the richness of the other cheeses. Always opt for whole milk ricotta for the best flavor and consistency.
- Mozzarella & Parmesan: A dynamic duo! The combination of fresh, creamy mozzarella and salty, aged Parmesan creates a multi-dimensional cheese filling. For the most superior flavor and melt-in-your-mouth texture, always grate your cheese fresh from the block rather than using pre-shredded varieties, which often contain anti-caking agents.
- Parsley: Fresh Italian parsley adds a bright, herbaceous note that is crucial to the Italian flavor profile. If fresh parsley is unavailable, you can substitute with dried parsley, using about 4 teaspoons for the amount specified.
- Nutmeg: This warm, nutty spice might seem unexpected, but it’s a traditional Italian secret ingredient that enhances the flavor of cheese-based dishes. It adds a subtle depth that truly rounds out the filling. If you don’t have nutmeg, allspice, cloves, or a pinch of cardamom can serve as suitable alternatives.
- Garlic: Finely mince two large cloves of fresh garlic for maximum flavor. If you’re a true garlic enthusiast, don’t hesitate to add an extra clove or two to make this dish even more aromatic!
- Yellow Onion: Diced yellow onion provides a sweet and savory base to the meat mixture. Feel free to substitute with red onion, white onion, or even milder shallots if those are what you have on hand or prefer.
How to Make this Easy Manicotti Recipe: Step-by-Step Guide
- Brown the Meat, Onion, & Garlic: Begin by heating 2 teaspoons of olive oil in a large skillet over medium heat. Add the diced onion and minced garlic, sautéing for about 2 minutes until fragrant and softened. Then, add the ground beef and pork to the skillet. Season generously with kosher salt and freshly ground black pepper. Break up the meat with a spoon and cook, stirring occasionally, for approximately 5 minutes, until the meat is thoroughly browned and the onion is translucent. Drain any excess fat, then remove the skillet from the heat and allow the mixture to cool completely. This cooling step is crucial to prevent the ricotta from melting prematurely when combined.
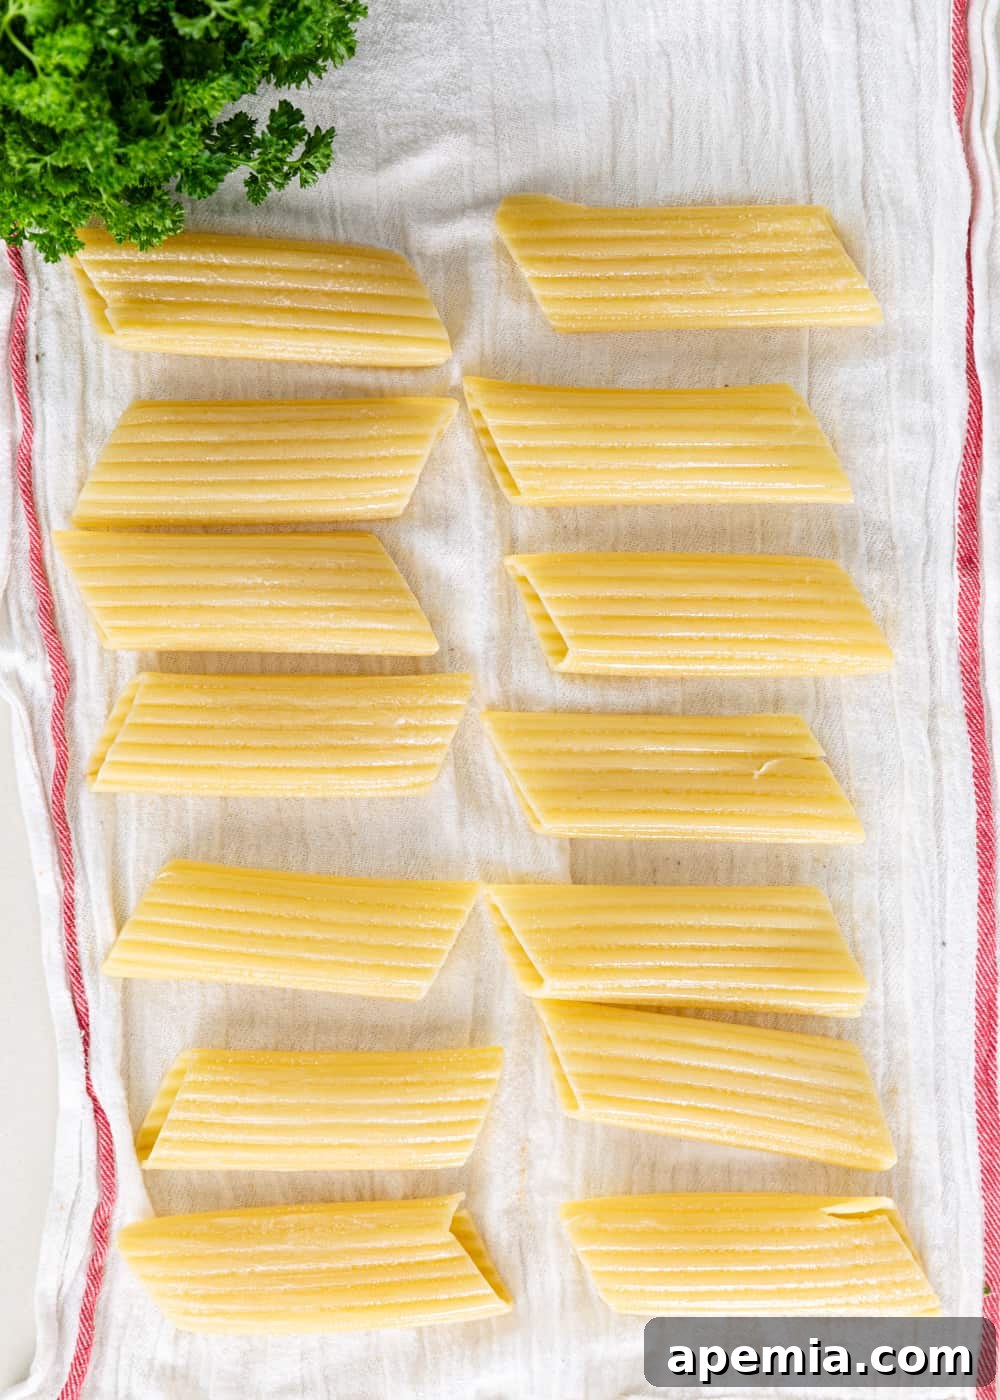
- Boil the Pasta: Bring a large pot of heavily salted water to a rolling boil. Add the manicotti shells and cook them for exactly 6 minutes, or until they are al dente. It’s important not to cook them fully, as they will continue to soften and cook in the oven. Drain the pasta immediately and gently toss with the remaining 2 teaspoons of olive oil to prevent them from sticking together. Lay them out on a clean kitchen towel or baking sheet to cool slightly, making them easier to handle for stuffing.
- Prepare the Cheese Filling: In a large mixing bowl, combine the whole milk ricotta cheese, 2 cups of shredded mozzarella, ½ cup of grated Parmesan, chopped fresh Italian parsley, and ground nutmeg. Mix these ingredients thoroughly until well combined. Once the meat and onion mixture has cooled, add it to the cheese mixture and mix everything together until evenly distributed. This ensures every bite of manicotti is packed with flavor.
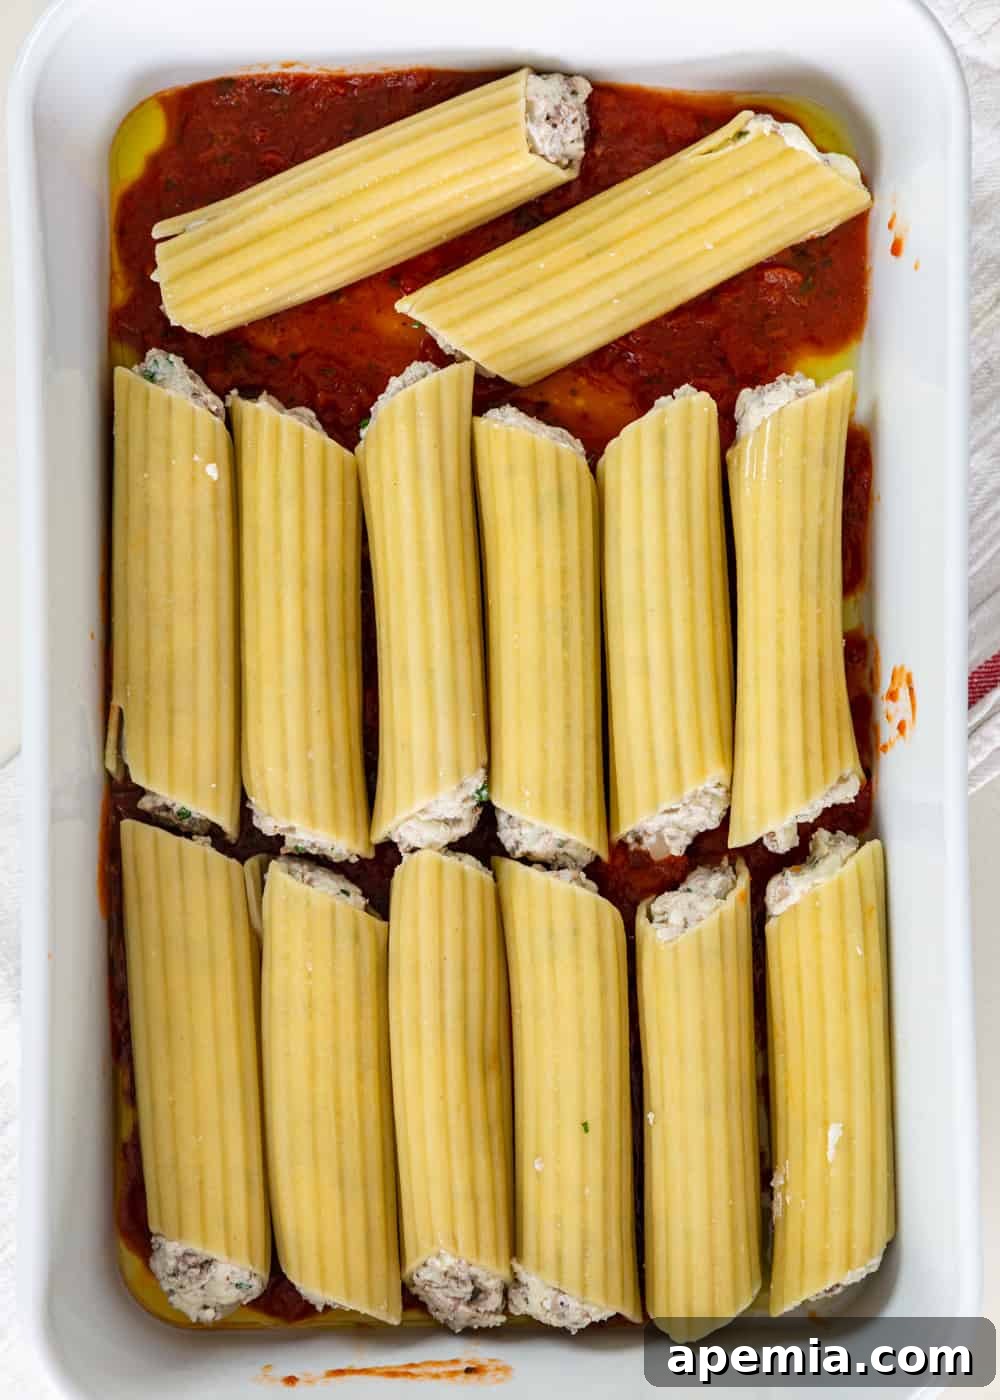
- Prepare the Baking Dish: Preheat your oven to 350°F (175°C). Drizzle the remaining 2 teaspoons of olive oil into a 13×9-inch baking dish, ensuring the bottom and sides are well coated. Spoon 1 ½ cups of your chosen marinara sauce evenly over the bottom of the dish. This creates a flavorful base for the manicotti and prevents sticking.
- Fill the Shells: This step can be the most fun! For ease and cleanliness, transfer all of the meat and cheese filling into a large Ziploc bag (or a piping bag if you have one). Snip off one corner of the bag to create a piping hole. Carefully squeeze the filling into each manicotti shell. Alternatively, you can use a small spoon to meticulously fill each shell by hand. For best results, fill halfway from one end, then turn the noodle and finish filling from the other end to ensure a complete and even distribution.
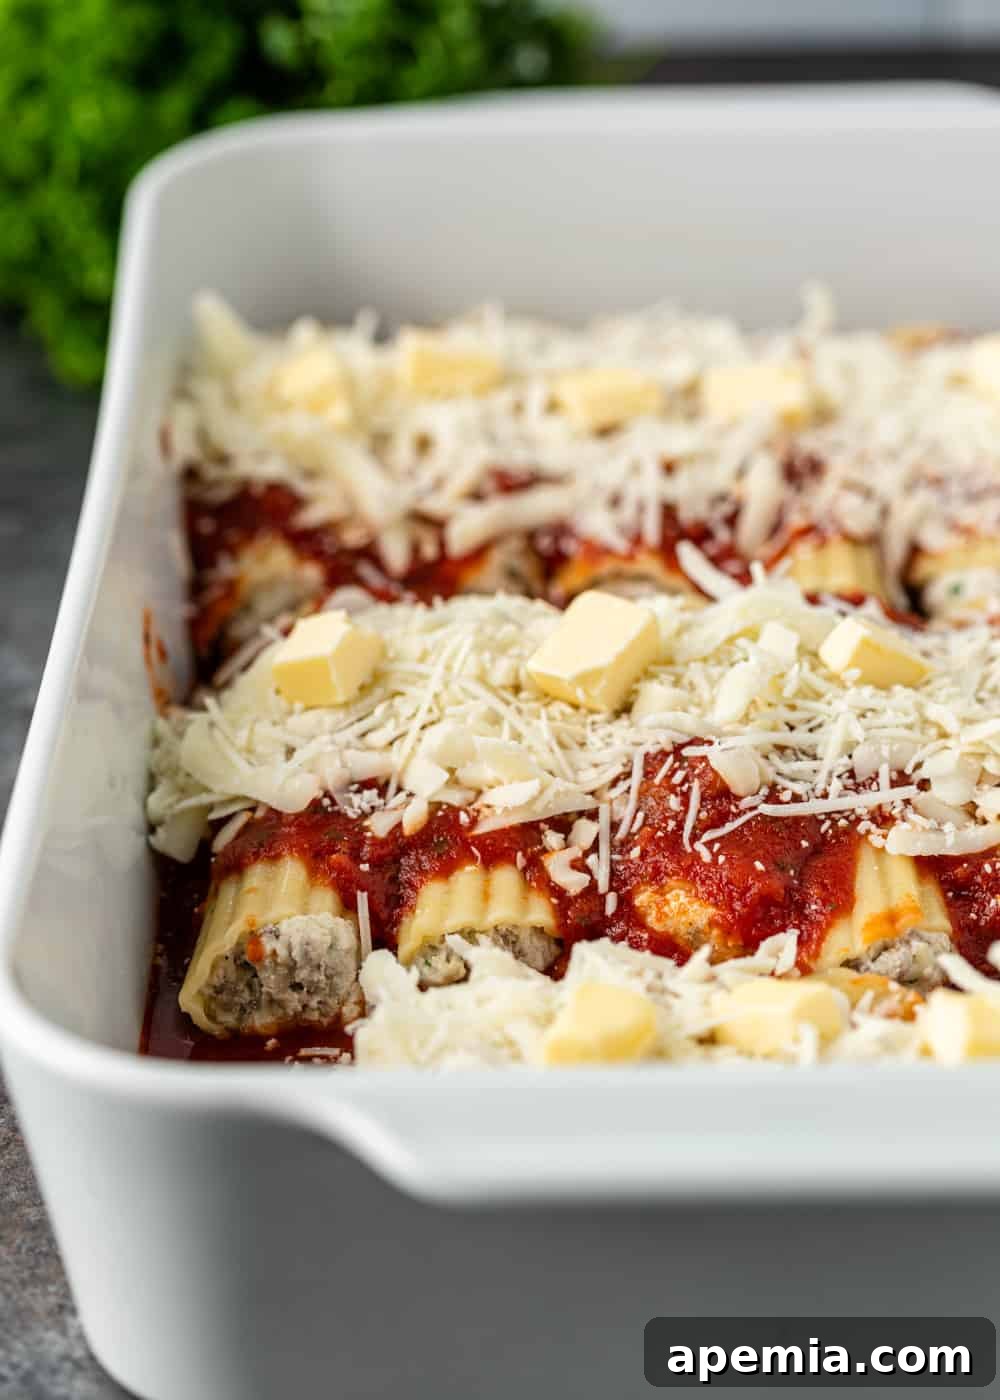
- Layer the Pasta Bake: Arrange the filled manicotti shells in a single layer over the marinara sauce in the prepared baking dish. Once all the shells are in place, spoon the remaining marinara sauce evenly over the top, ensuring each manicotti is well-covered. Sprinkle the remaining 1 ½ cups of shredded mozzarella cheese and the remaining ½ cup of grated Parmesan over the entire dish. Finally, slice the butter into small pieces and dot them evenly over the top layer of cheese; these butter pieces will melt down, adding incredible richness and helping to create that beautiful golden crust.
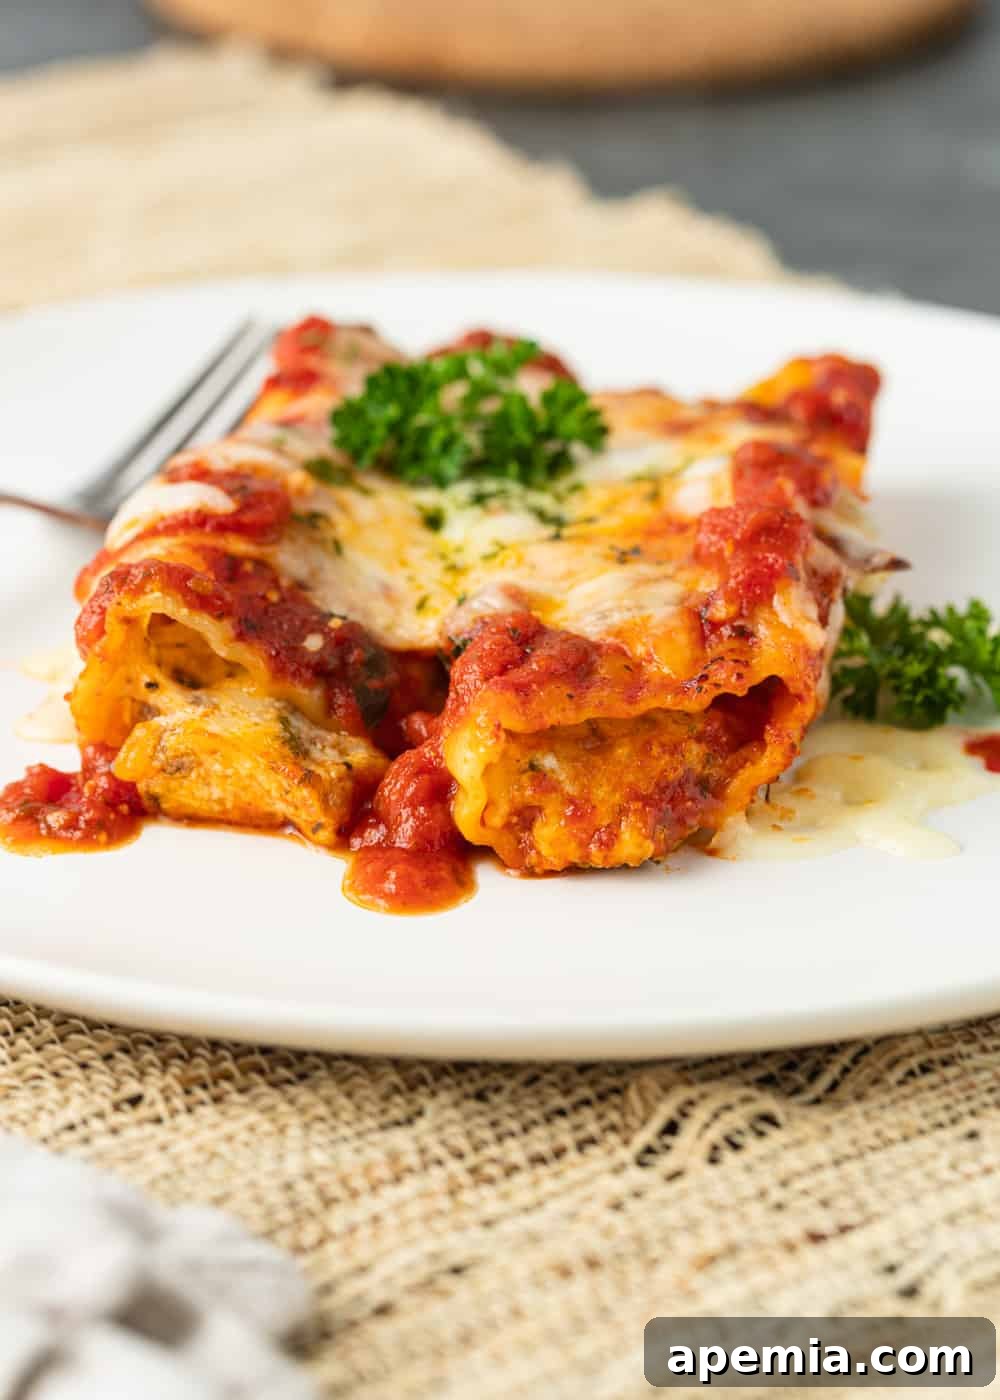
- Bake & Serve: Place the baking dish in the preheated oven and bake, uncovered, for 30 to 35 minutes, or until the sauce is bubbly and the cheese topping is melted, golden brown, and slightly crisp at the edges. Once baked, remove the dish from the oven and let it rest for at least 5 minutes before serving. This resting period allows the cheese and sauce to set, making for cleaner slices and a more enjoyable eating experience.
Essential Tools for Manicotti Preparation
- Ziploc Baggie (or Piping Bags): This is a game-changer for easily and cleanly filling your manicotti shells. If you happen to have actual piping bags, even better! Any cornered plastic bag will significantly speed up the process and reduce mess when preparing this manicotti recipe.
- Large Skillet: You’ll need a sturdy nonstick skillet or a similar large saucepan for browning the ground beef, pork, garlic, and onions that form the flavorful base of your stuffed pasta filling. A good skillet ensures even cooking and browning.
- Large Stockpot: A generously sized stockpot is indispensable for boiling the large, thick manicotti noodles. It allows the pasta to cook without crowding, ensuring each tube cooks perfectly to an al dente texture.
- 13×9-inch Baking Dish: This standard-sized baking dish is perfect for holding all 14 of your delicious manicotti. Make sure your dish has sufficiently tall sides to contain all that wonderful, bubbling marinara sauce and cheesy goodness as it bakes.
Storing and Reheating Your Manicotti
Proper storage is key to enjoying your homemade manicotti for days to come. Any cooked beef or pork dishes, including this fantastic manicotti recipe, can be safely stored for up to 4 days in the refrigerator. To maintain its freshness and prevent food-borne illness, always transfer leftovers to an airtight container. It’s also a good idea to store any extra marinara sauce separately or alongside the manicotti to ensure it stays moist.
When you’re ready to enjoy your leftovers, reheat them gently to preserve their delicious flavors and textures. You can reheat individual servings in the microwave until warmed through. For larger portions or a crispier top, it’s best to reheat in the oven at around 300°F (150°C) until thoroughly heated, covering the dish with foil for the first part of reheating to prevent drying out, then removing it for the last few minutes to allow the cheese to crisp up again. Always ensure it’s warmed completely before serving.
Frequently Asked Questions About Manicotti
Should manicotti be cooked before stuffing?
Yes, it is crucial to par-cook manicotti shells before stuffing them. However, don’t cook them all the way through; aim for an al dente texture, meaning they should still have a slight bite. This initial cooking softens the pasta enough to make it pliable for stuffing, but it will finish cooking in the oven as it bakes with the sauce and cheese, absorbing flavors and achieving the perfect tenderness without becoming mushy.
What is the best way to fill manicotti shells?
The easiest and cleanest method for filling manicotti shells is by using a piping bag or a large plastic storage bag (like a Ziploc bag) with one corner snipped off. This allows for precise and mess-free filling. For optimal results and to ensure the filling is evenly distributed throughout the entire tube, I recommend filling the shell halfway from one side of the noodle and then rotating it to finish filling from the other side. This prevents air pockets and ensures every bite is full of delicious stuffing.
Is manicotti the same as cannelloni?
While often used interchangeably, manicotti and cannelloni are similar but not exactly the same, with distinctions often varying by region and tradition. Manicotti typically refers to the larger, ridged tubes popular in Italian-American cuisine. Cannelloni, on the other hand, can refer to the smoother, slightly smaller tubes, but more traditionally, it refers to flat sheets of pasta that are filled and then rolled up—much like the lasagna noodle substitute mentioned in our ingredient notes. Additionally, fresh cannelloni pasta is often used and can sometimes be baked without pre-boiling, unlike dried manicotti.
Can I make this manicotti recipe ahead of time?
Absolutely! Pasta bakes like manicotti are fantastic candidates for make-ahead meals, which can save significant time on busy days. To prepare in advance, follow the recipe instructions all the way up to the point where it’s ready for baking. Instead of baking, cover the dish tightly with plastic wrap and then foil, and refrigerate it for up to 24 hours. When you’re ready to bake, remove the pan from the refrigerator and let it come to room temperature for about one hour before baking as directed. This prevents thermal shock to the dish and ensures even cooking.
Share this recipe on Pinterest!
Love this recipe? Share it with the world on Pinterest.
Beef and Cheese Manicotti Recipe
Print Recipe
Ingredients
- 14 manicotti pasta shells (8 ounce package)
- 3 cups spaghetti marinara sauce
- 2 tbsp butter, cut into pieces
Filling
- 4 tsp olive oil
- 1 medium onion, diced
- 2 cloves garlic, minced
- 1/2 lb ground beef
- 1/2 lb ground pork
- 1/2 tsp kosher salt
- 1/2 tsp black pepper
- 15 oz whole milk ricotta cheese
- 3 1/2 cups mozzarella, shredded
- 1 cup Parmesan cheese, grated
- 1/4 cup fresh Italian parsley, chopped
- 1/4 tsp ground nutmeg
Instructions
- In a skillet over medium heat, add 2 teaspoons of the olive oil, diced onion, minced garlic, ground beef, and ground pork. Season with salt and pepper. Brown the meat, breaking it up, and cook the onion until softened, about 5 minutes. Remove from heat and allow to cool completely to prepare for mixing with the cheese filling.
- Cook the manicotti shells in a large pot of heavily salted boiling water for 6 minutes, until al dente. Drain the pasta and gently toss with a little olive oil to prevent sticking. Allow to cool slightly before stuffing.
- In a large bowl, combine the ricotta cheese, 2 cups of shredded mozzarella cheese, 1/2 cup of grated Parmesan, chopped parsley, and ground nutmeg. Mix thoroughly.
- Stir the cooled meat mixture into the cheese mixture until well combined. Set aside.
- Preheat your oven to 350°F (175°C).
- Drizzle the remaining 2 teaspoons of olive oil in a 13×9-inch baking dish to coat the bottom. Spoon 1 1/2 cups of the spaghetti (marinara) sauce evenly over the bottom of the dish.
- Transfer the meat/cheese mixture into a large Ziploc bag and snip off one bottom corner to use as a piping bag. Carefully squeeze the filling into each manicotti shell. Alternatively, use a small spoon to fill each manicotti by hand.
- Arrange the filled manicotti in a single layer in the prepared baking dish. Spoon the remaining marinara sauce over the top, ensuring all manicotti are covered. Sprinkle the remaining 1 1/2 cups of mozzarella cheese and the remaining 1/2 cup of Parmesan over the stuffed pasta. Divide the butter pieces evenly over the top layer of cheese.
- Bake the manicotti, uncovered, for about 30 to 35 minutes, or until the sauce is bubbly and the cheese is golden brown and melted. Let the manicotti stand for 5 minutes before serving to allow the flavors to meld and the cheese to set.
Nutrition
The information shown is an estimate provided by an online nutrition calculator. It should not be considered a substitute for a professional nutritionist’s advice.
Have You Made This Recipe? Let Me Know on Instagram
Tag @keviniscooking or use the hashtag #keviniscooking!